TOOLS
TOOLS
 NEW
NEW


 Contributor post by Cassie
Hey guys!
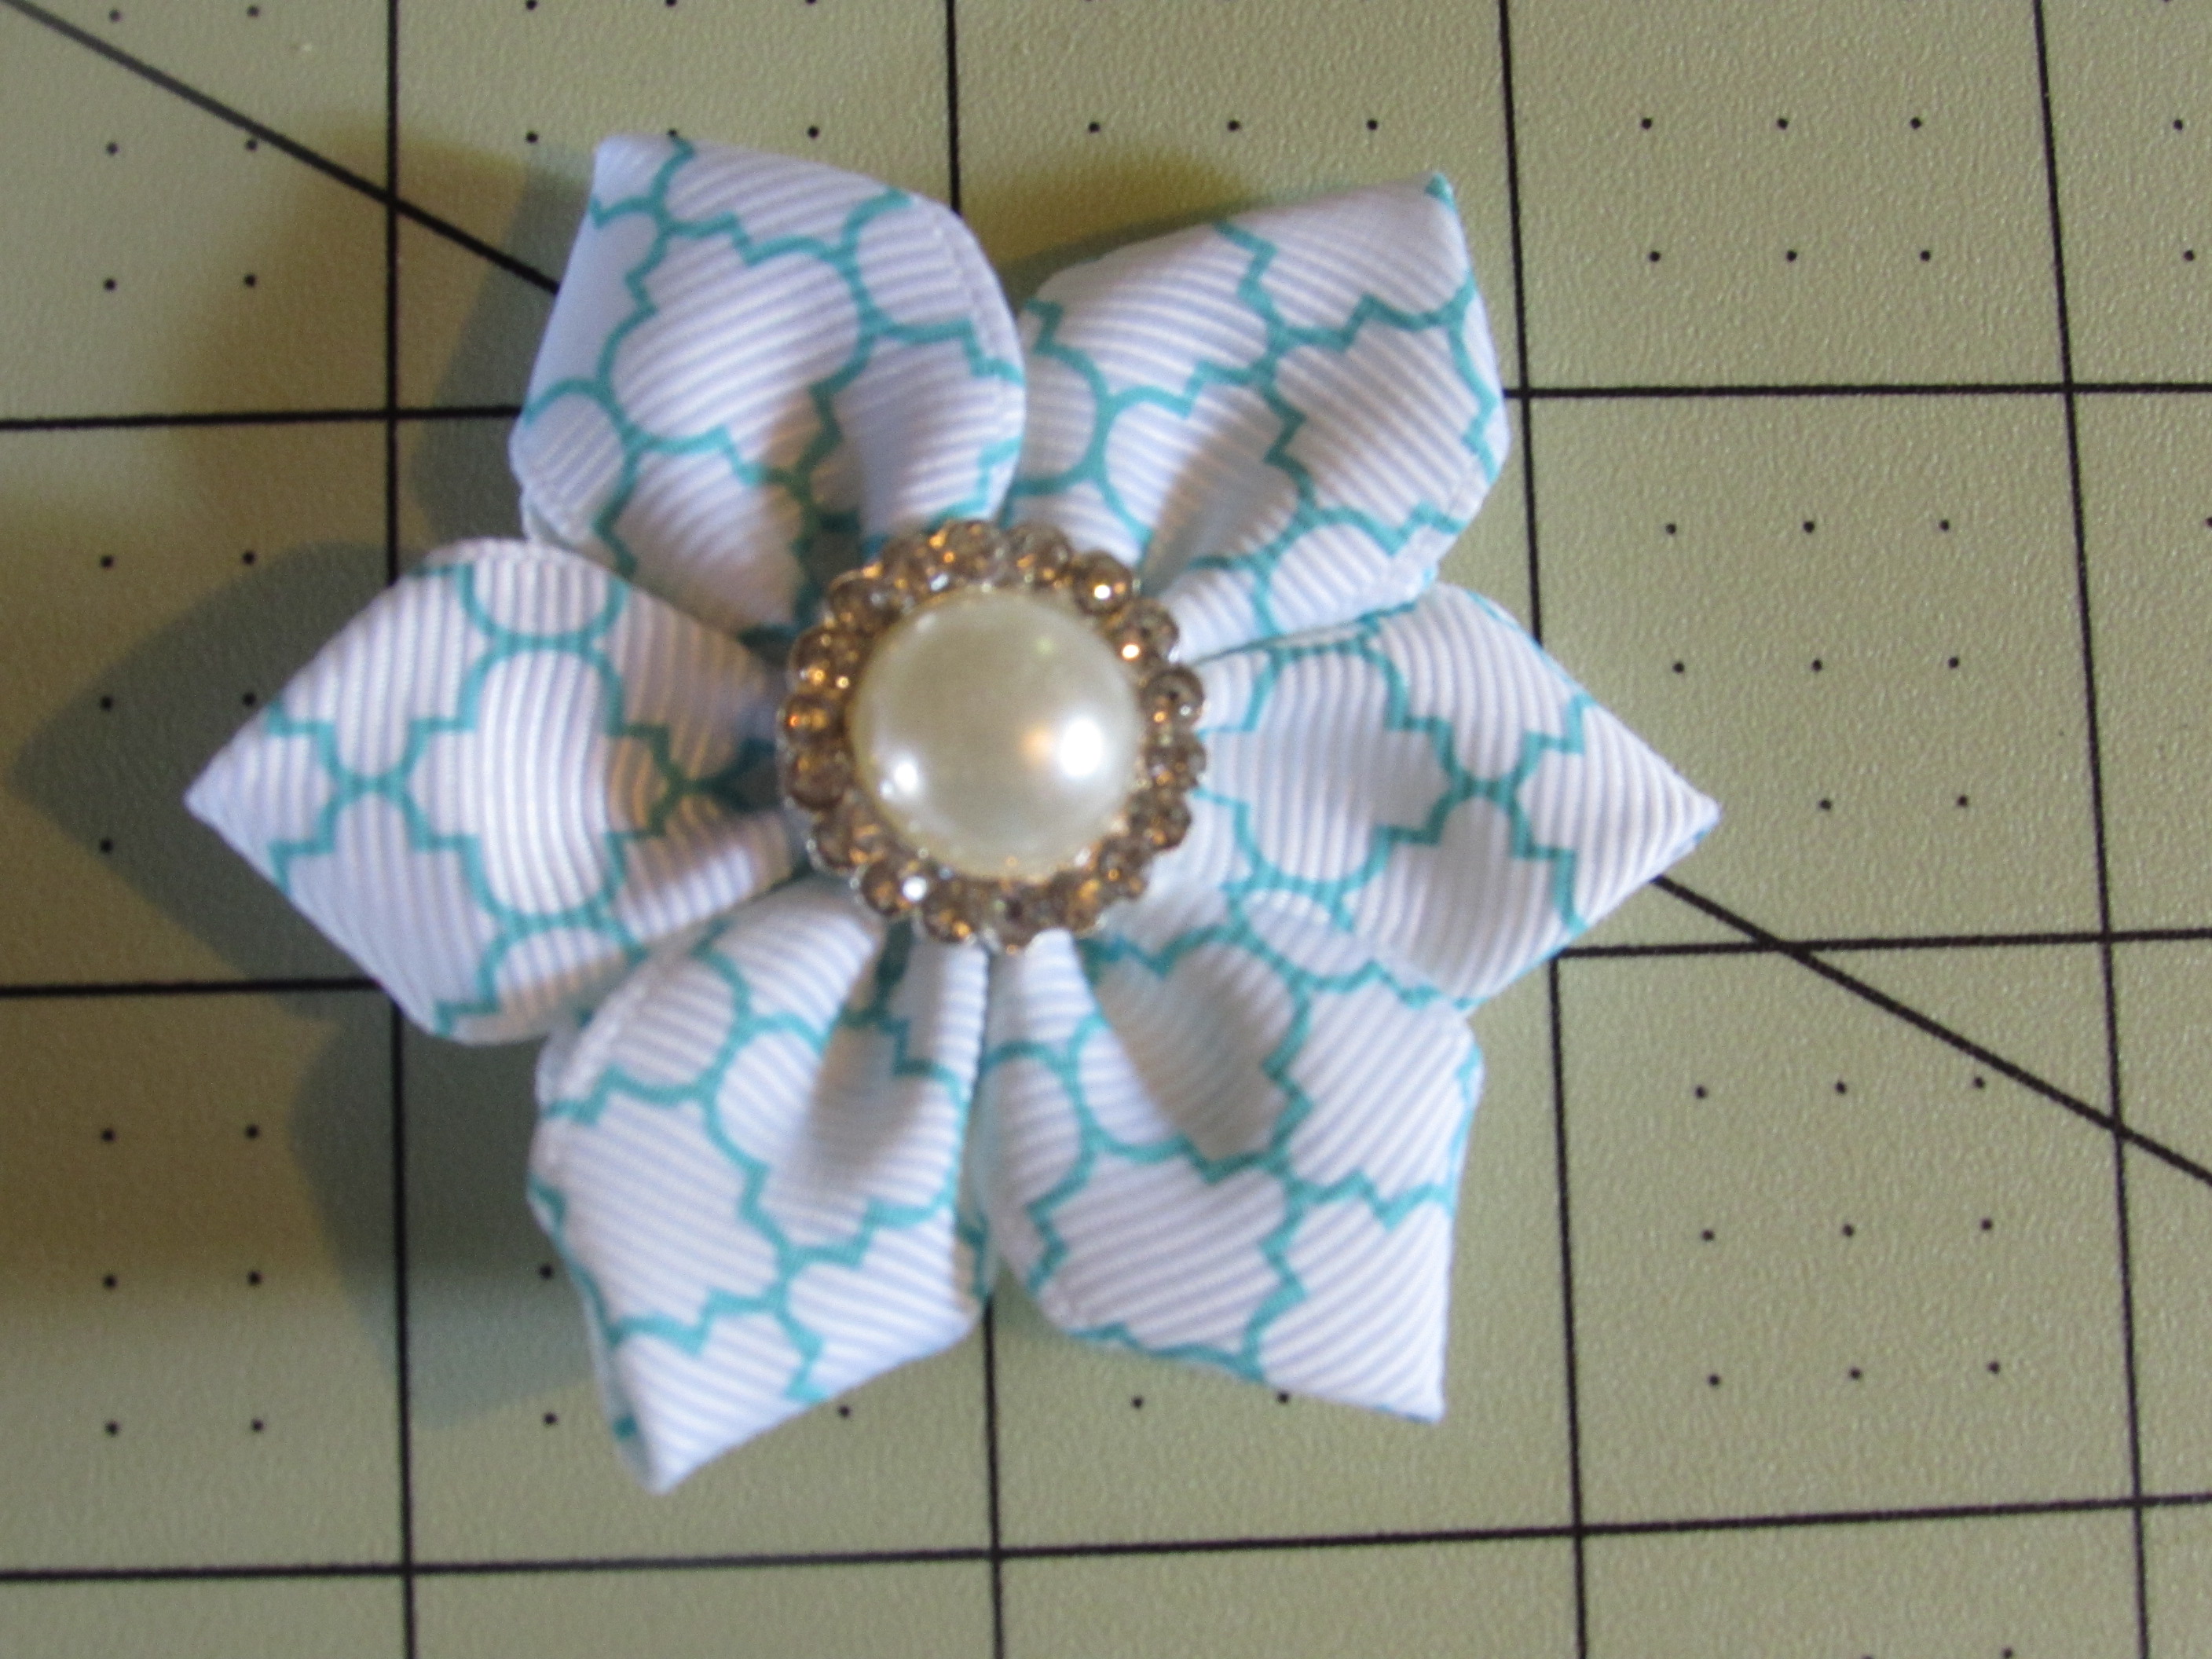
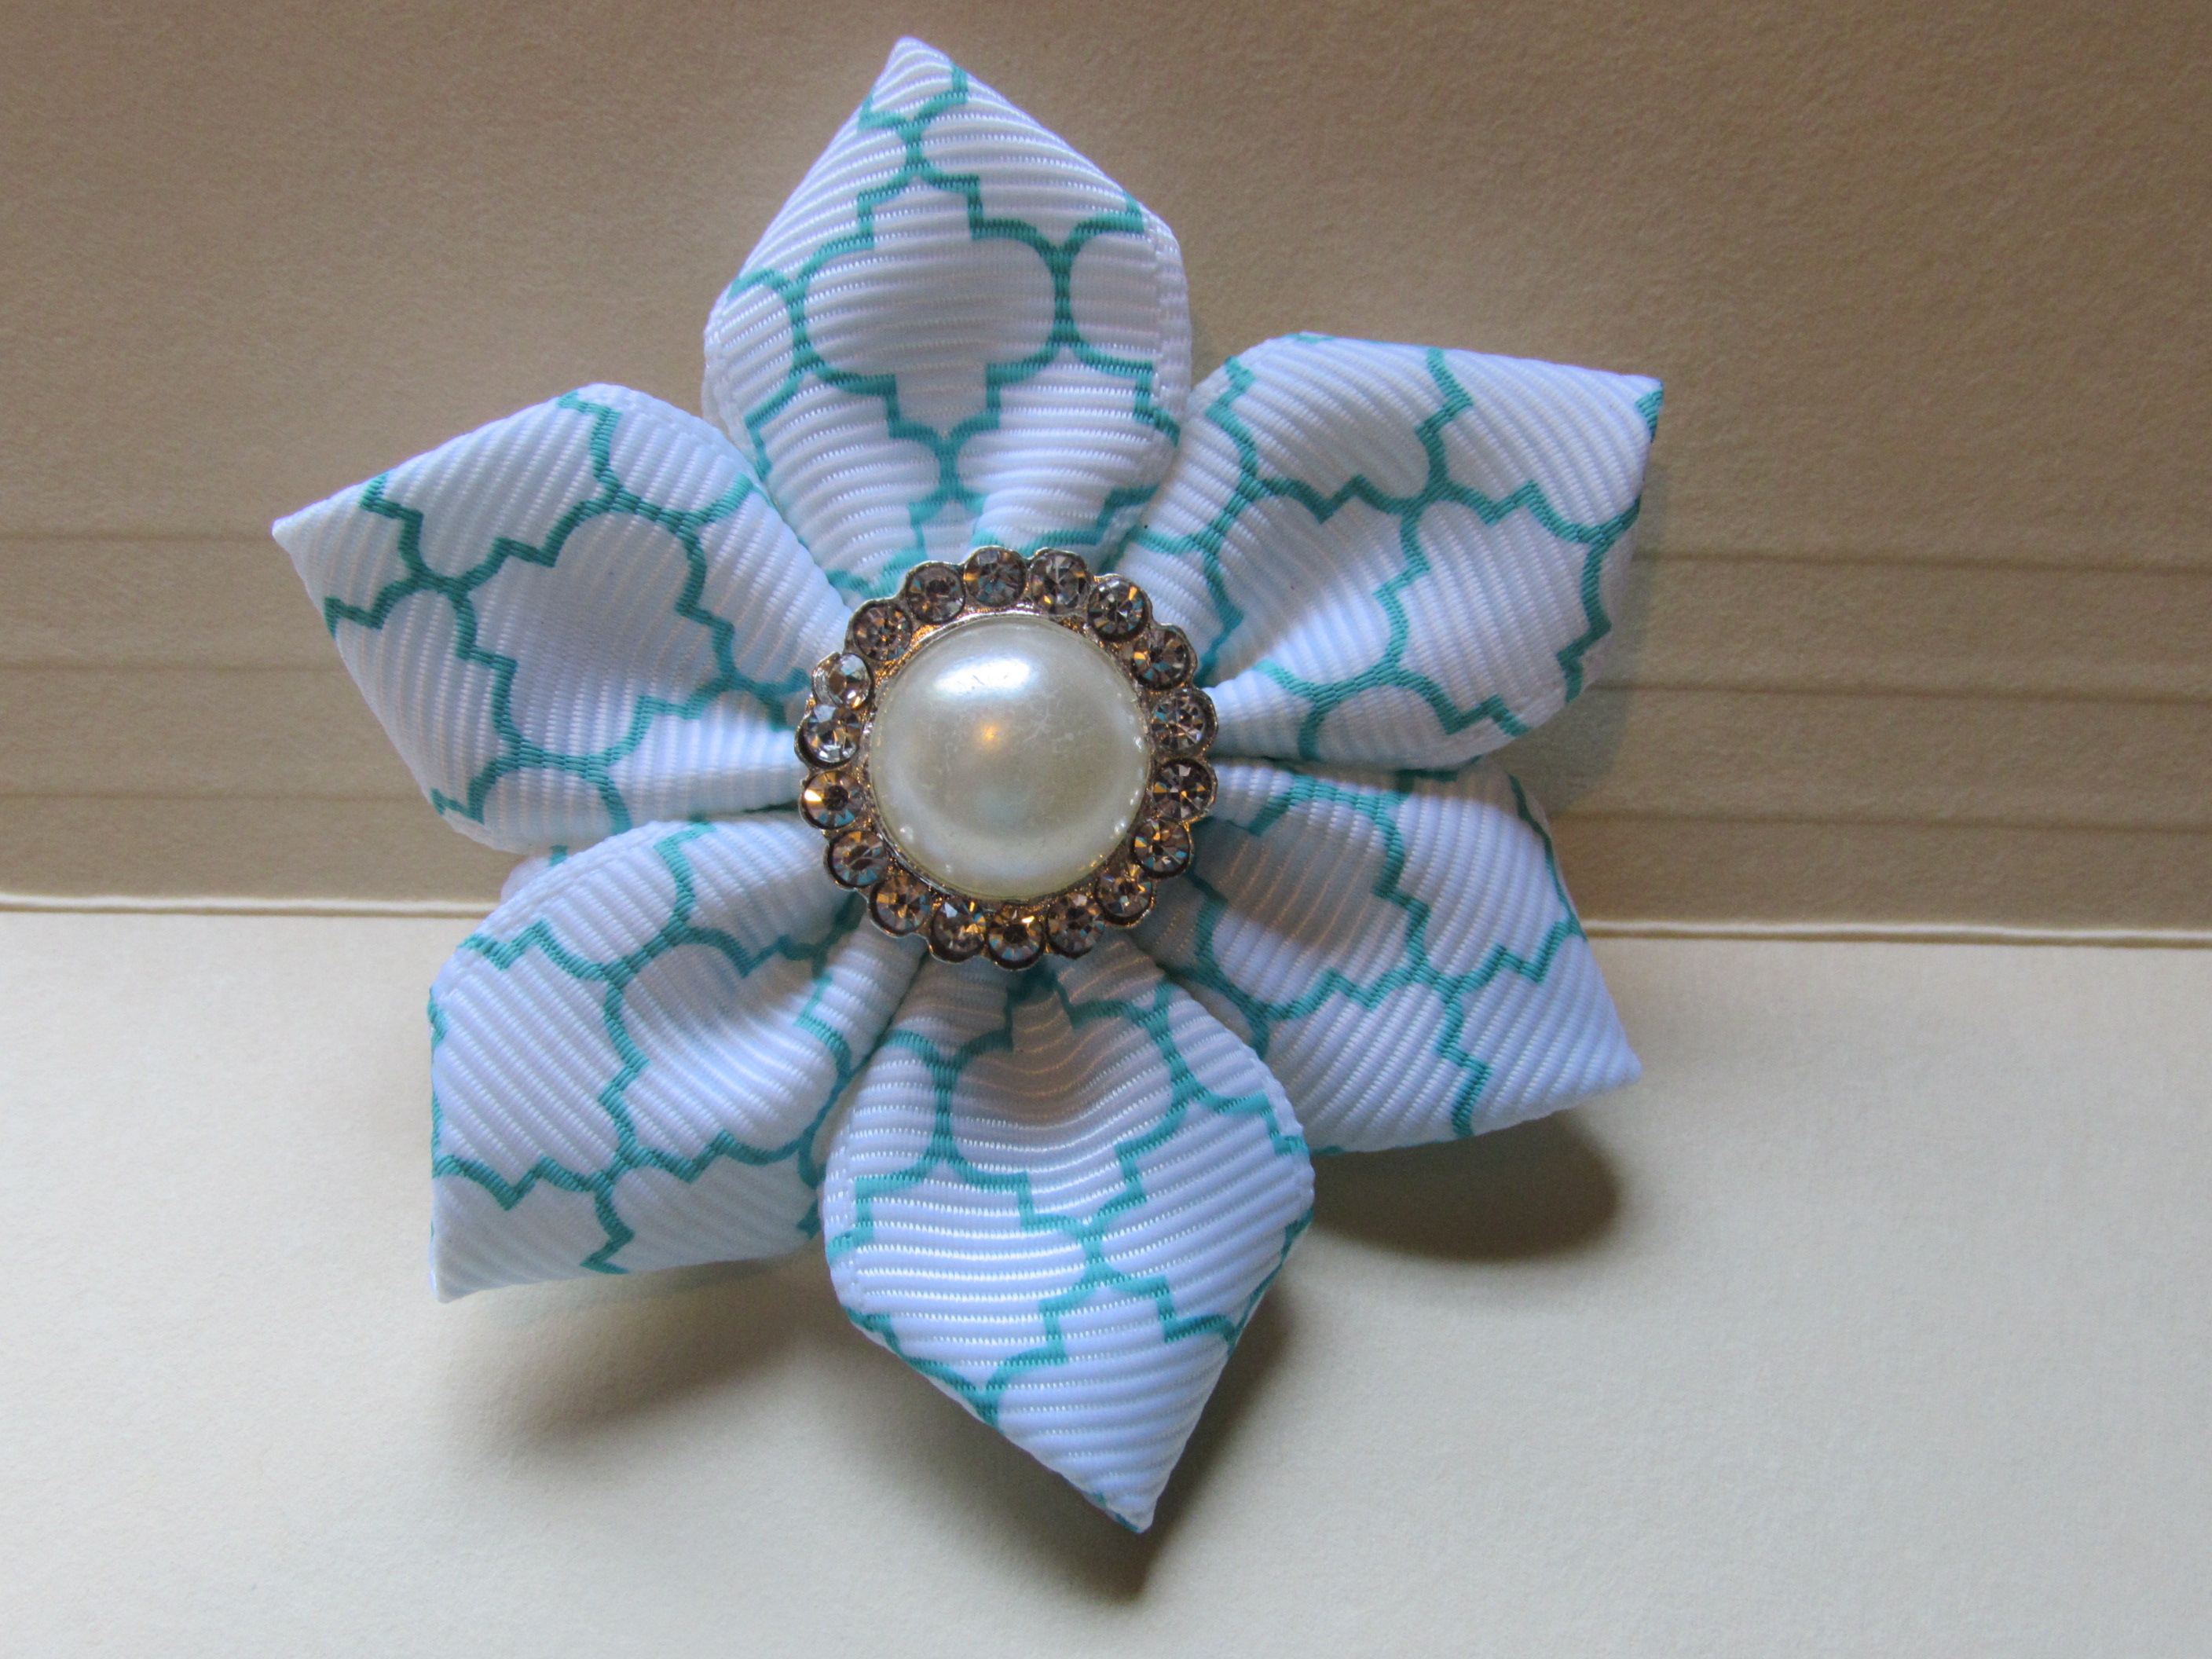
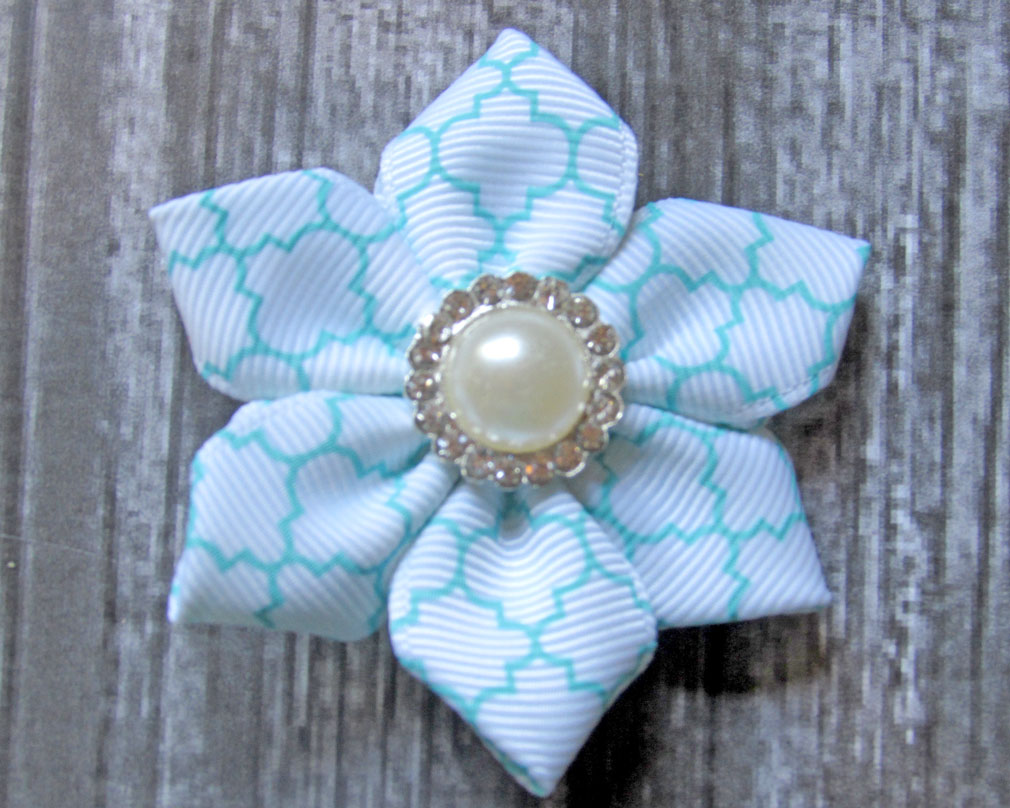
It is Cassie here from CuppyCake GumDrop Boutique & More and today I am going to show you how to make an adorable ribbon flower. This certain ribbon flower that I am going to show you can be made with any width of ribbon 7/8" and wider.
So let's gather our supplies and get started!
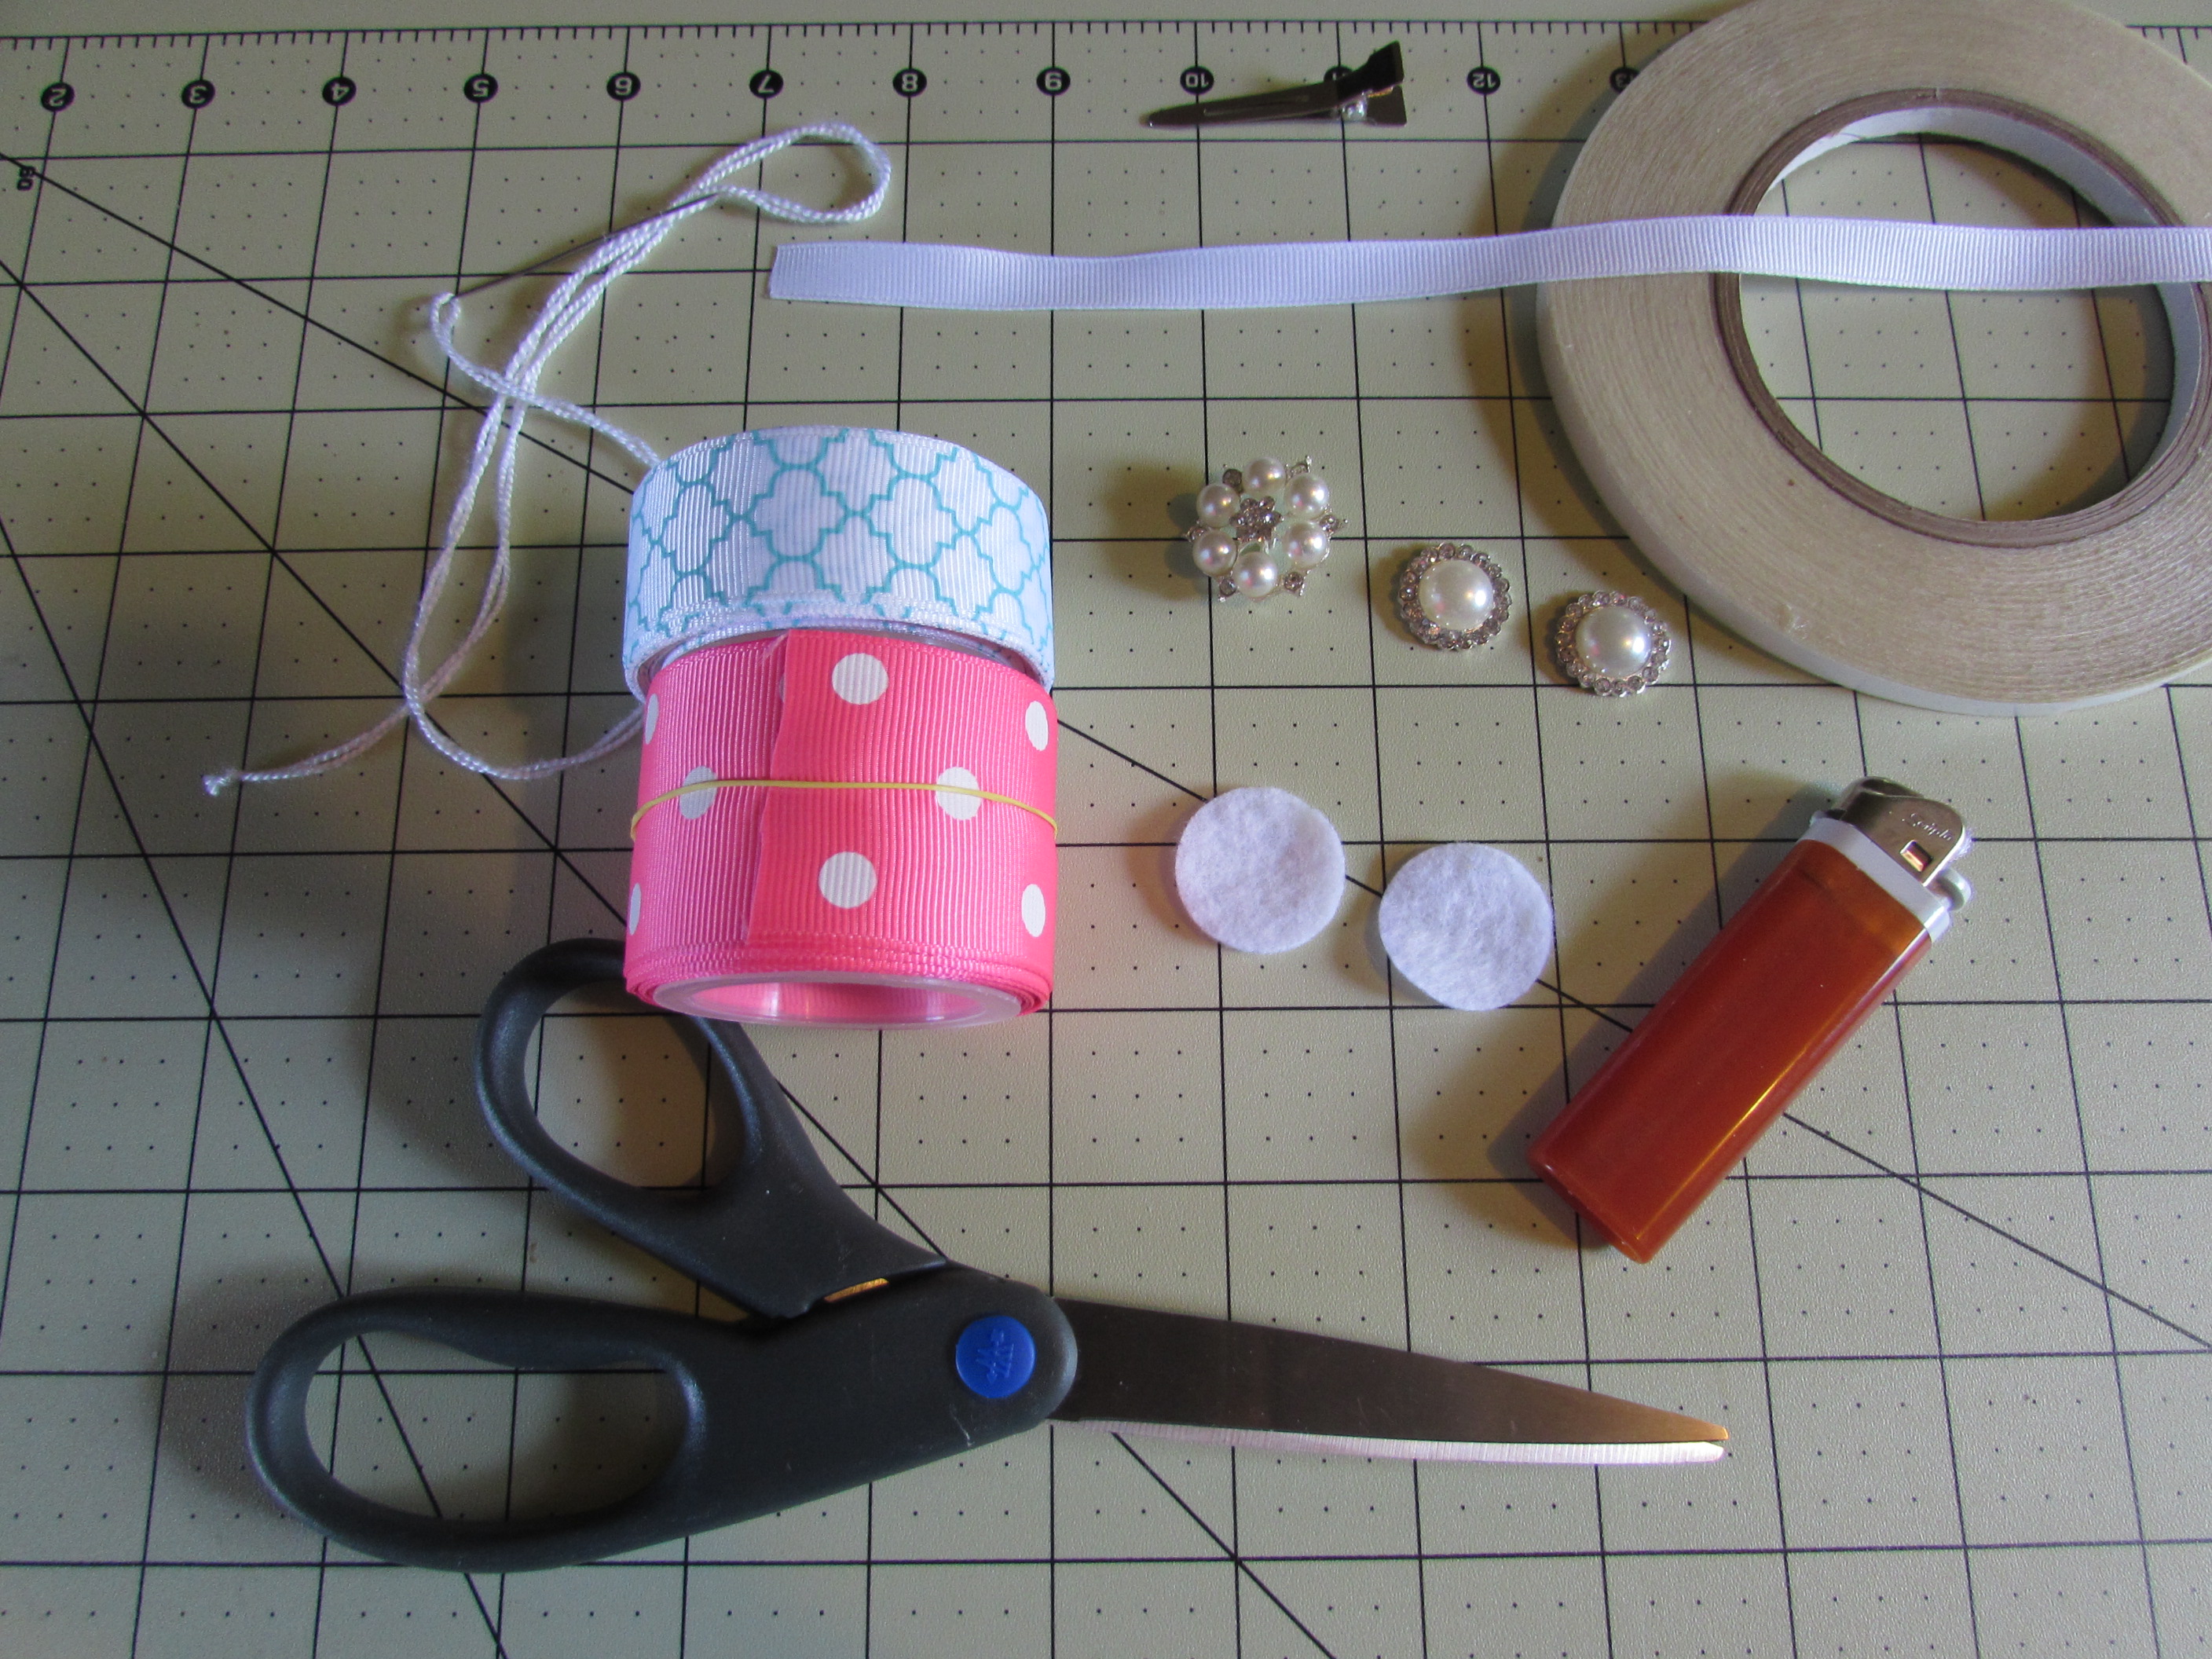
Supplies Needed:
Ribbon
Needle/ thread
Scissors
Lighter
Measuring Tool
Clip
Center
Felt Circles
Fillet Tape
Hotglue/gun
Contributor post by Cassie
Hey guys!
It is Cassie here from CuppyCake GumDrop Boutique & More and today I am going to show you how to make an adorable ribbon flower. This certain ribbon flower that I am going to show you can be made with any width of ribbon 7/8" and wider.
So let's gather our supplies and get started!
Supplies Needed:
Ribbon
Needle/ thread
Scissors
Lighter
Measuring Tool
Clip
Center
Felt Circles
Fillet Tape
Hotglue/gun
 ** Depending on the width of the ribbon you will be using will determine the length of ribbon pieces you need.
- 7/8" 2 1/2" long and need 6 pieces
- 1.5" 4" long and need 6 pieces
-*- Today we will be working with 7/8" ribbon.
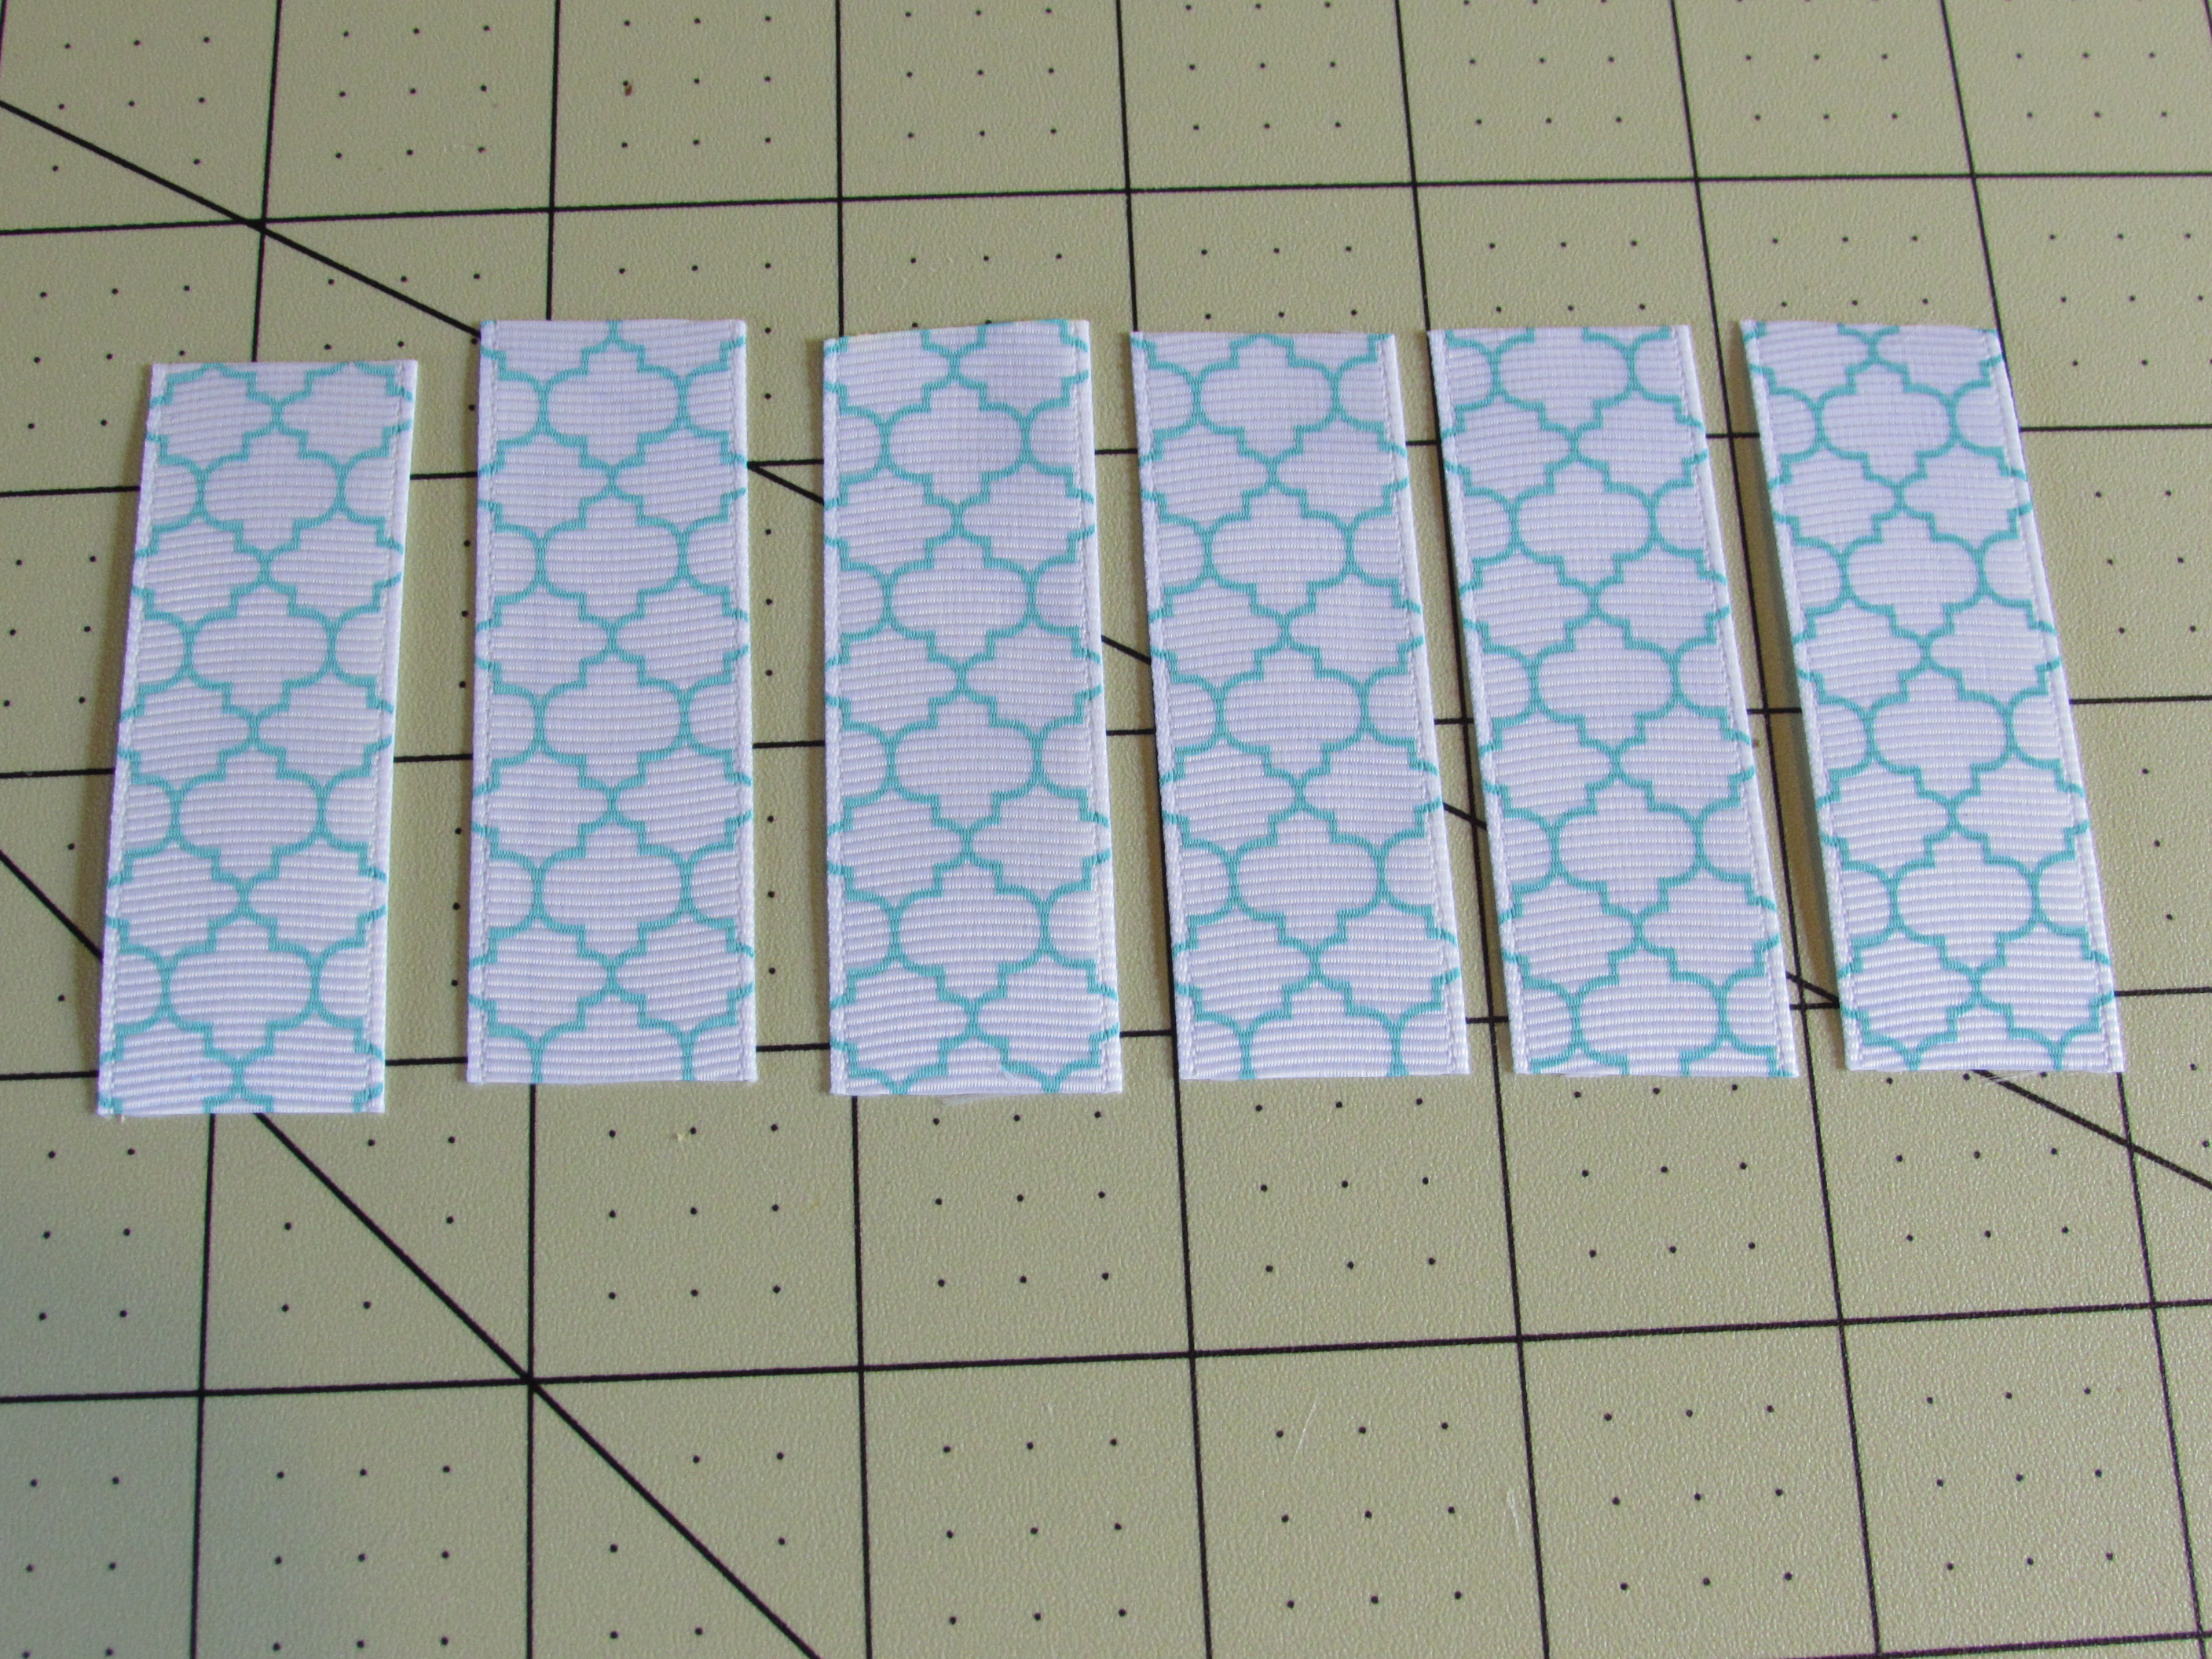
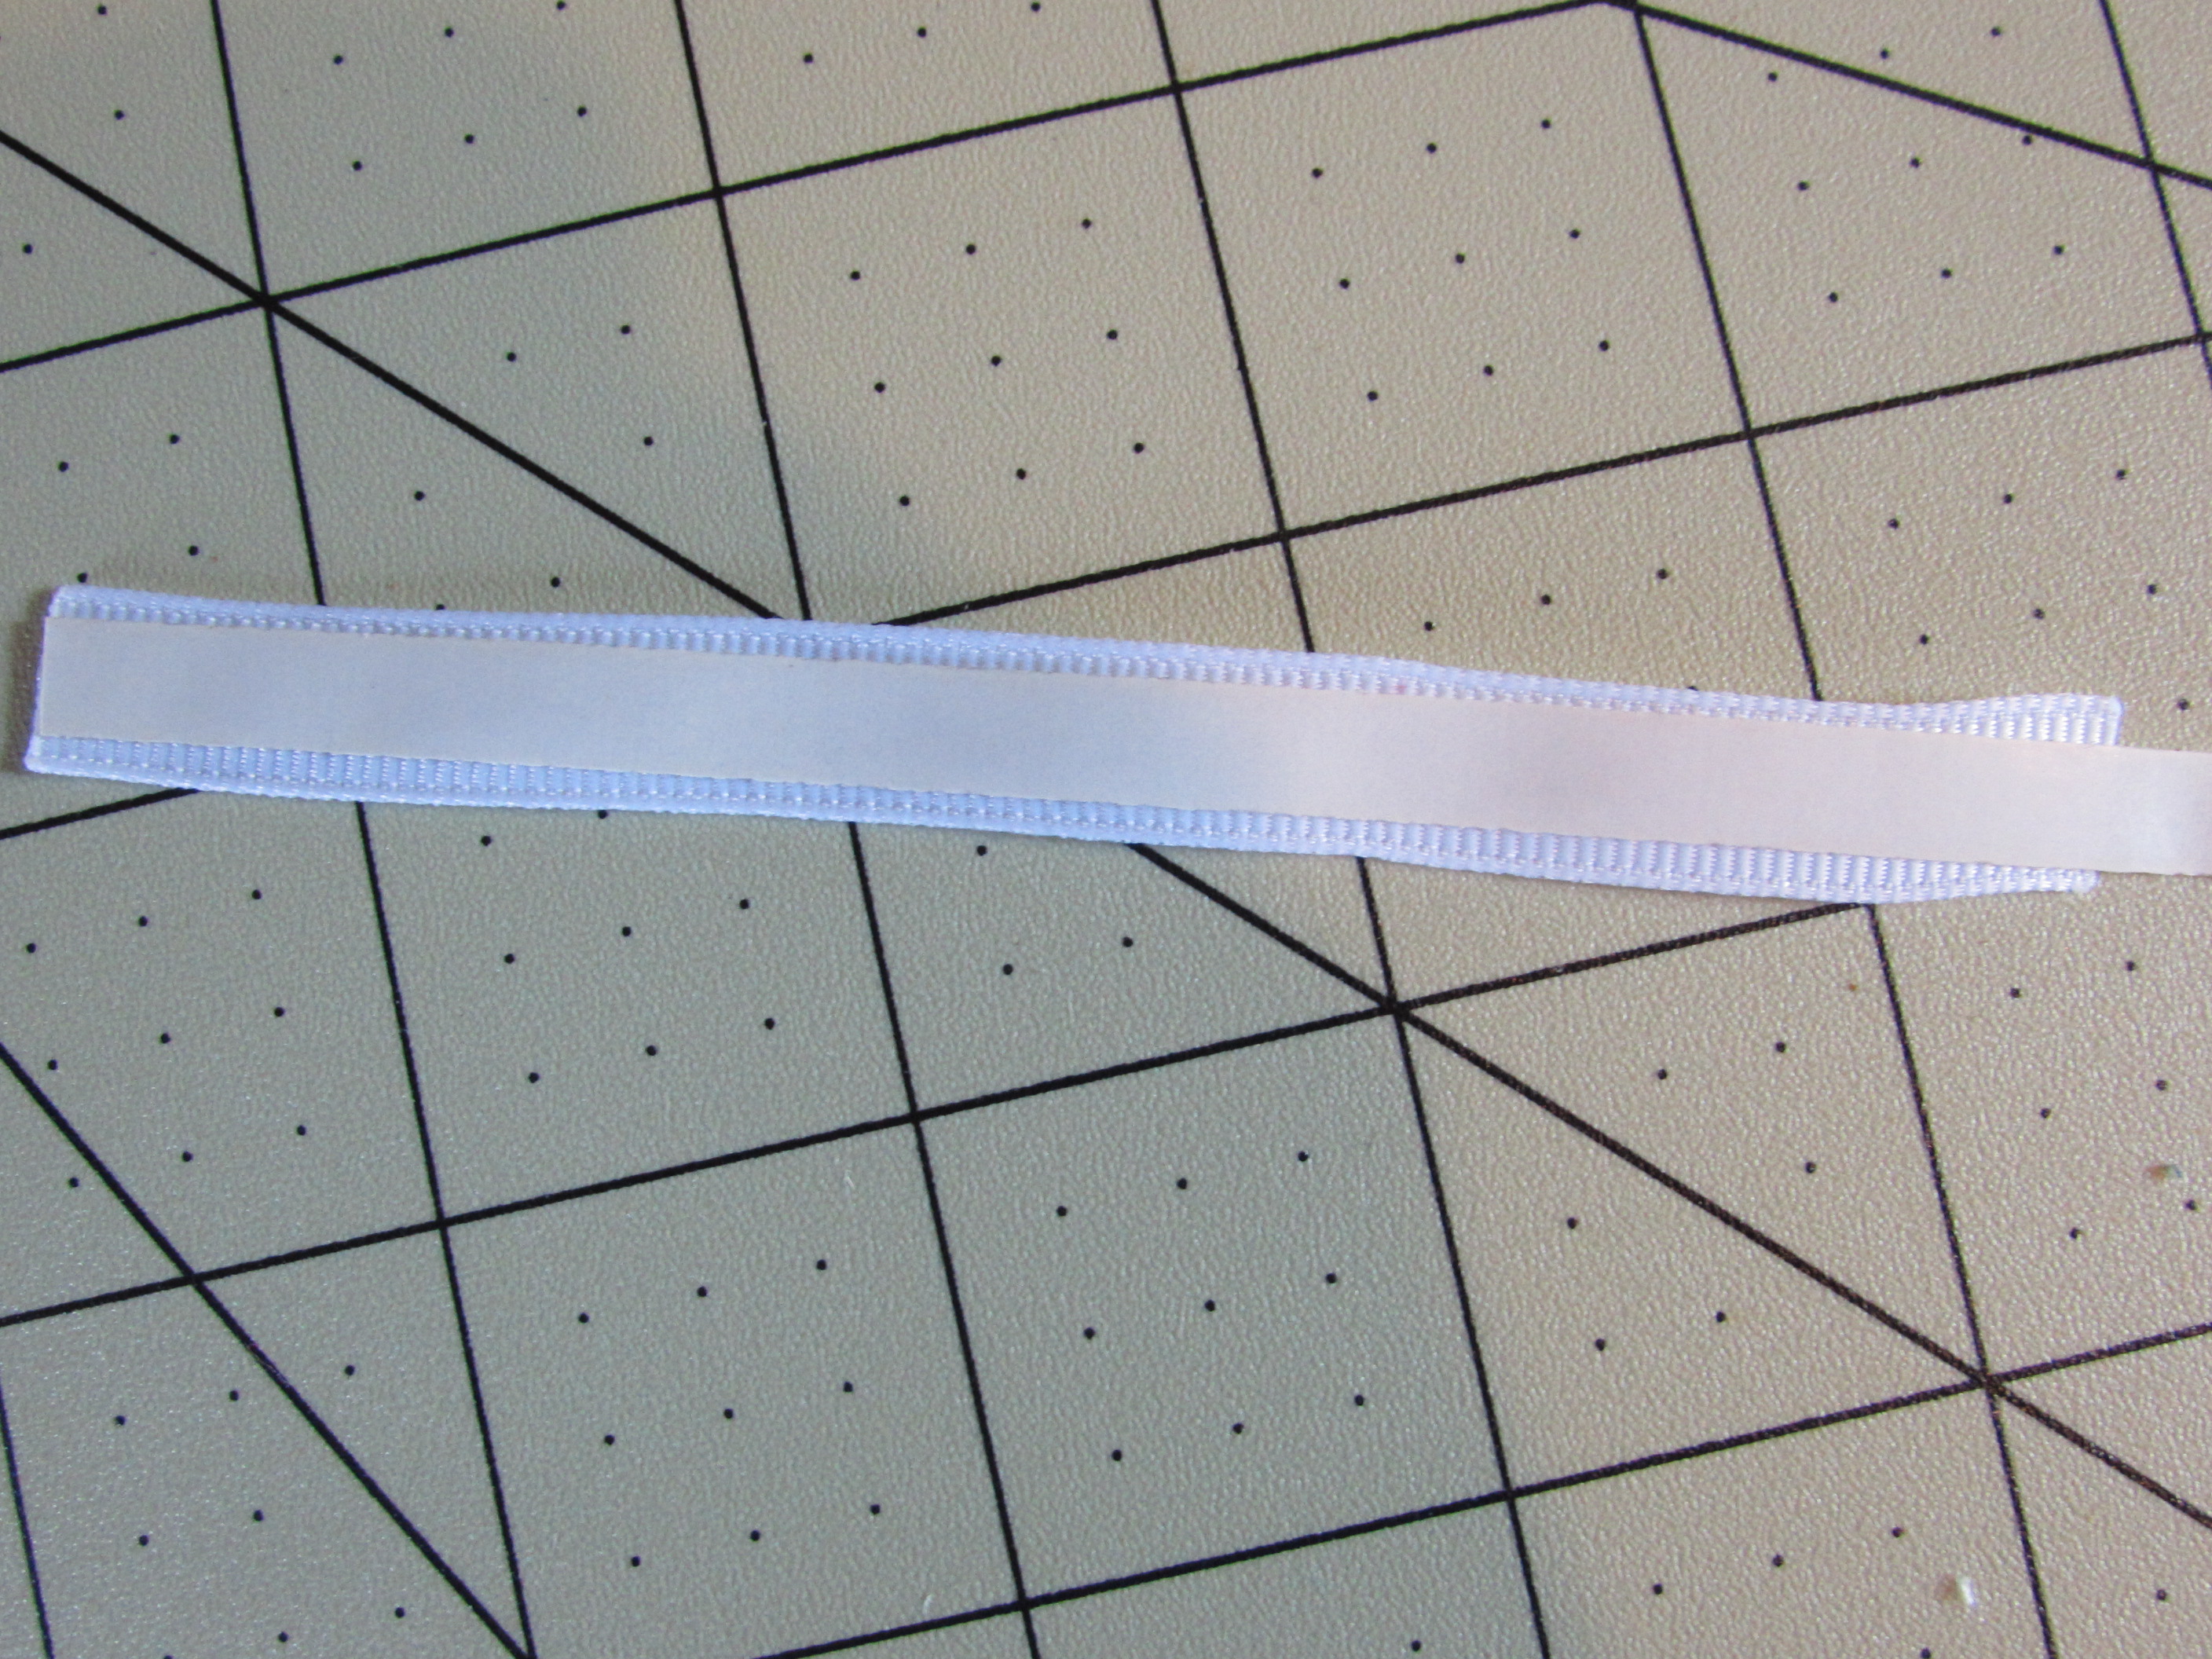
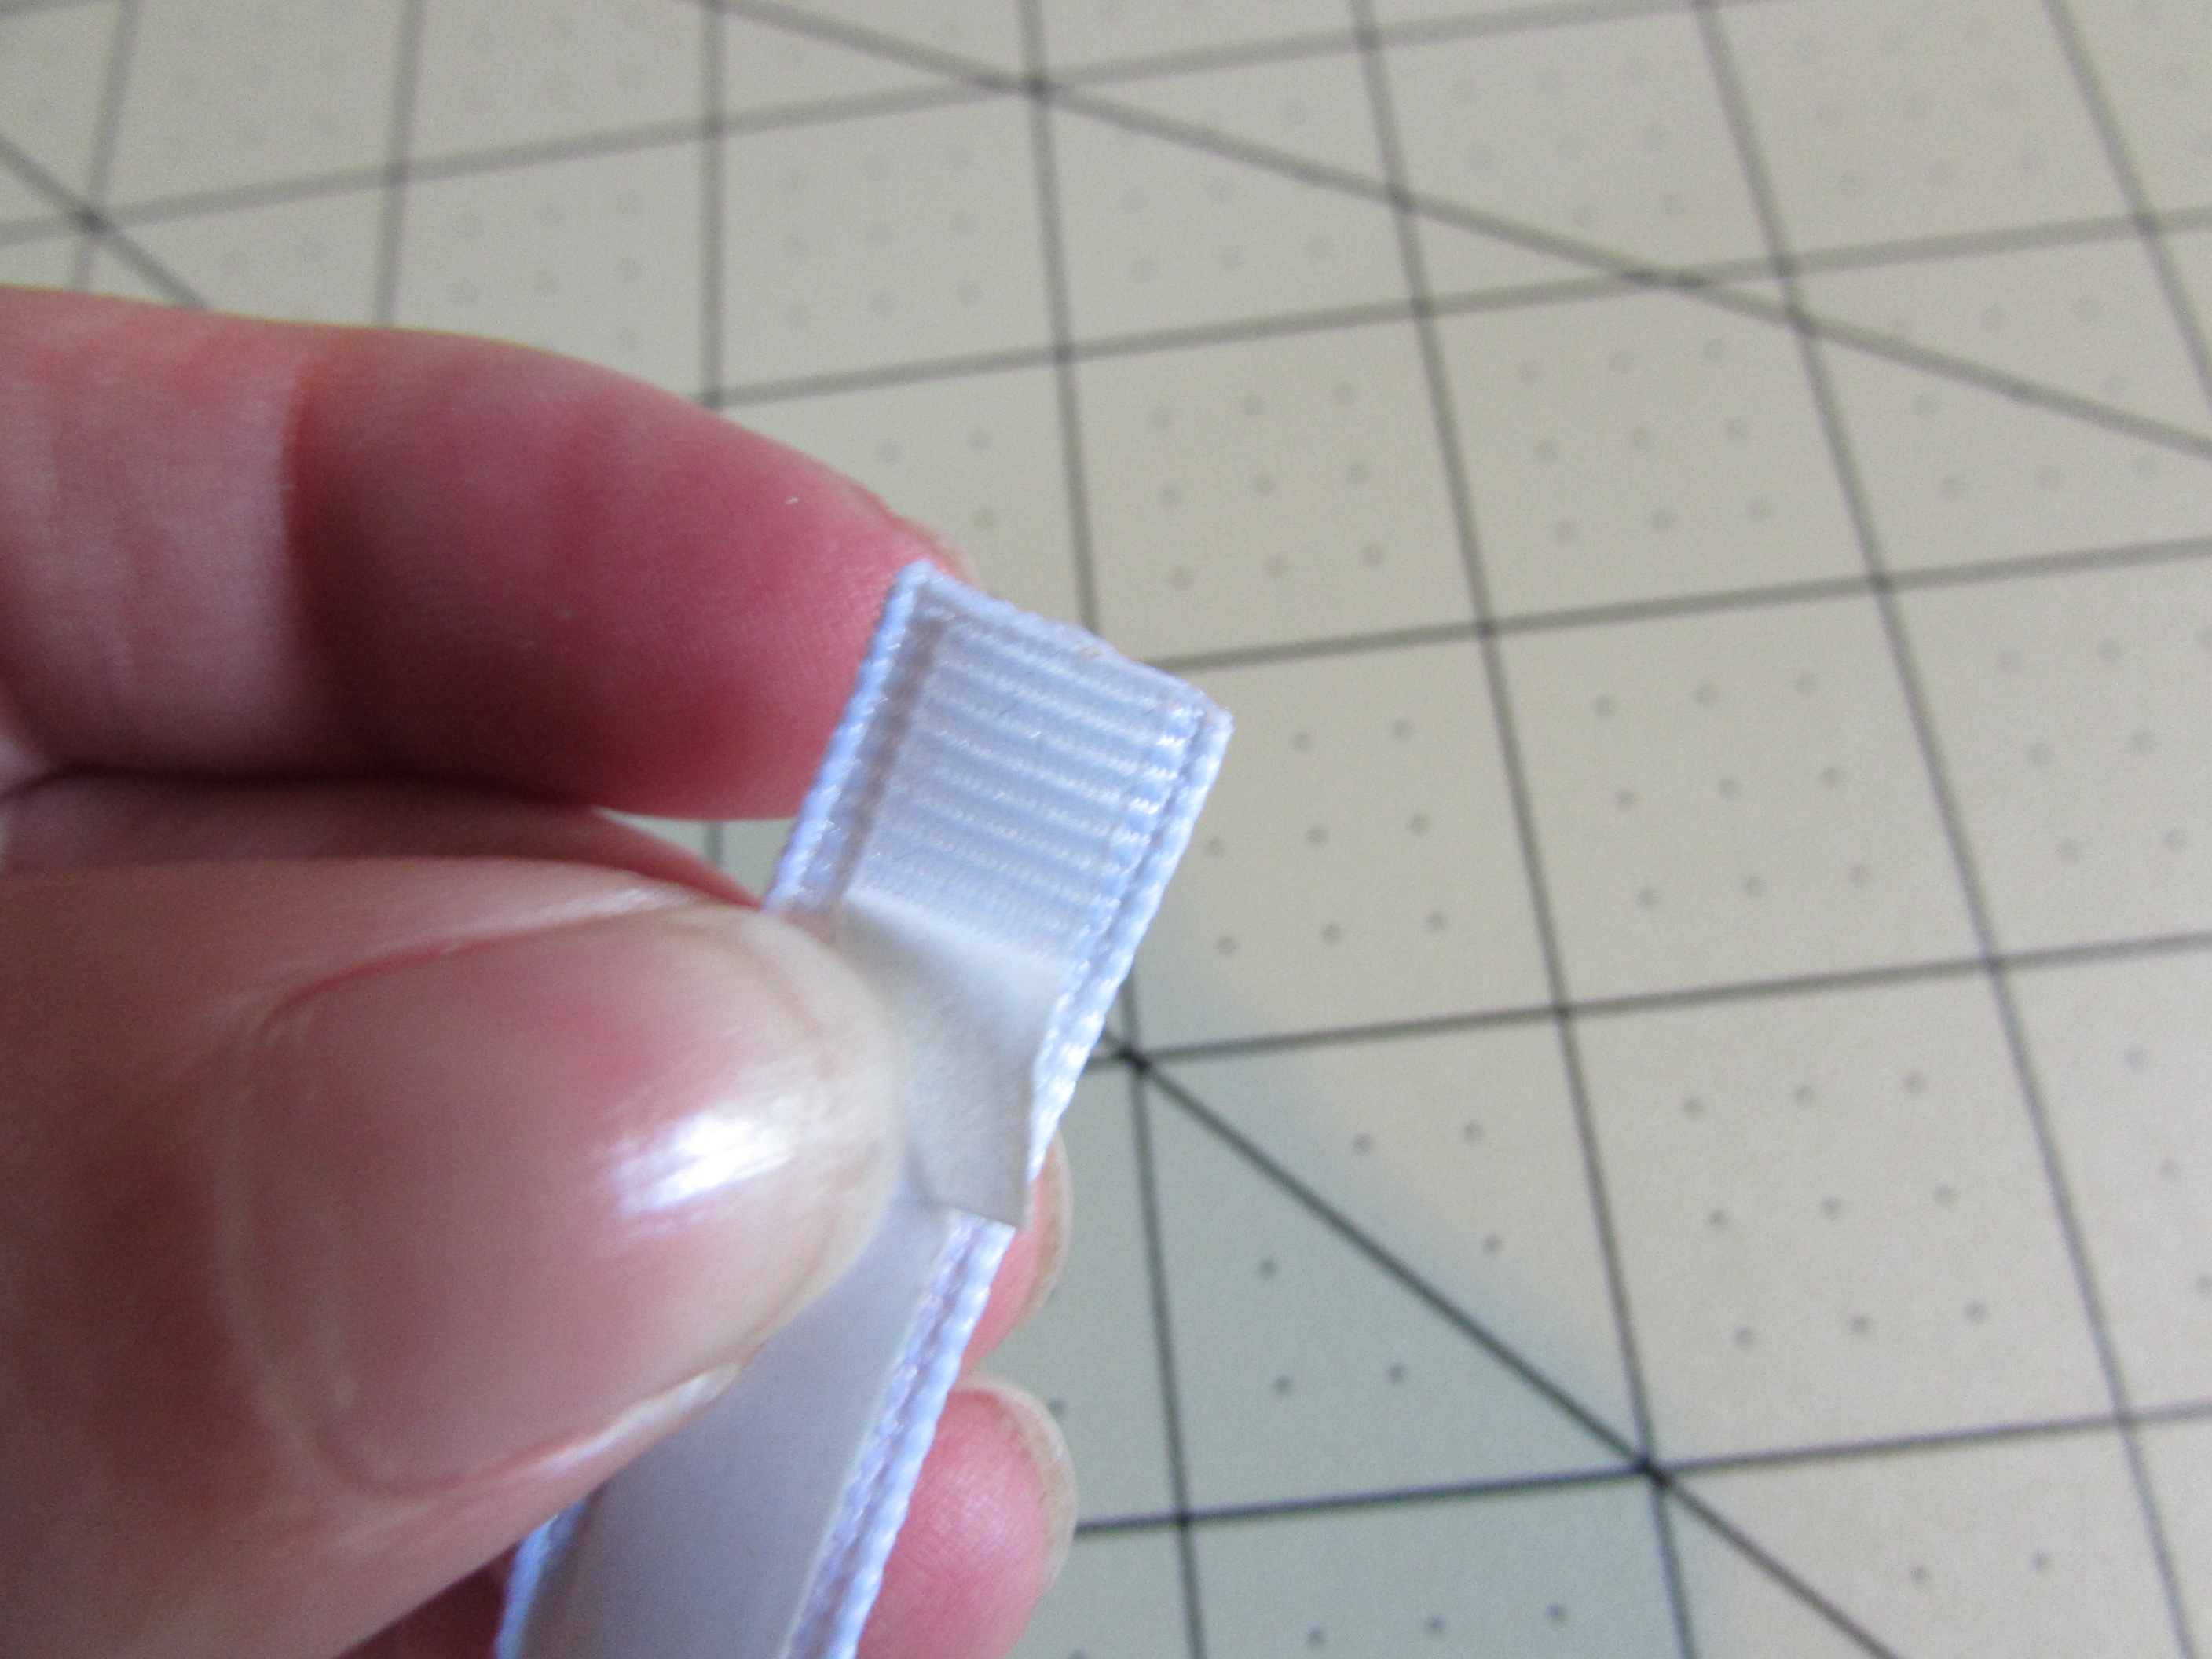
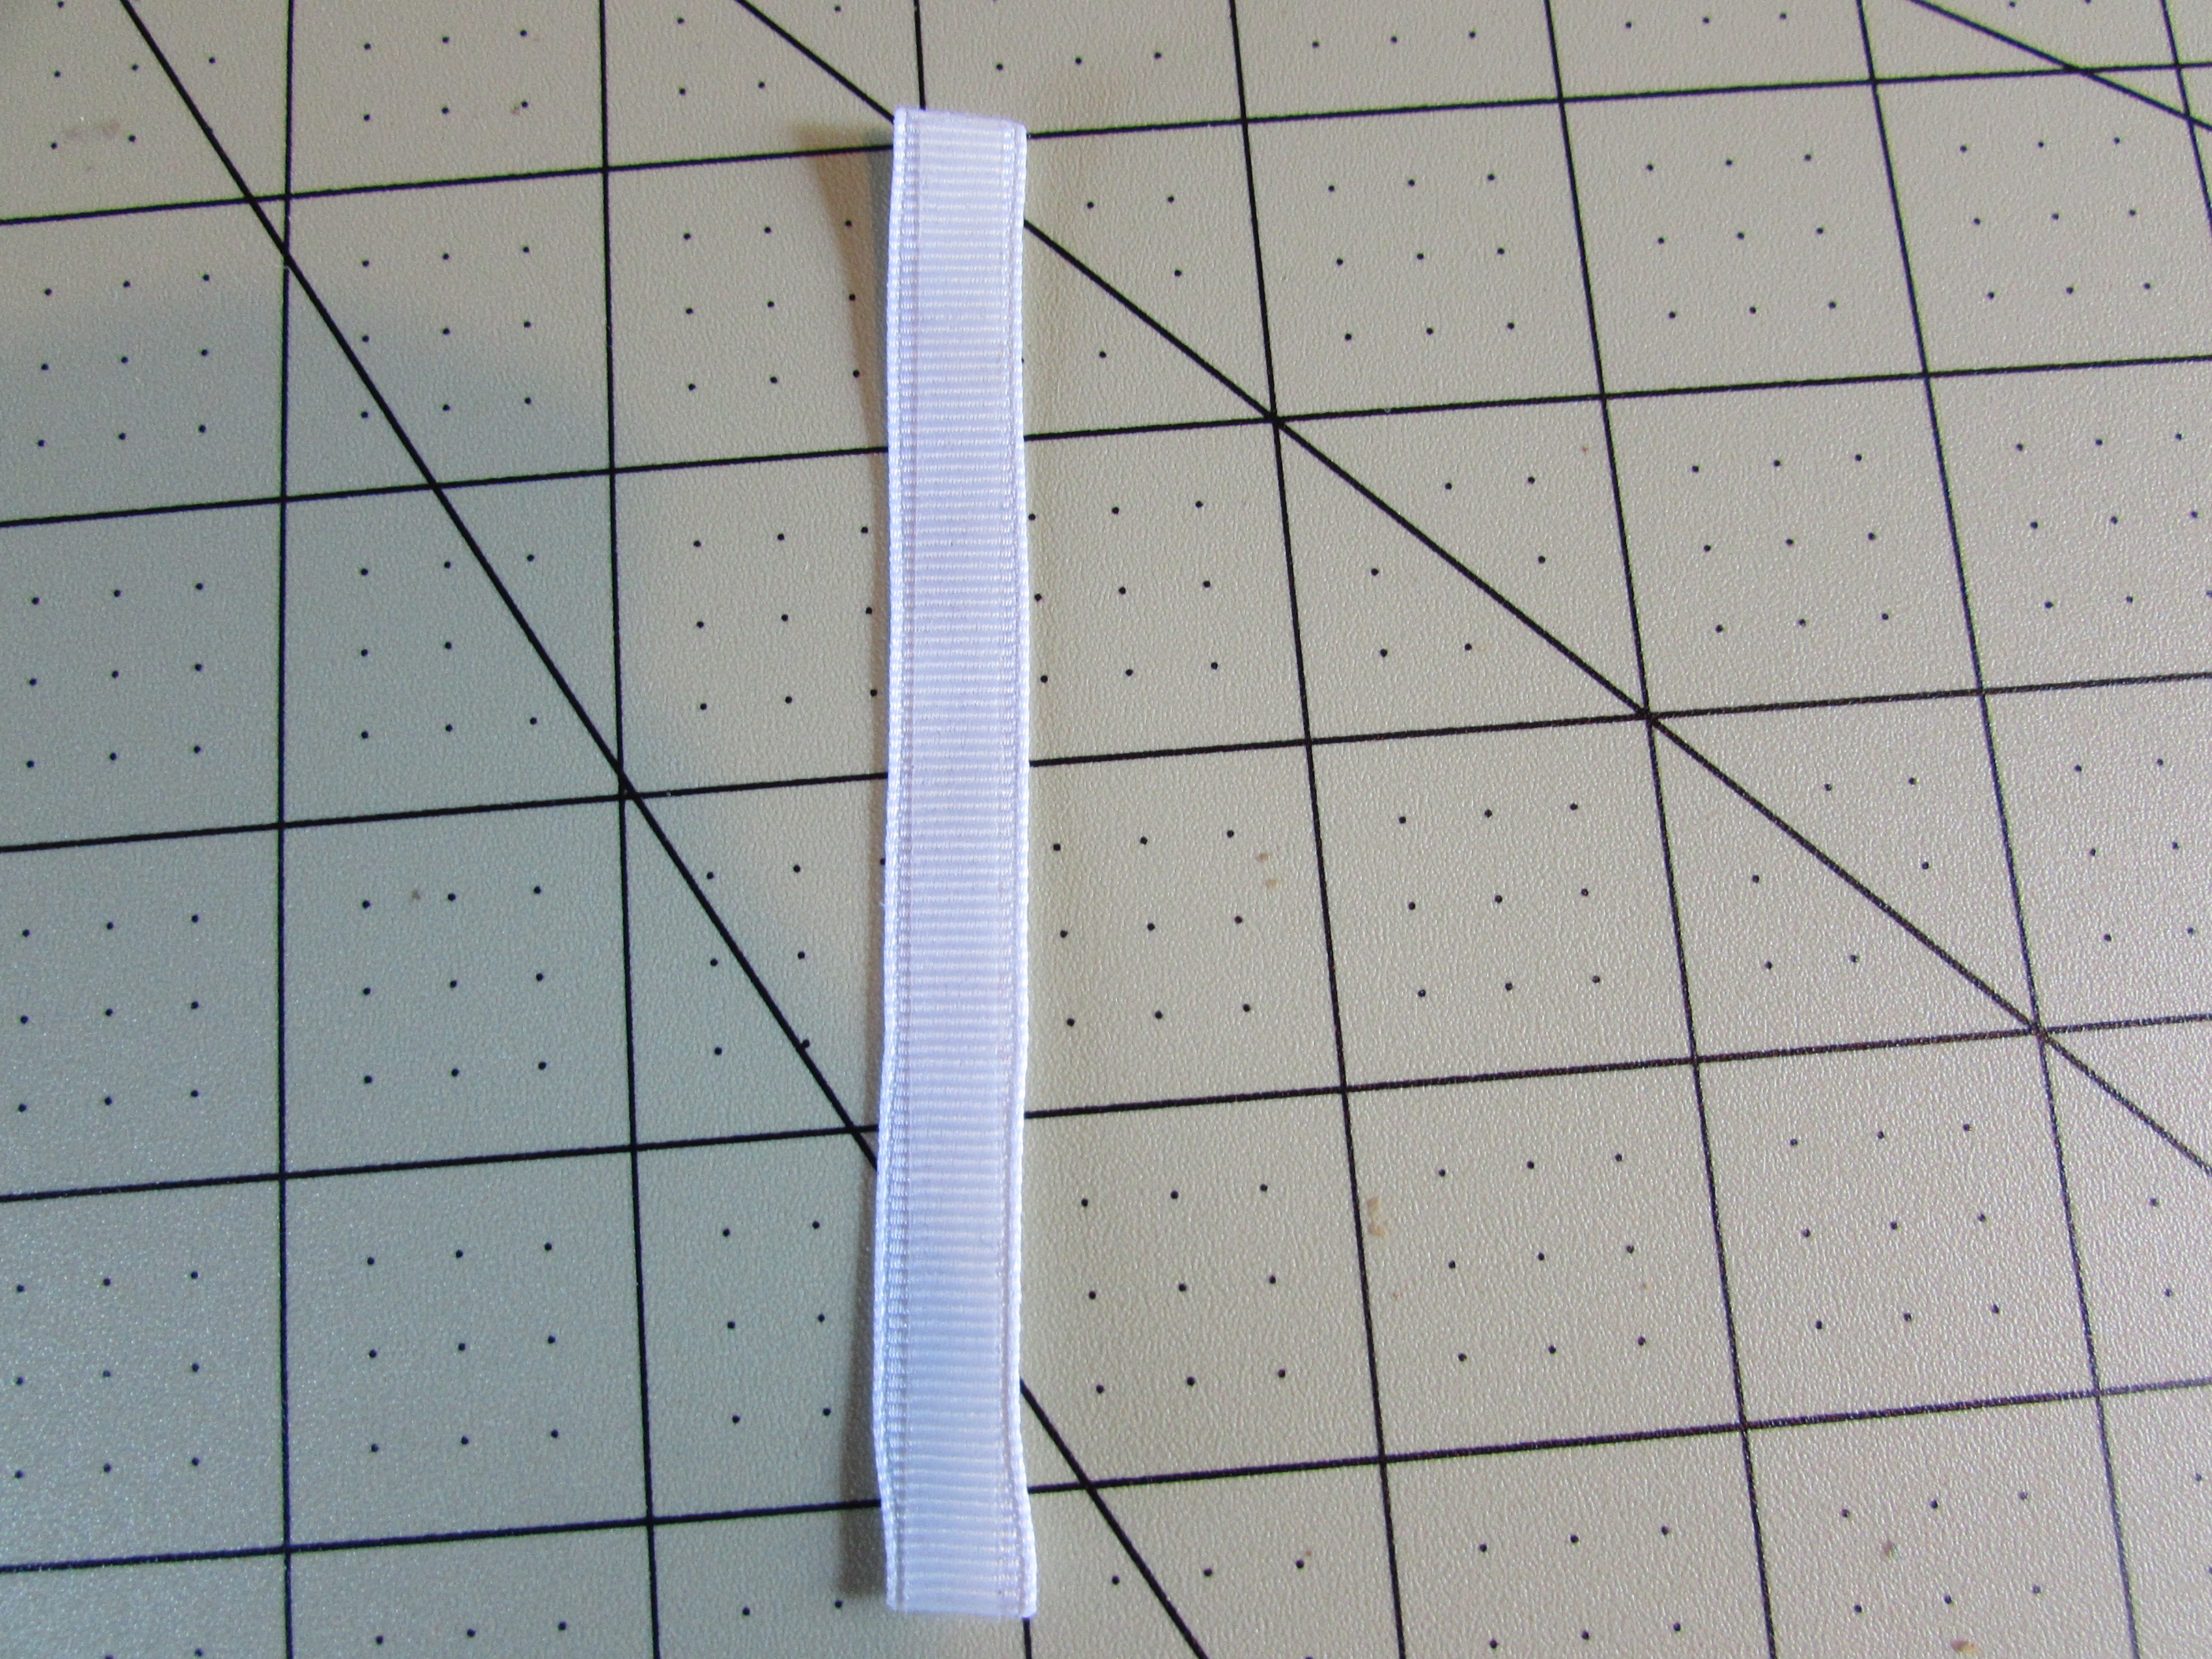
Step 1: Cut 6 pieces of 7/8" at 2 1/2" long
** Depending on the width of the ribbon you will be using will determine the length of ribbon pieces you need.
- 7/8" 2 1/2" long and need 6 pieces
- 1.5" 4" long and need 6 pieces
-*- Today we will be working with 7/8" ribbon.
Step 1: Cut 6 pieces of 7/8" at 2 1/2" long
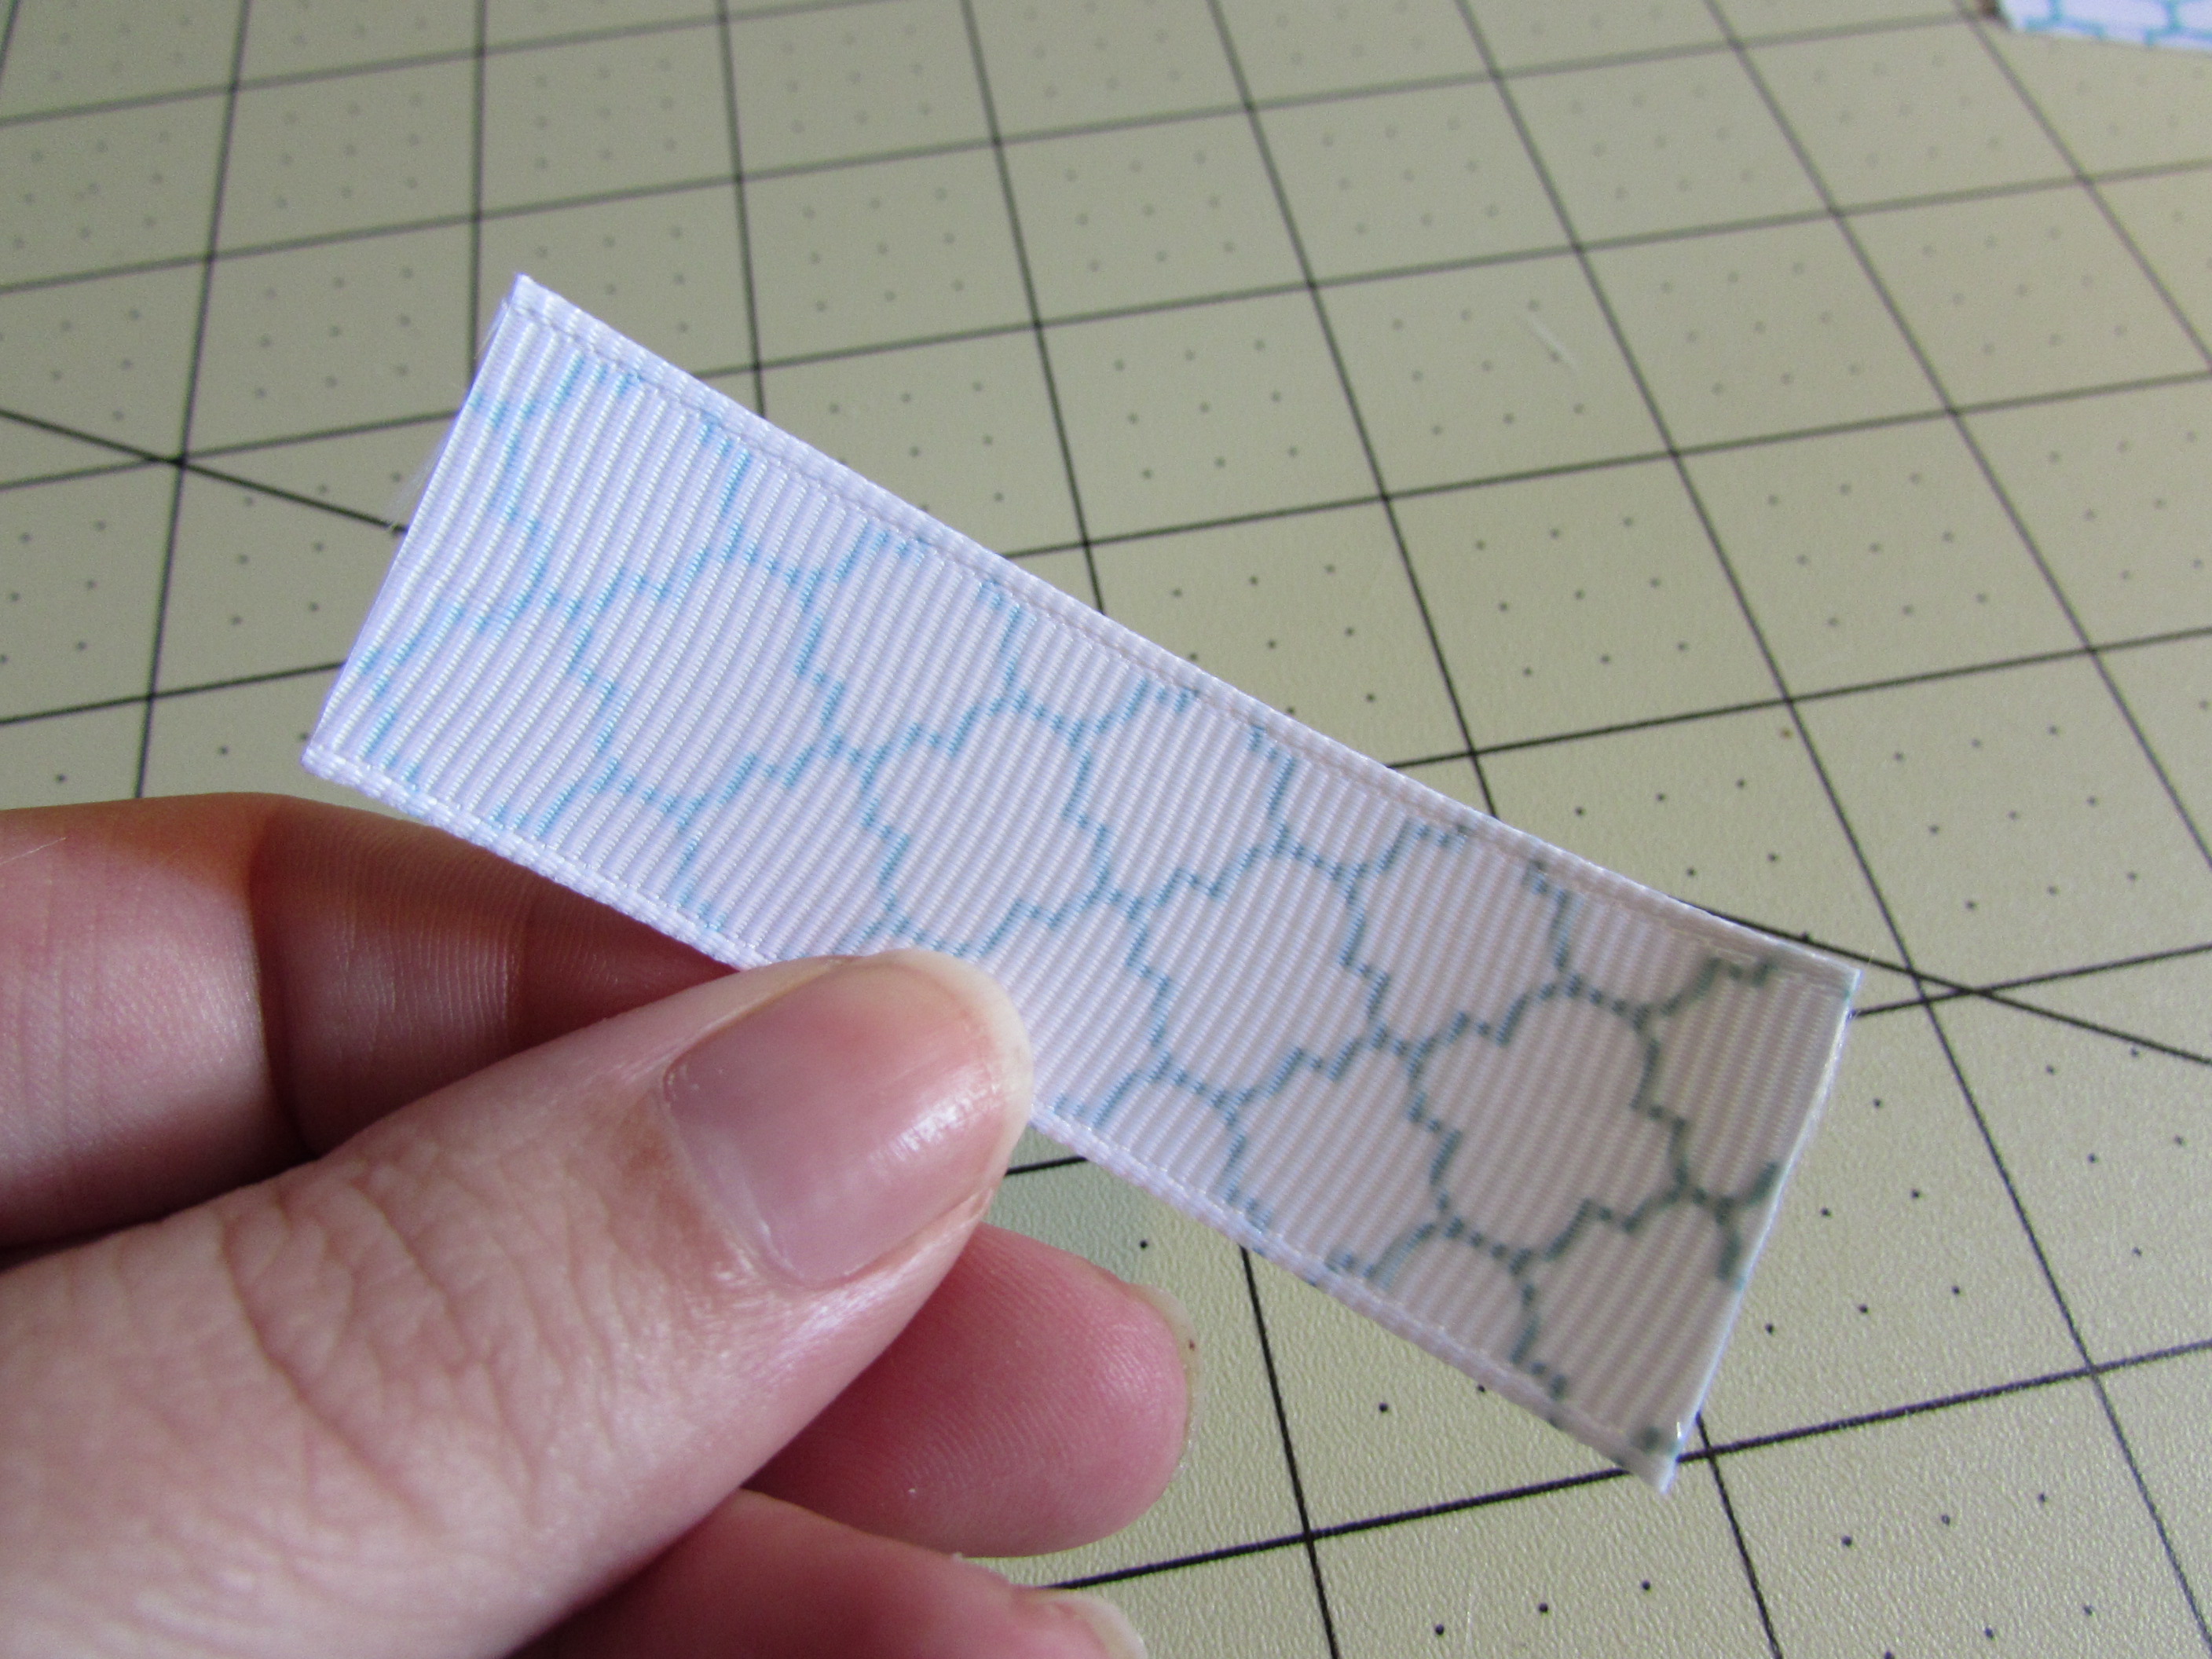
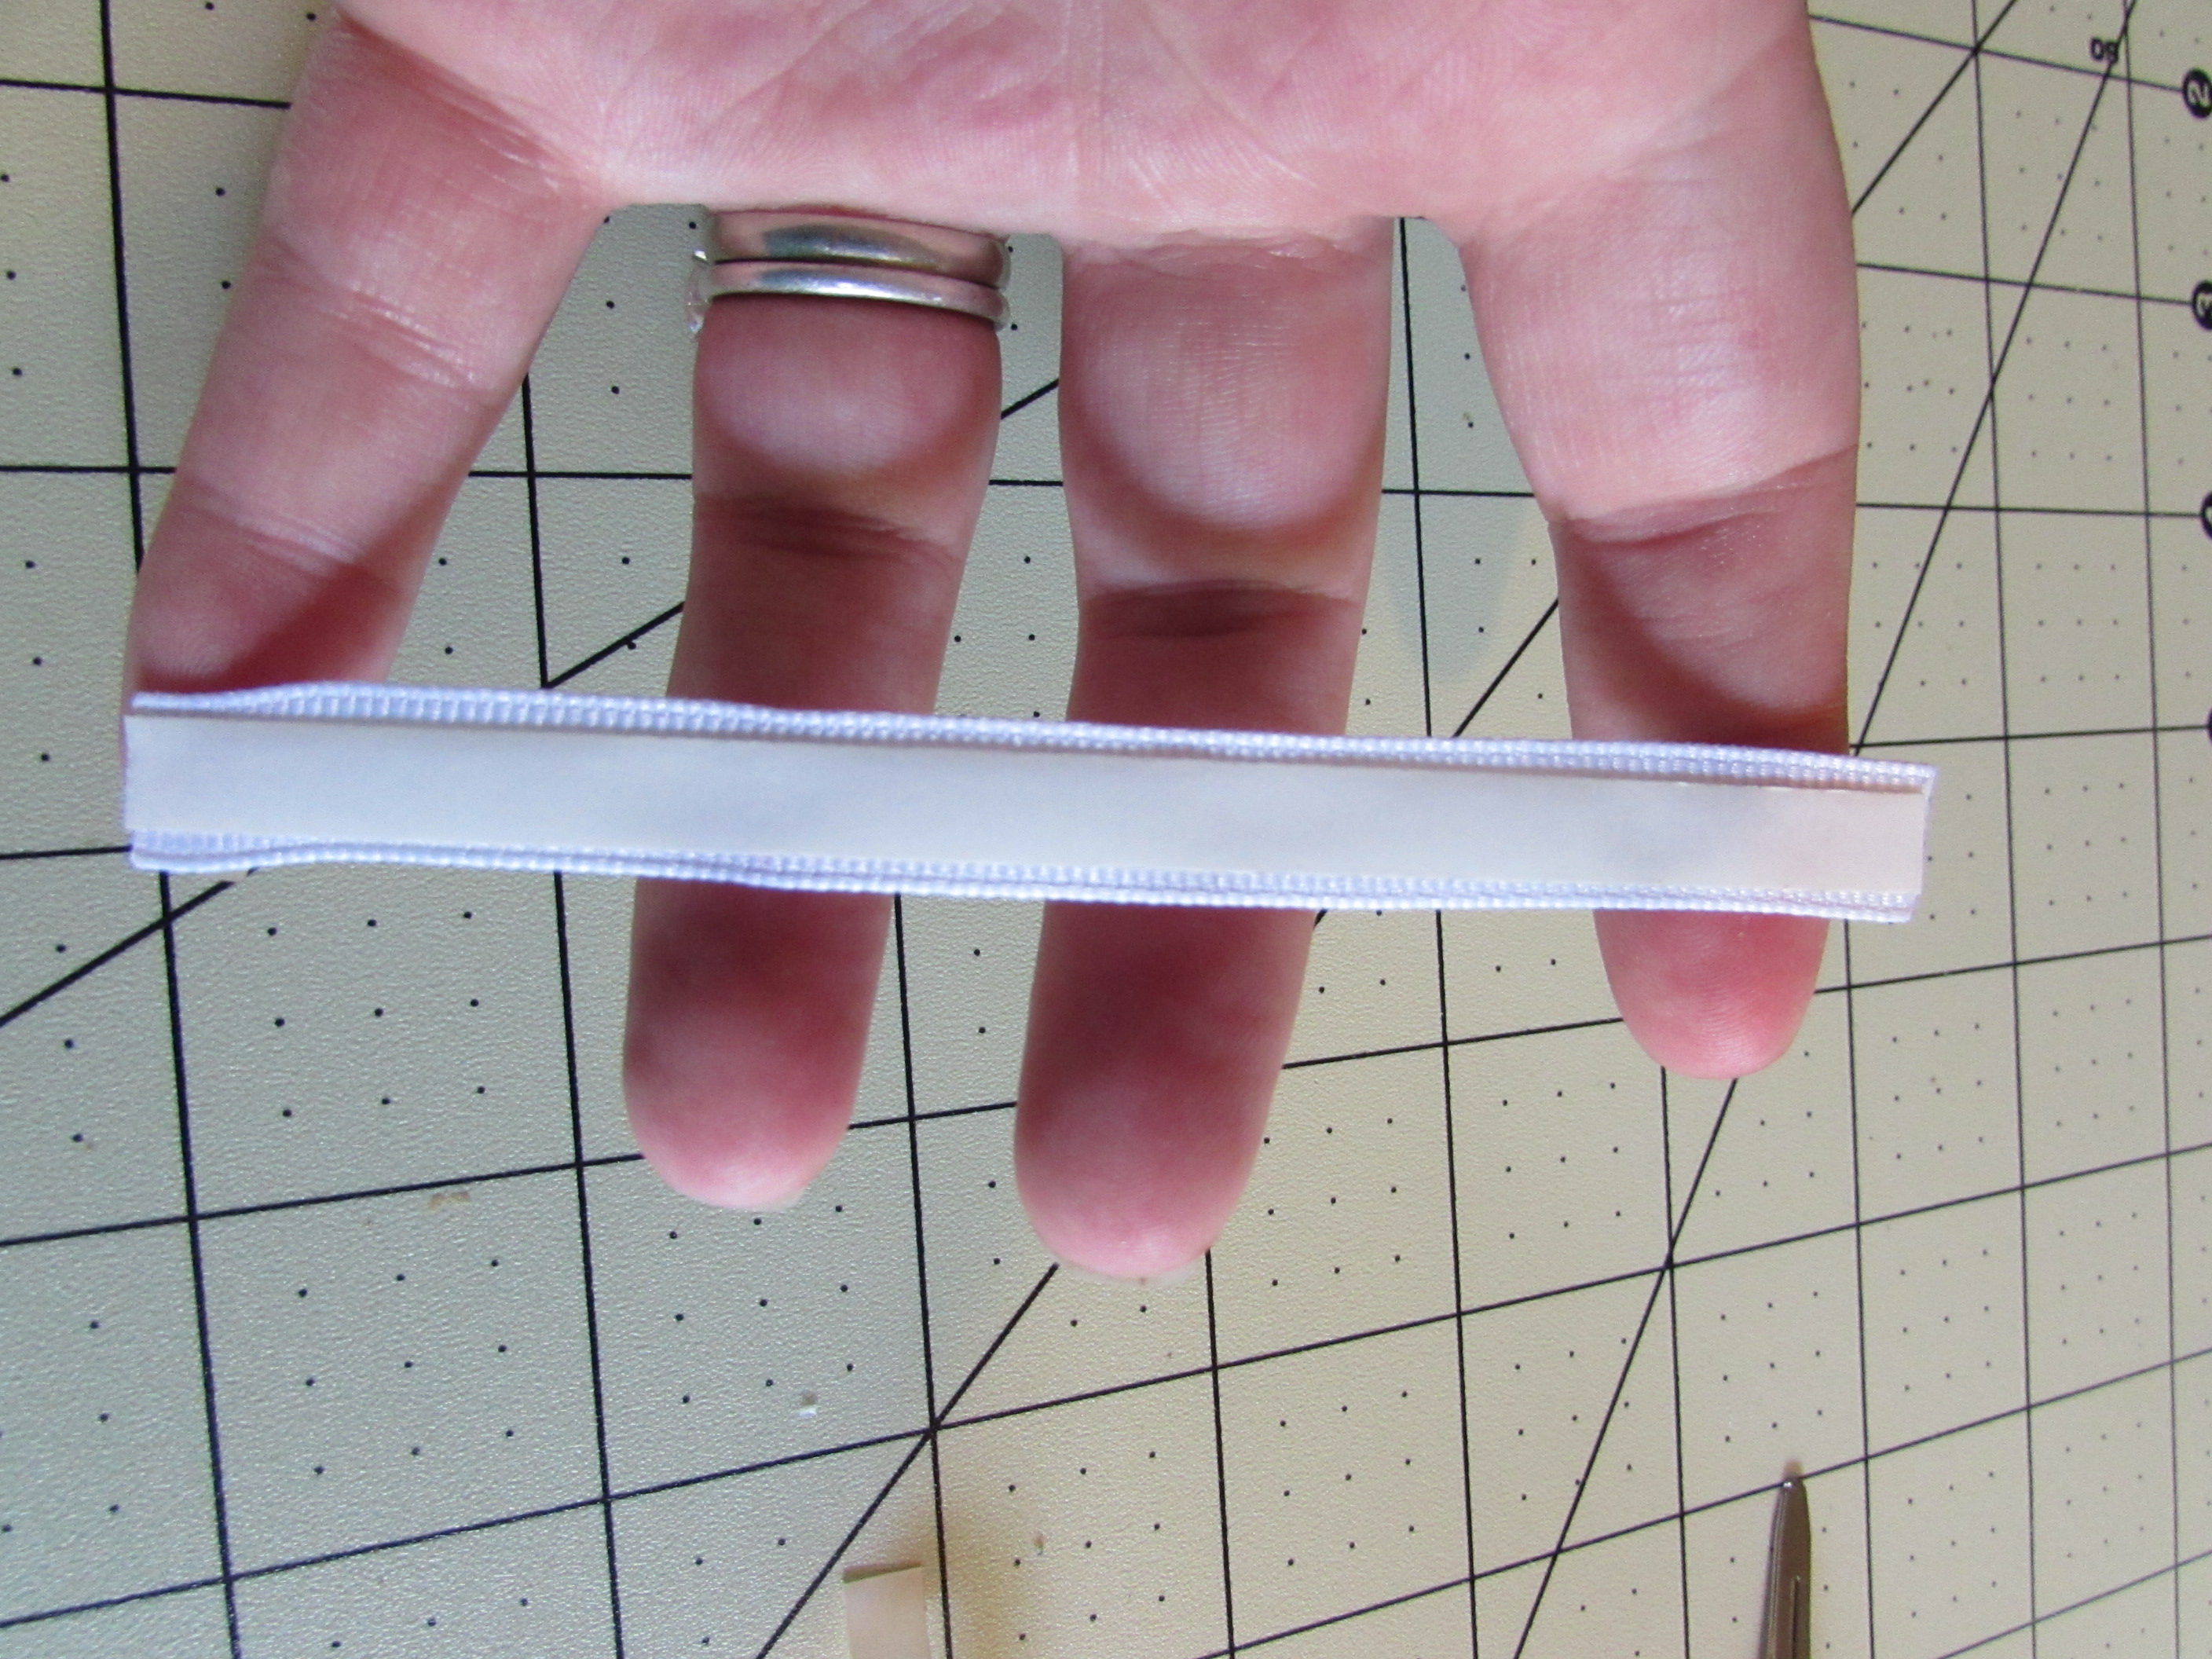
 Step 2: Take 1 piece turn upside down {{ IF you are using 1 sided printed }} solid side facing you
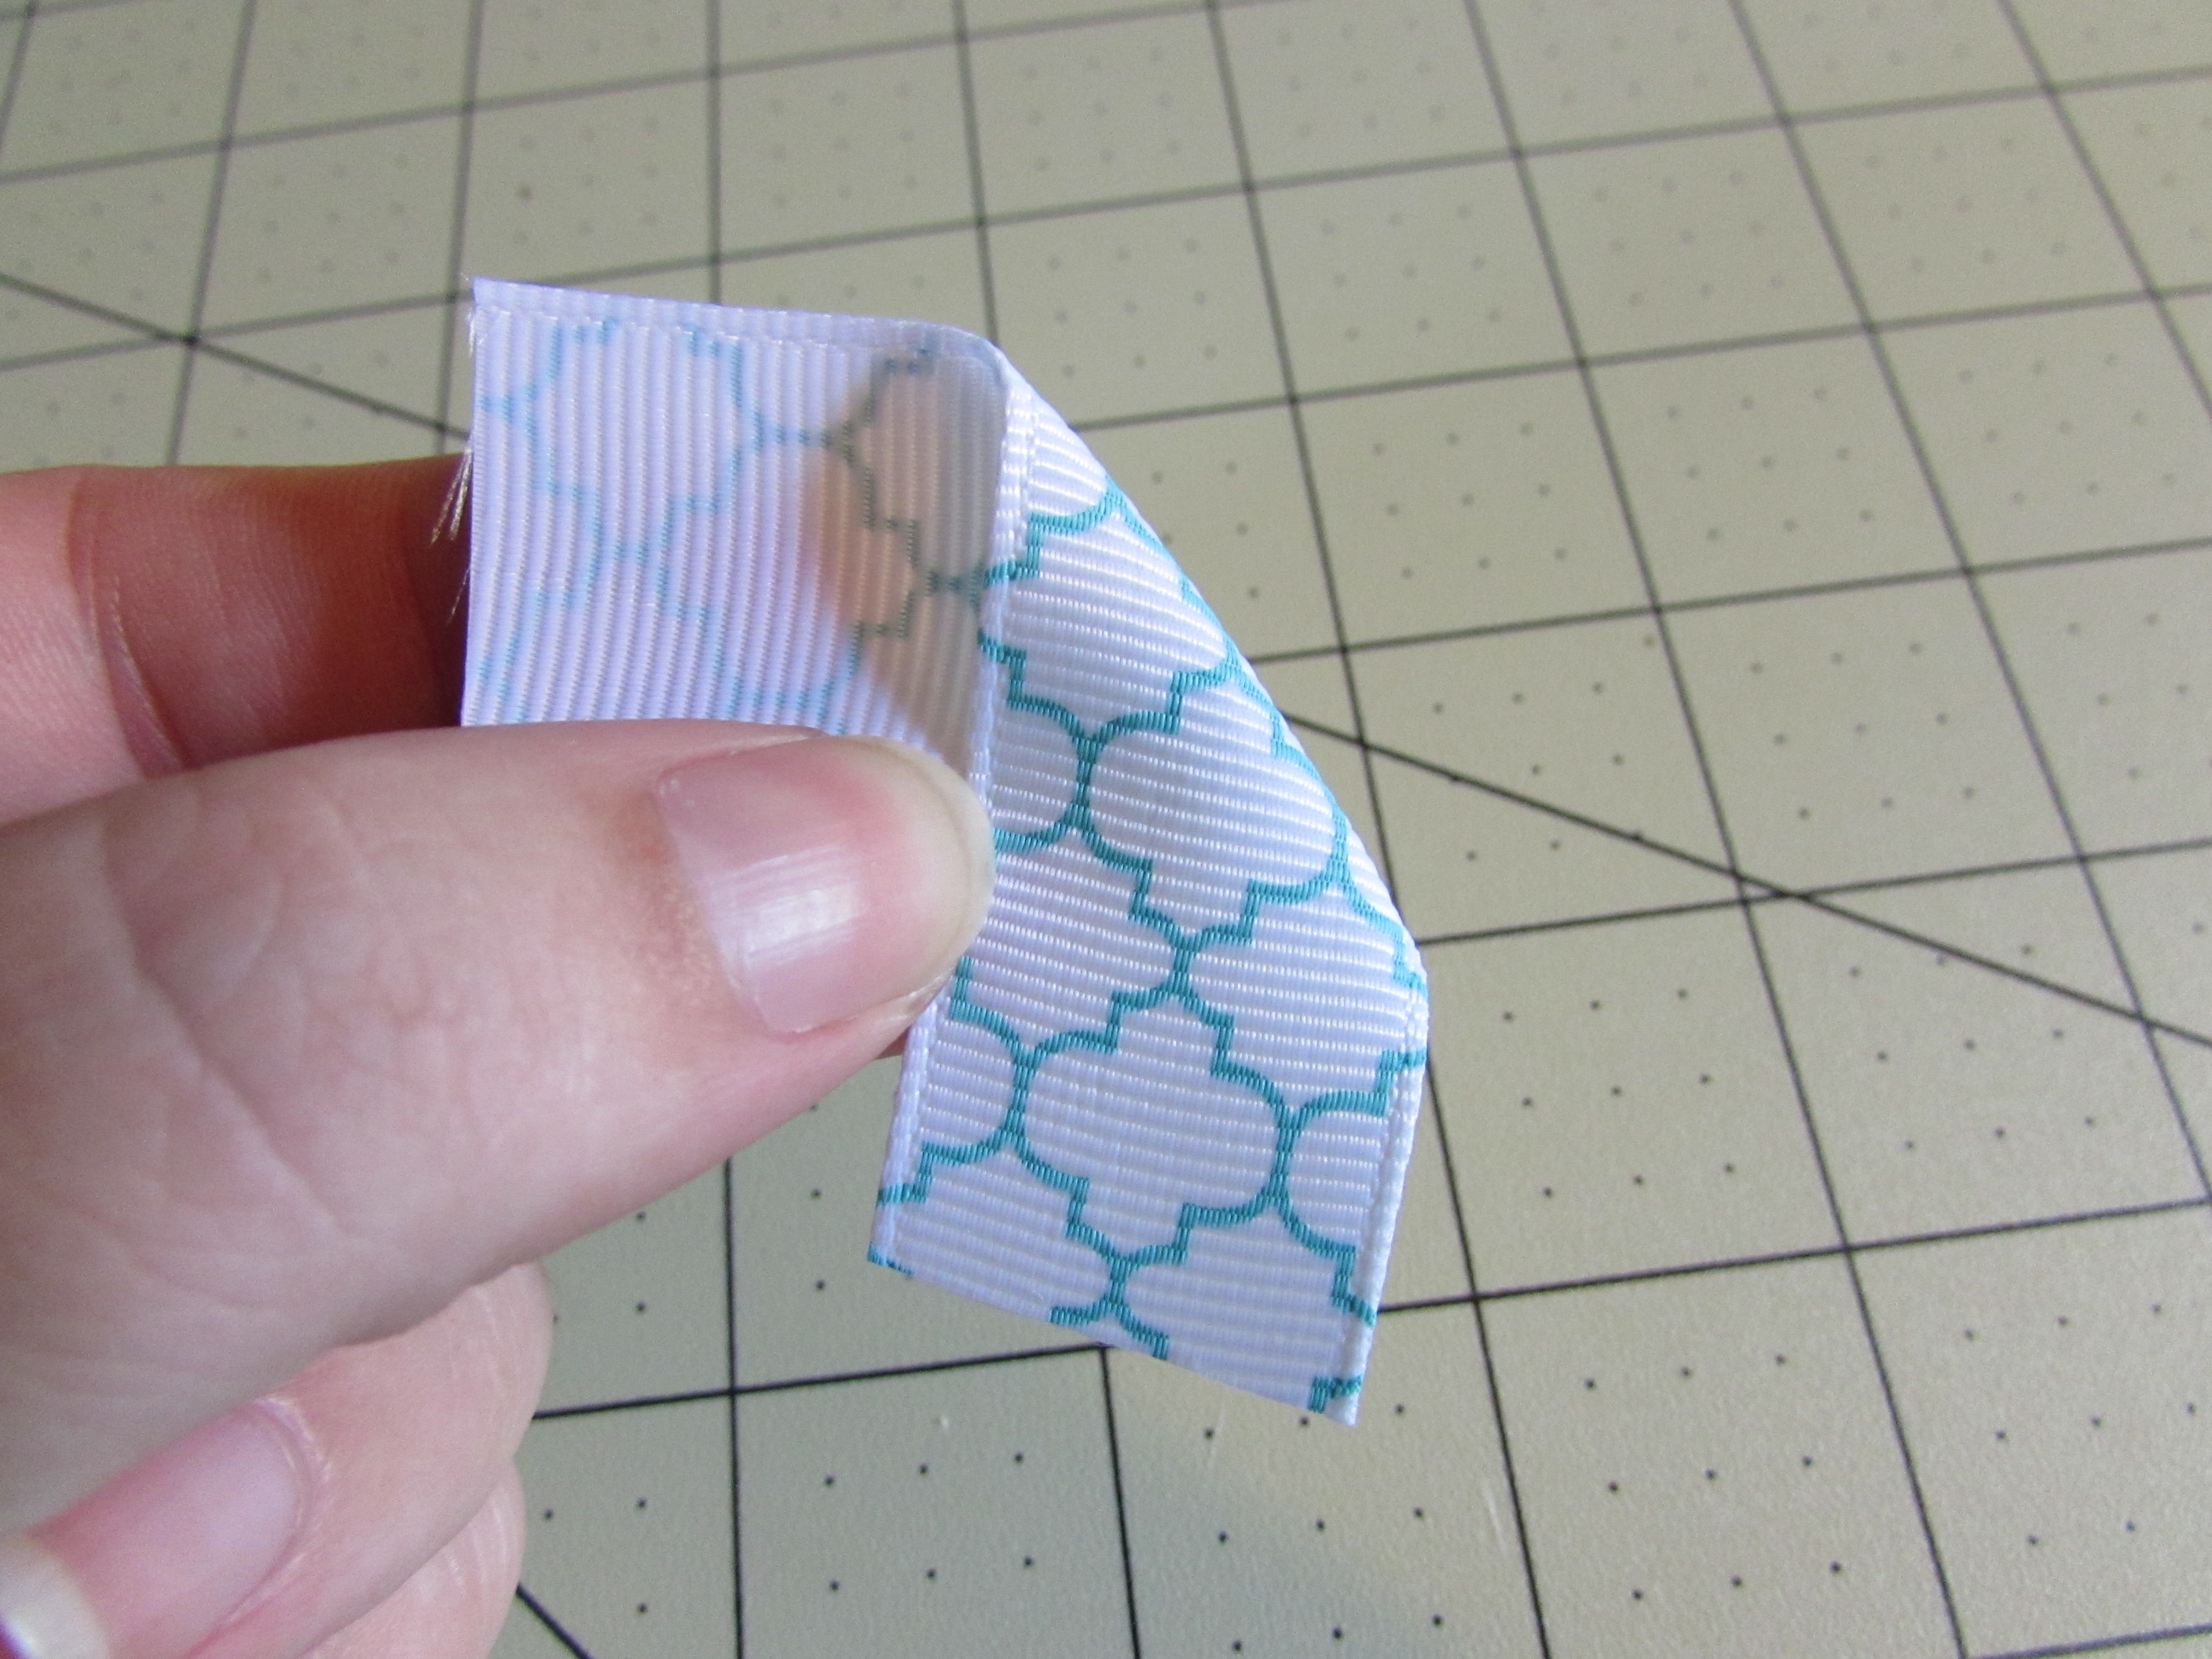
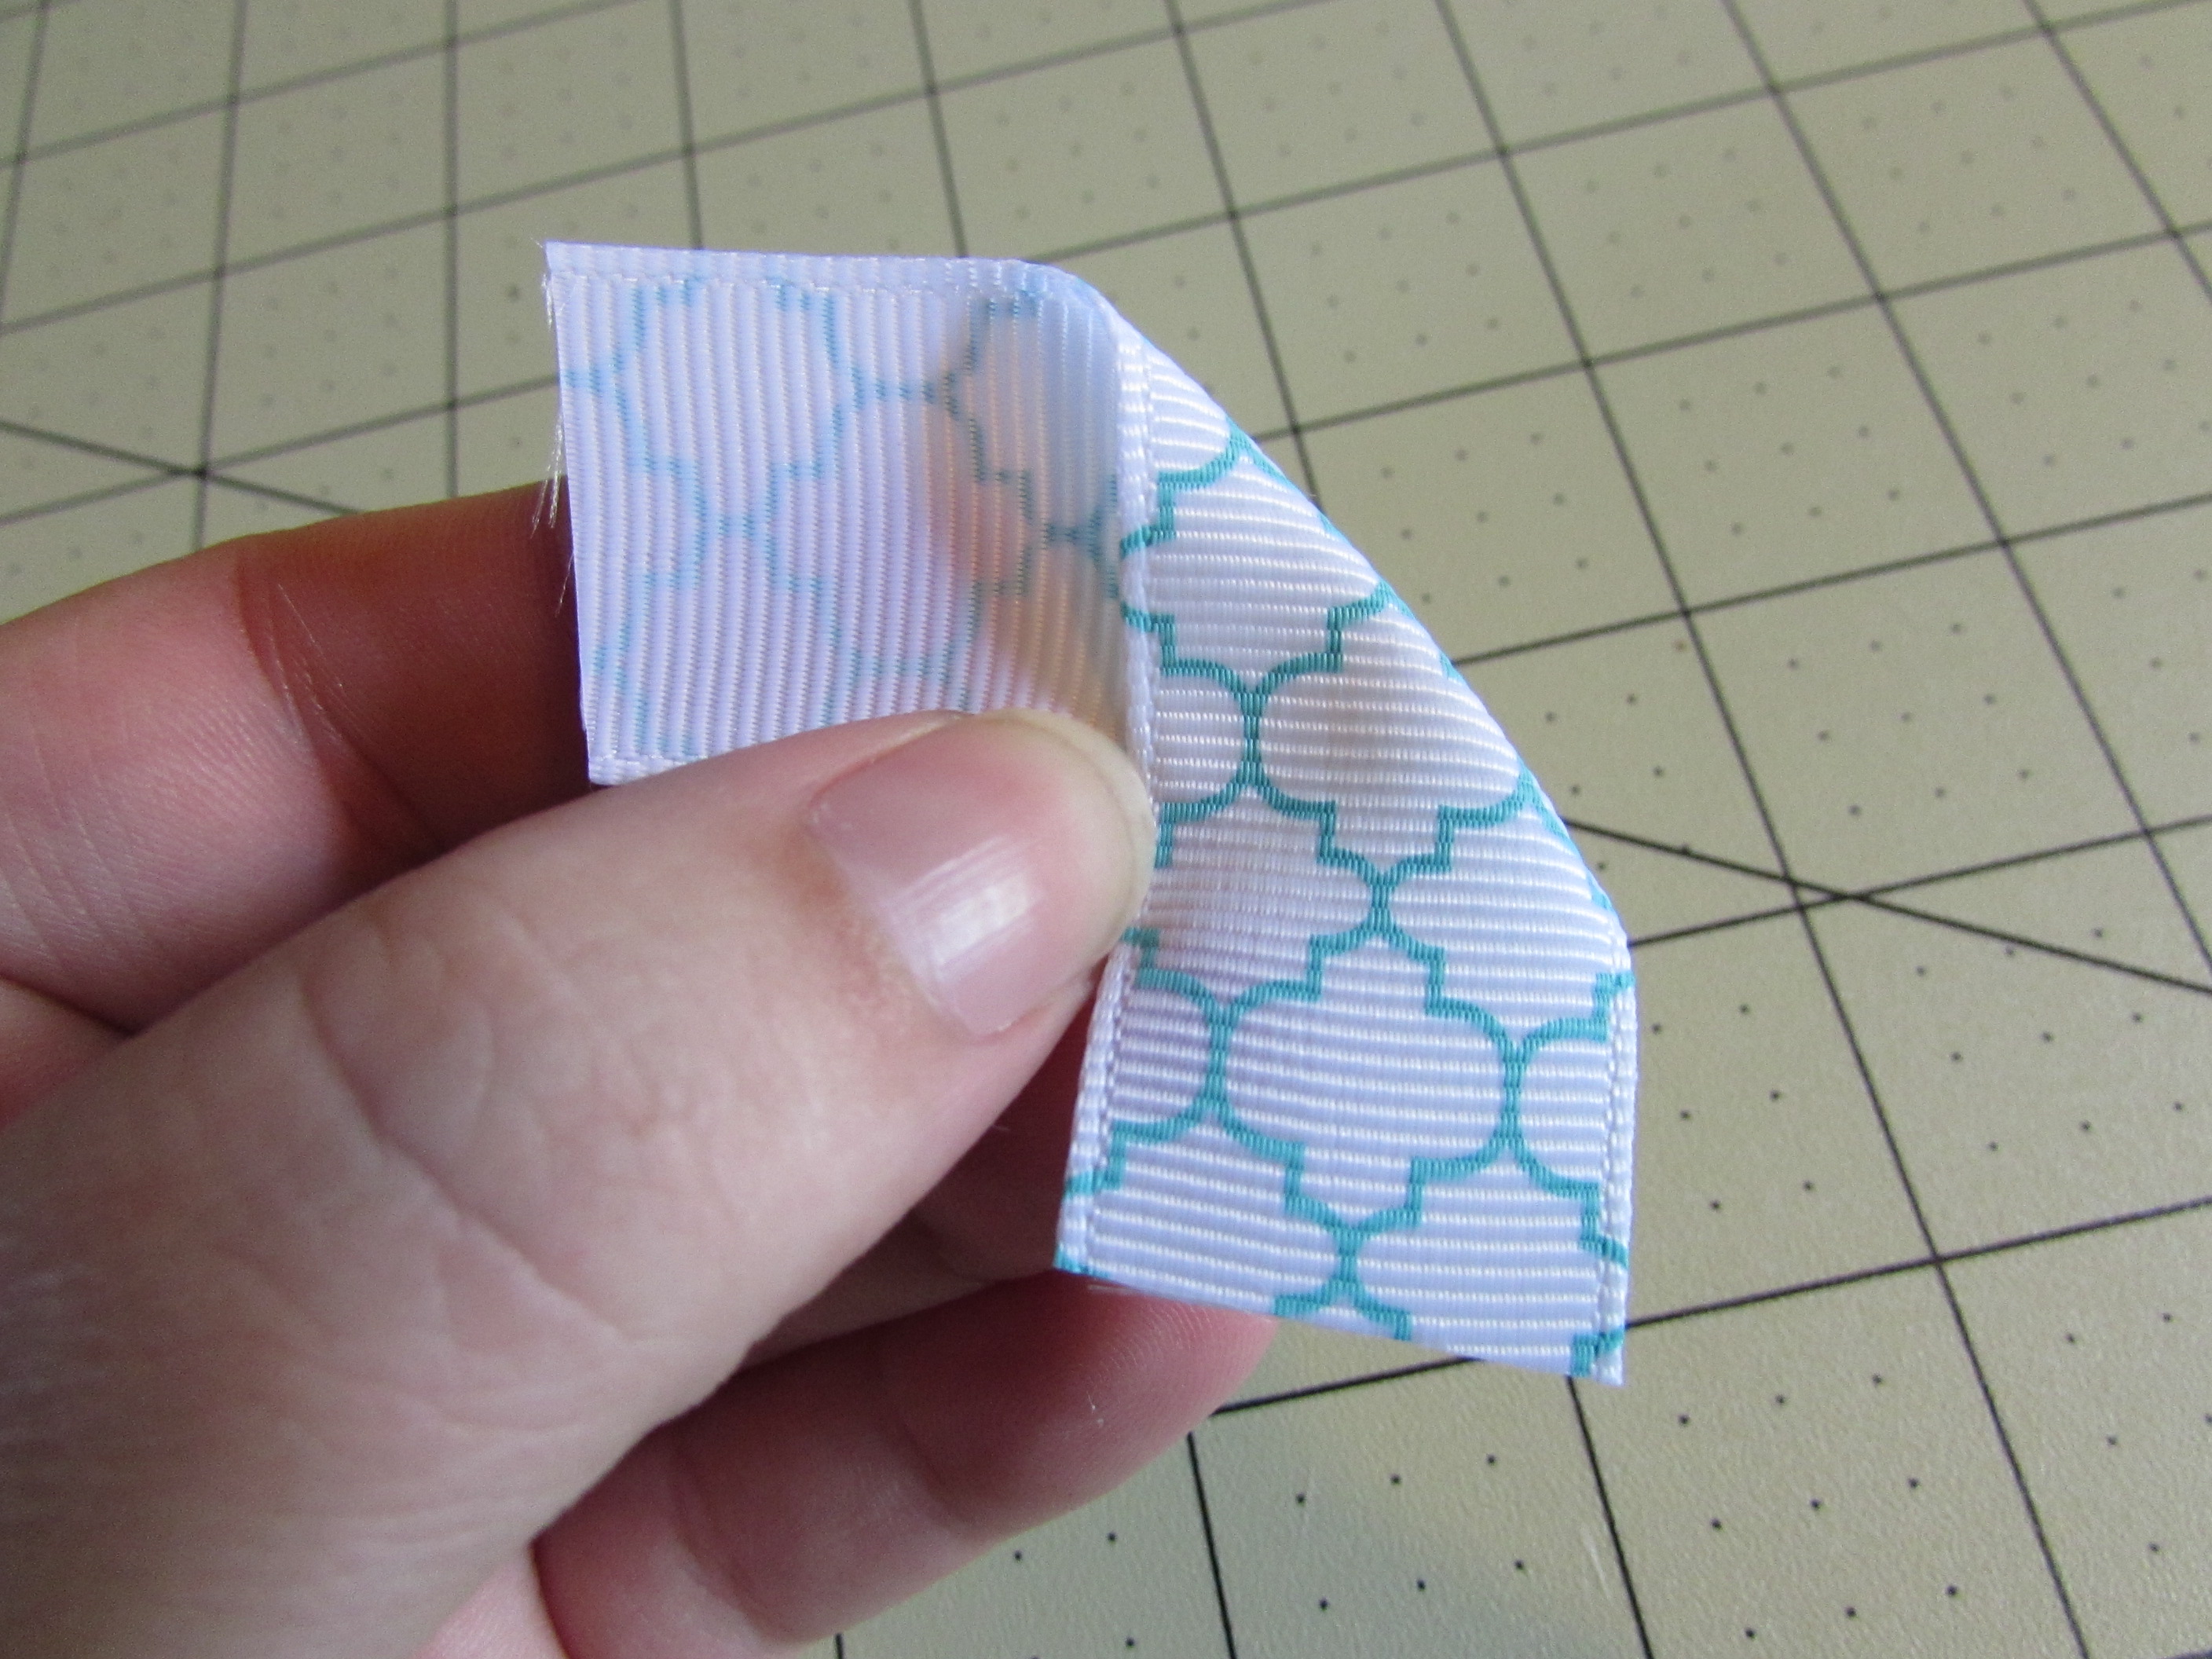
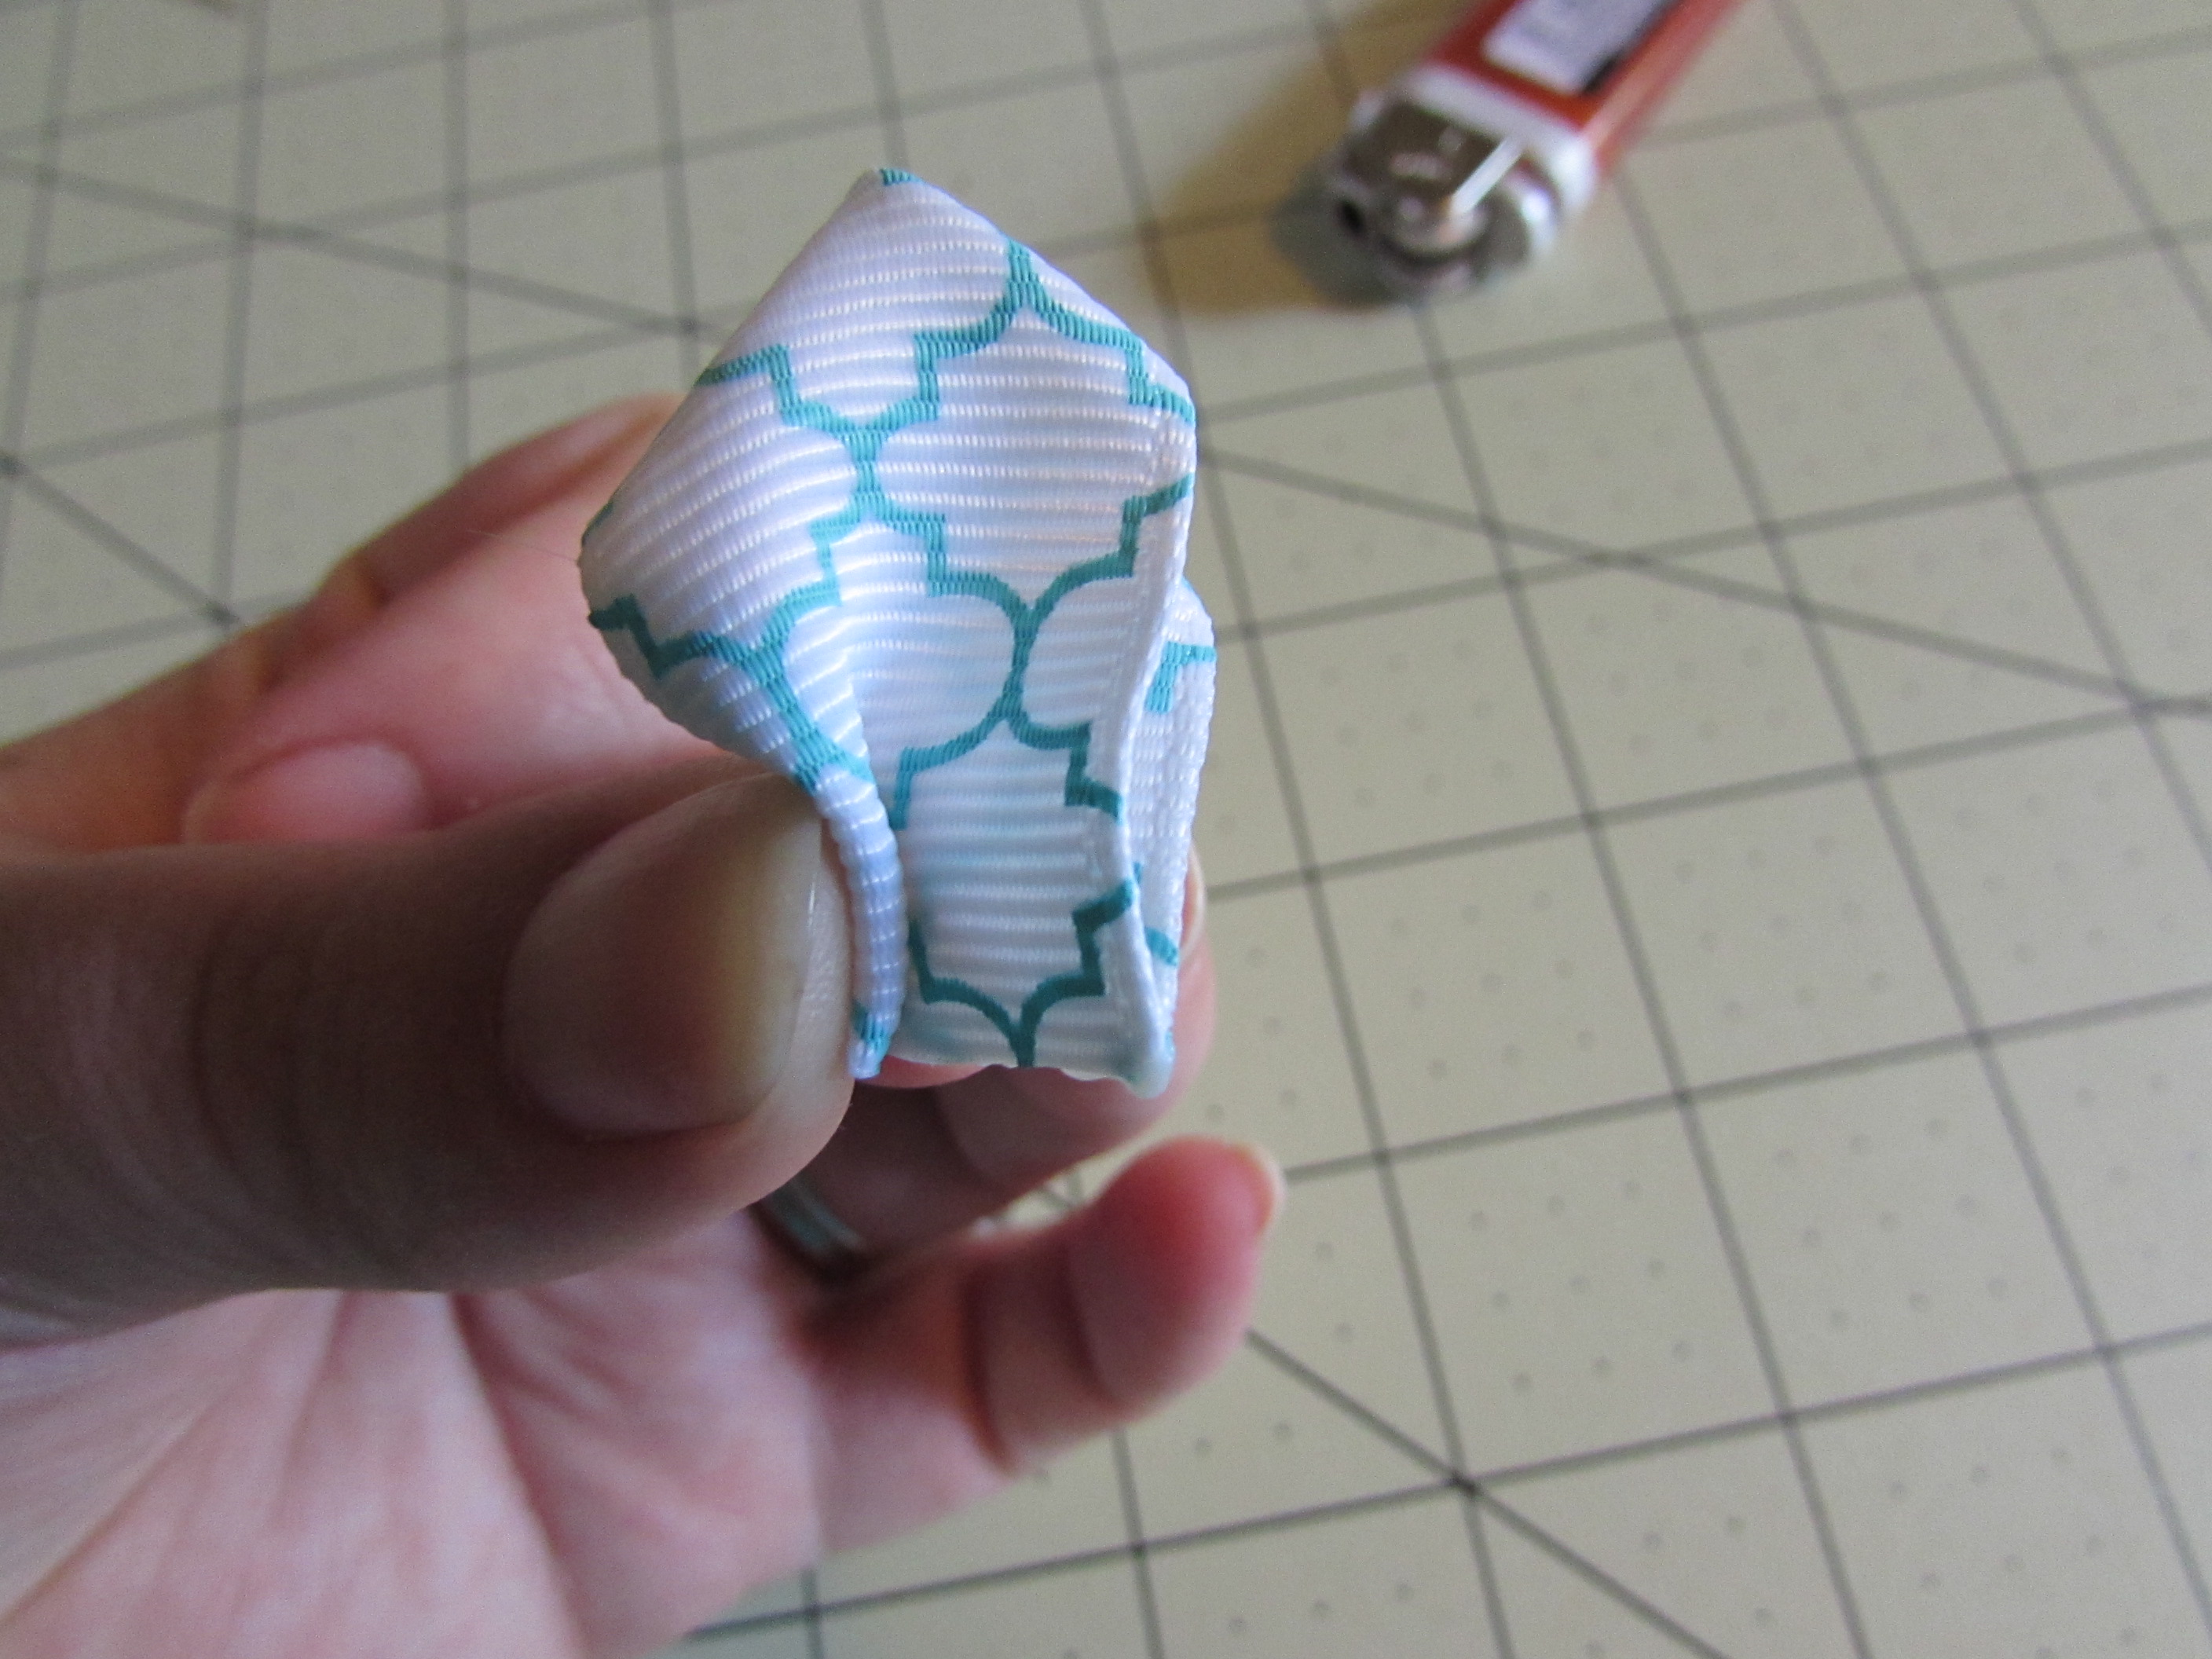
 Step 3: Fold the right end over {{ do about half way }}
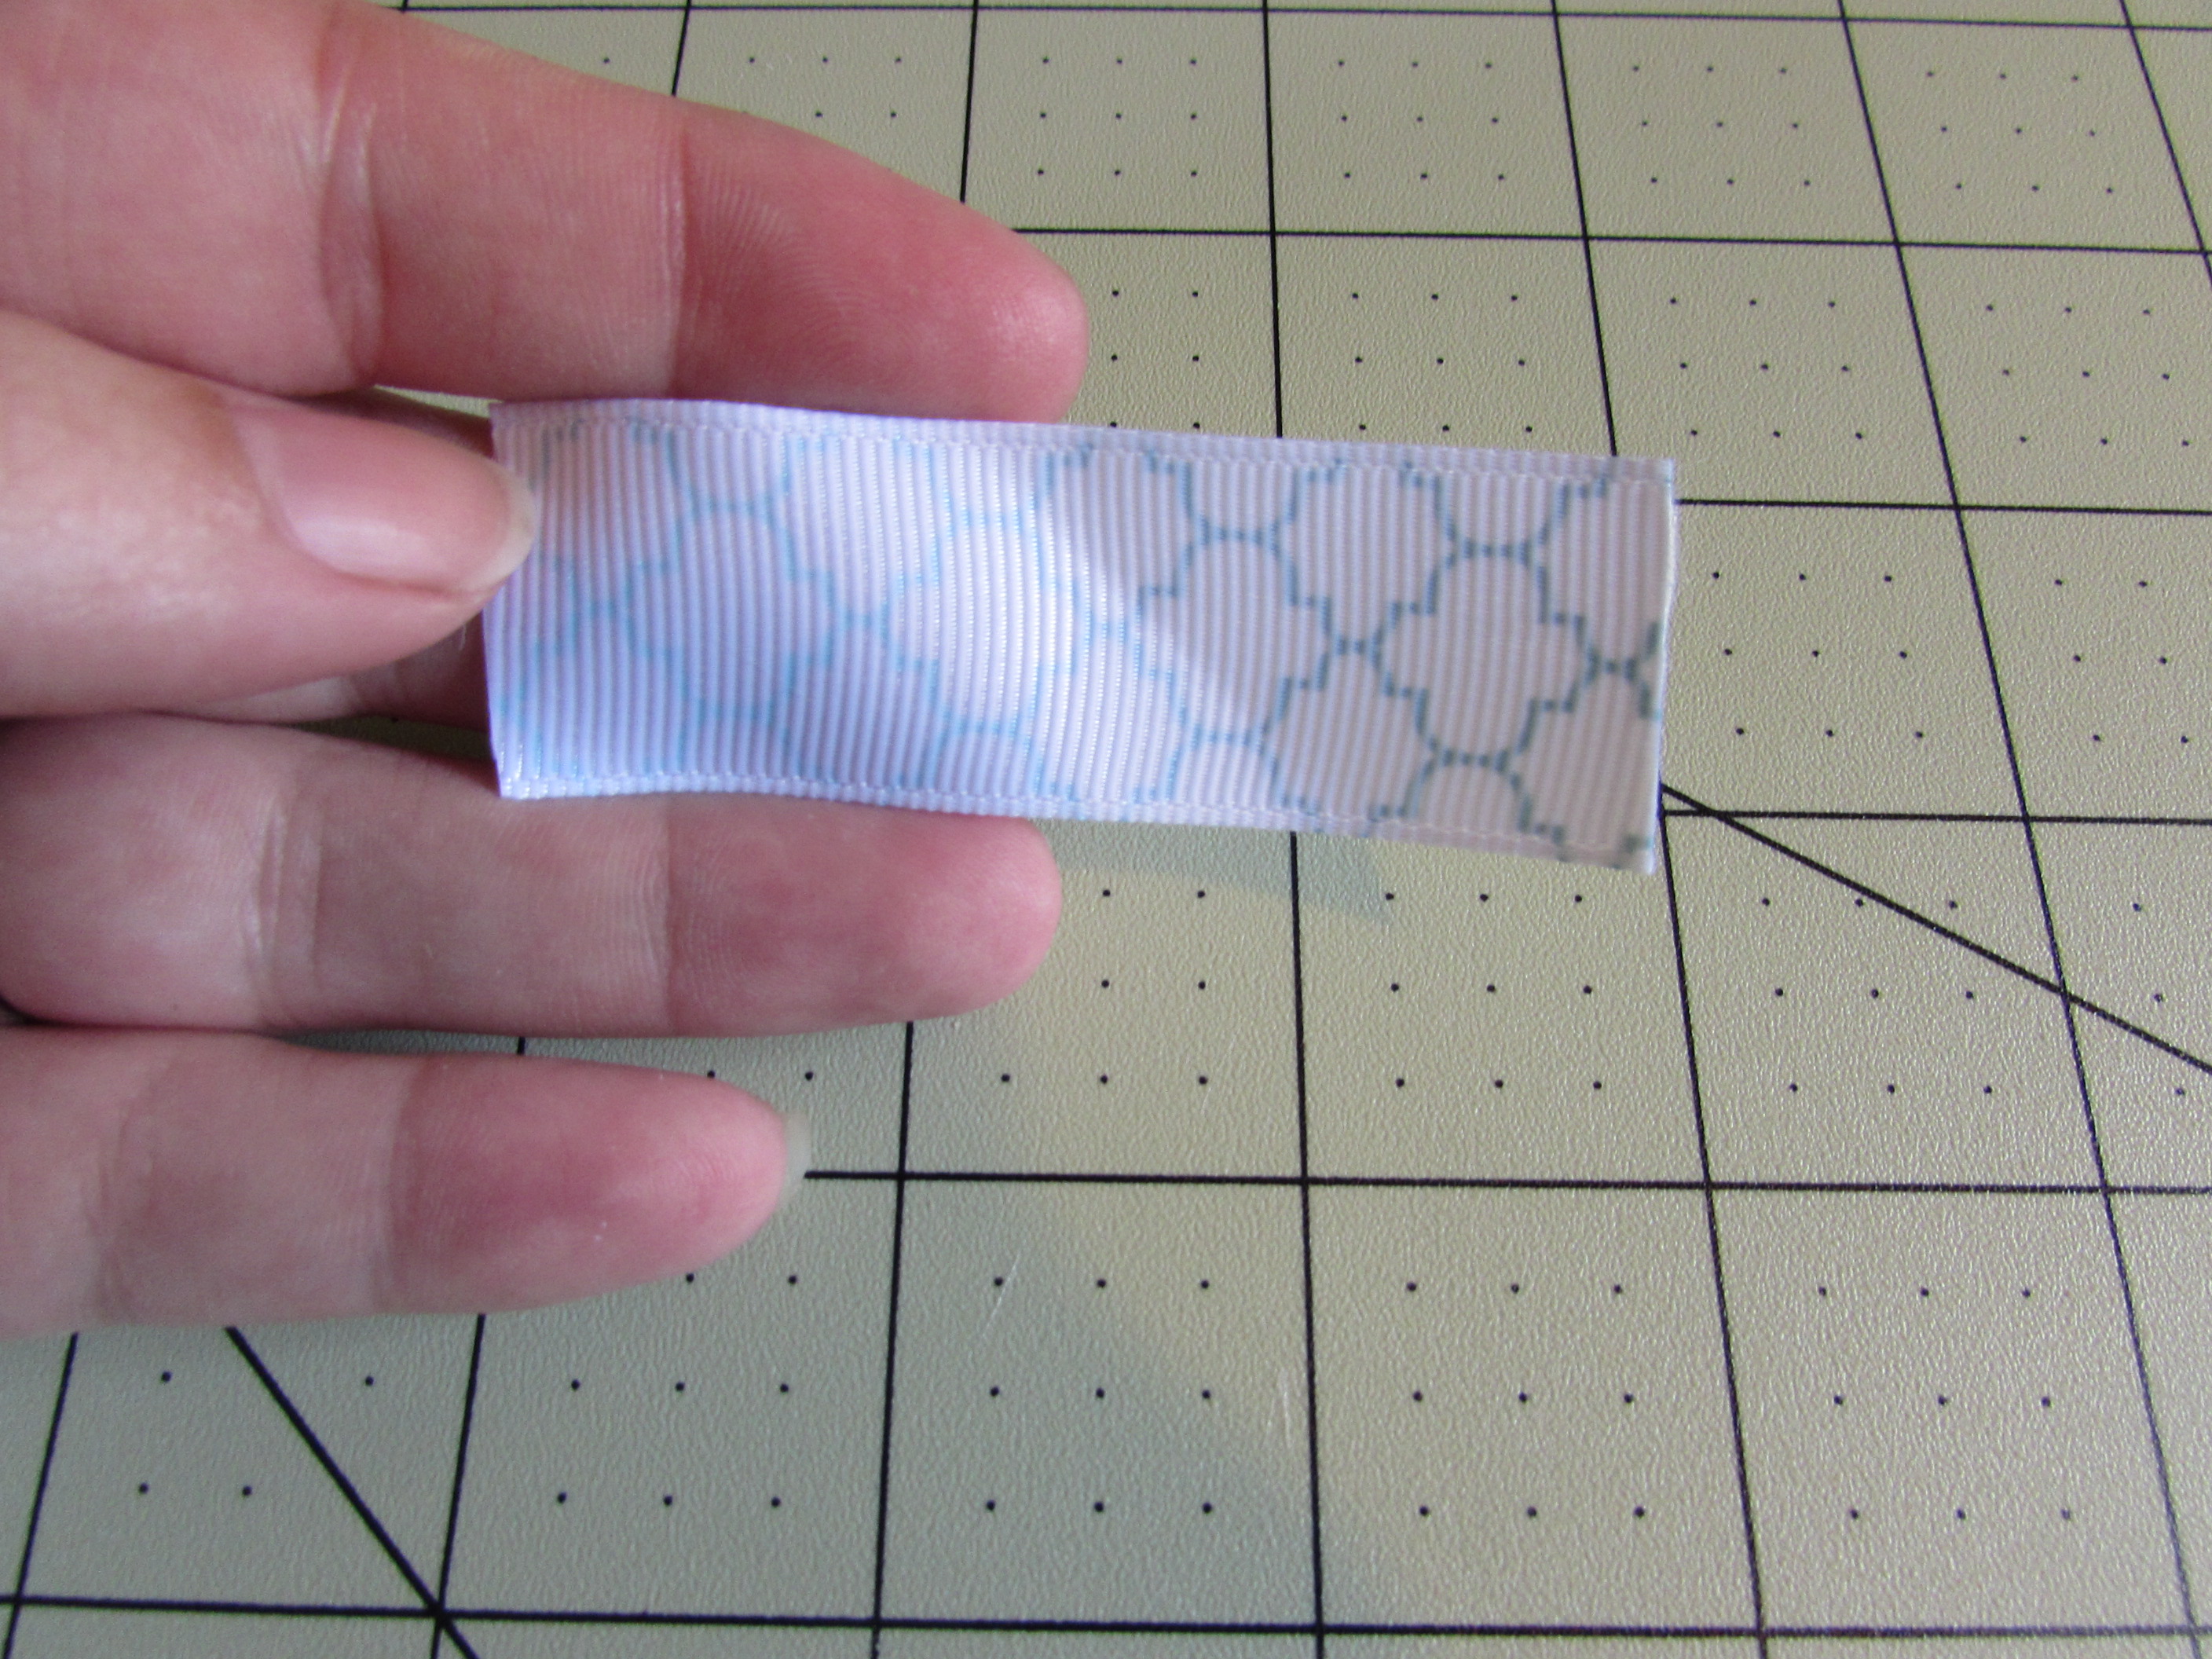
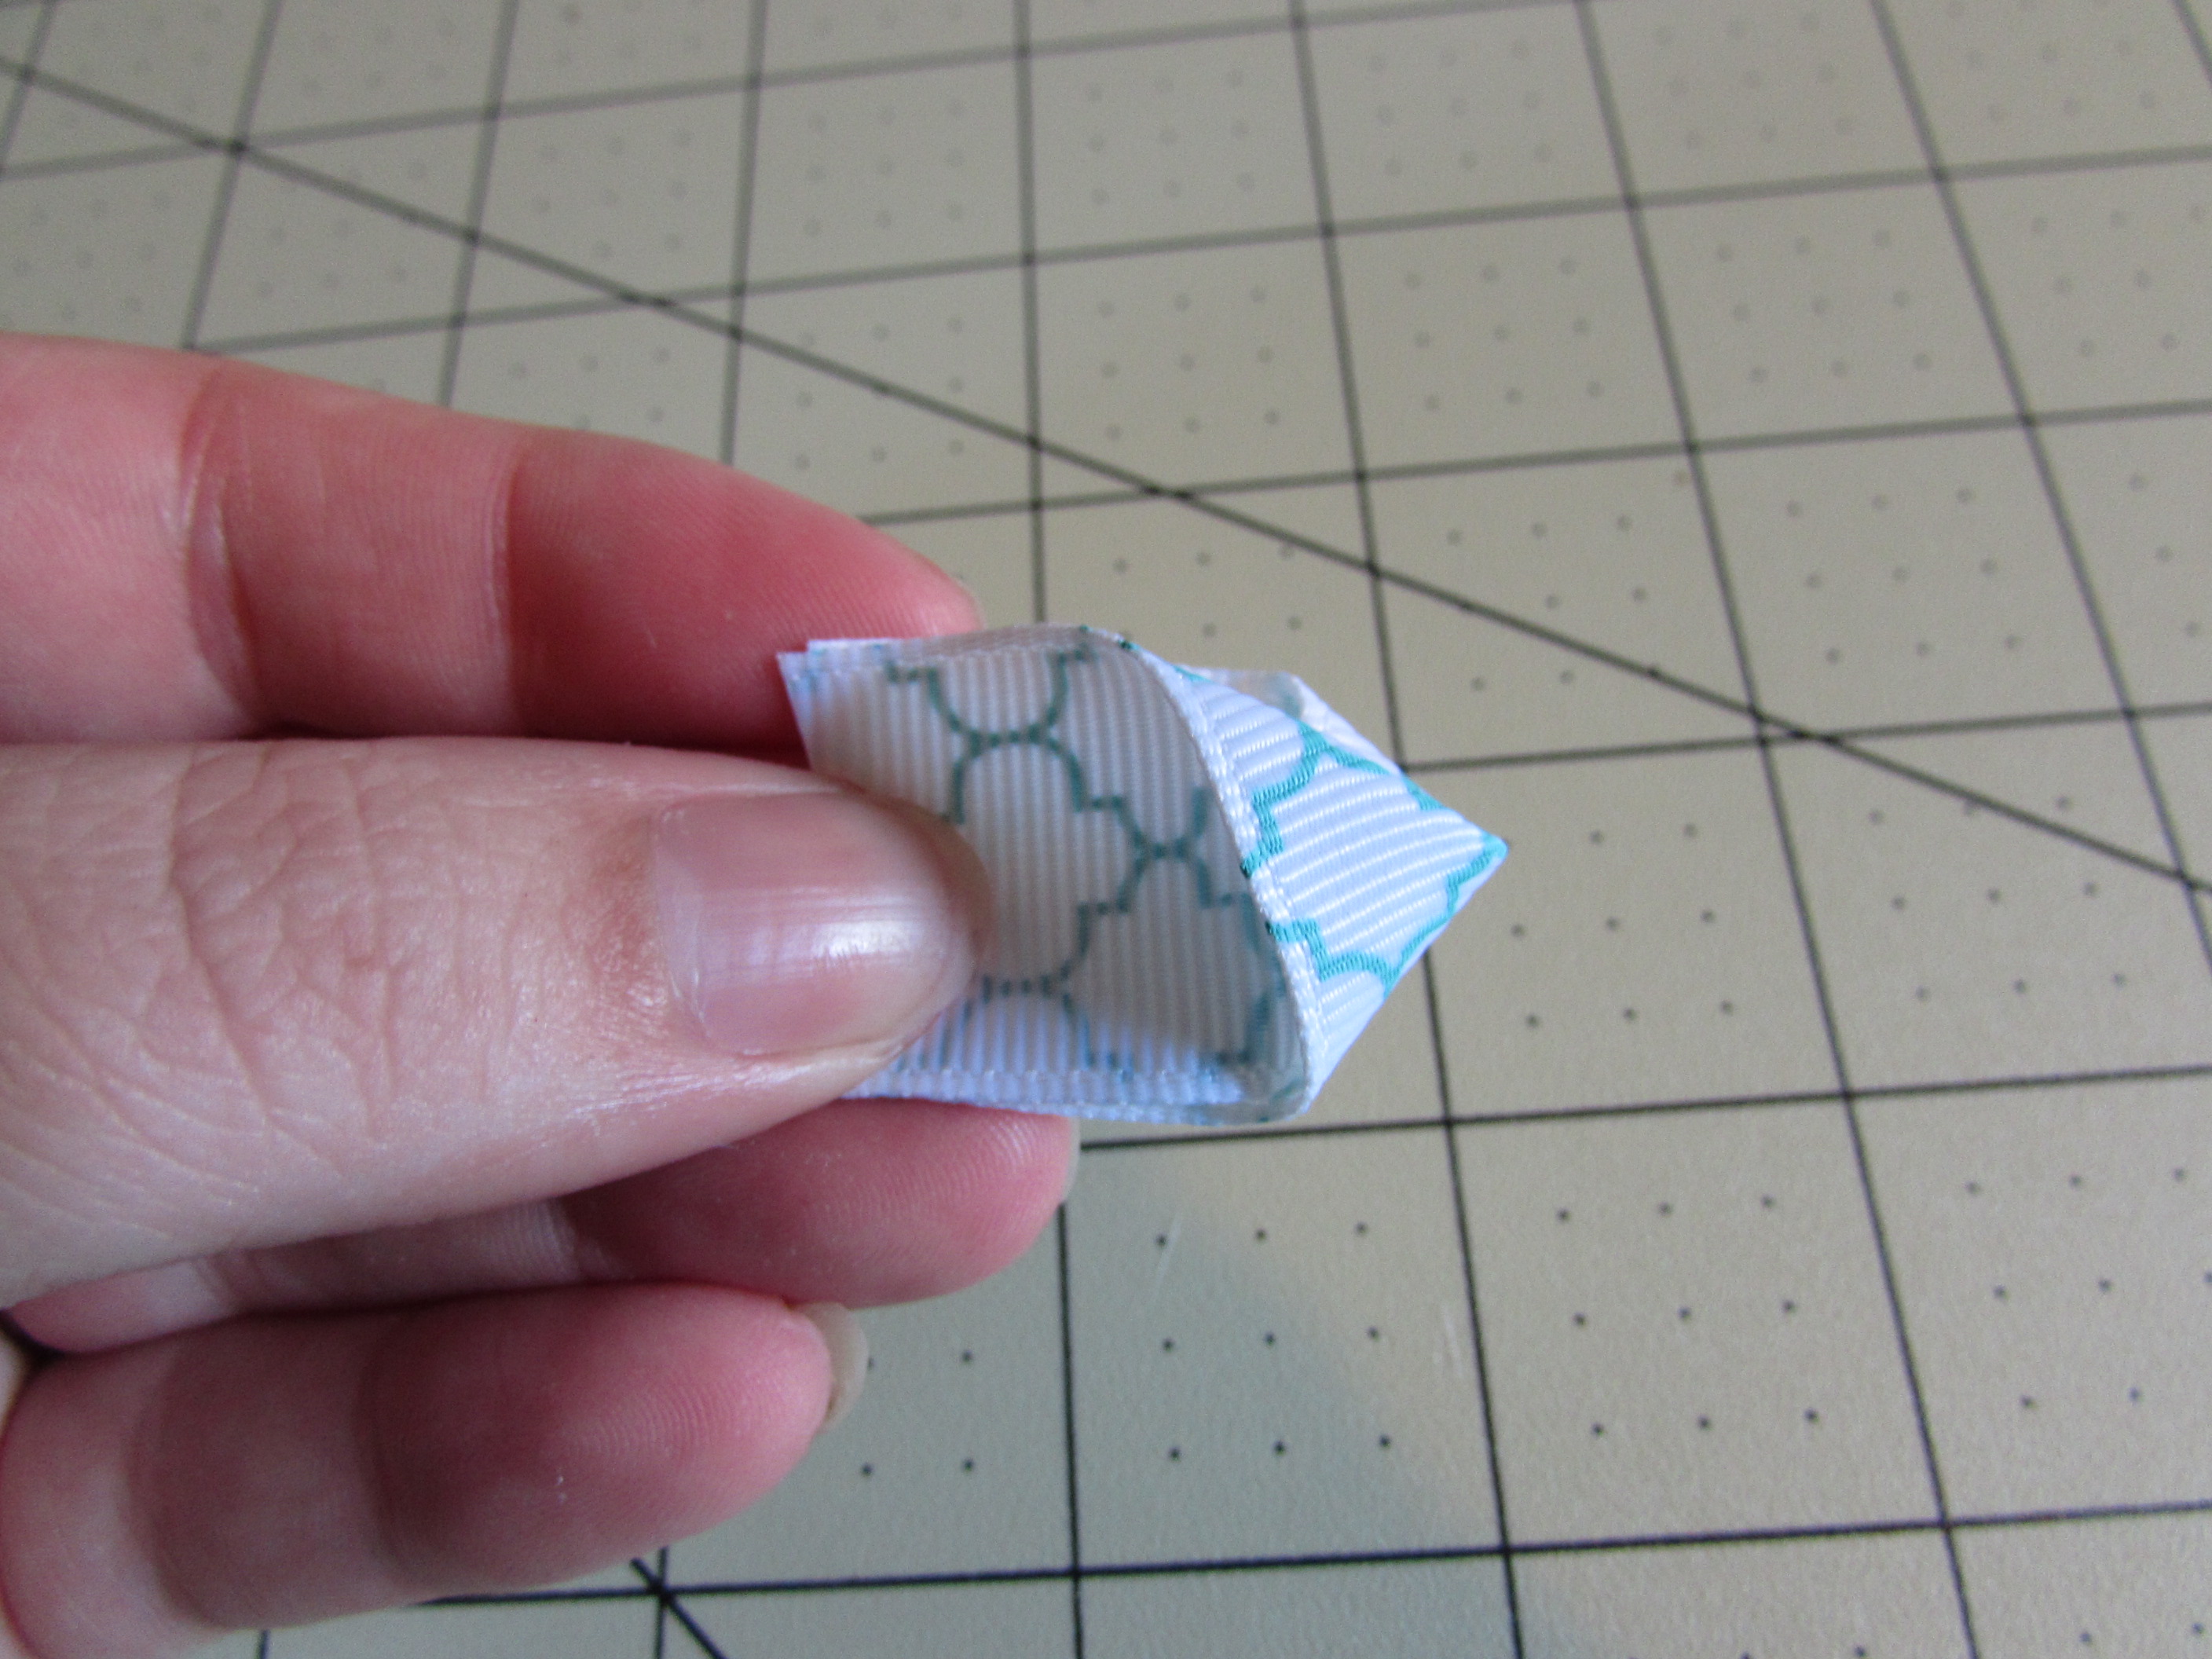
 Step 4: Fold the same piece back down onto the left side
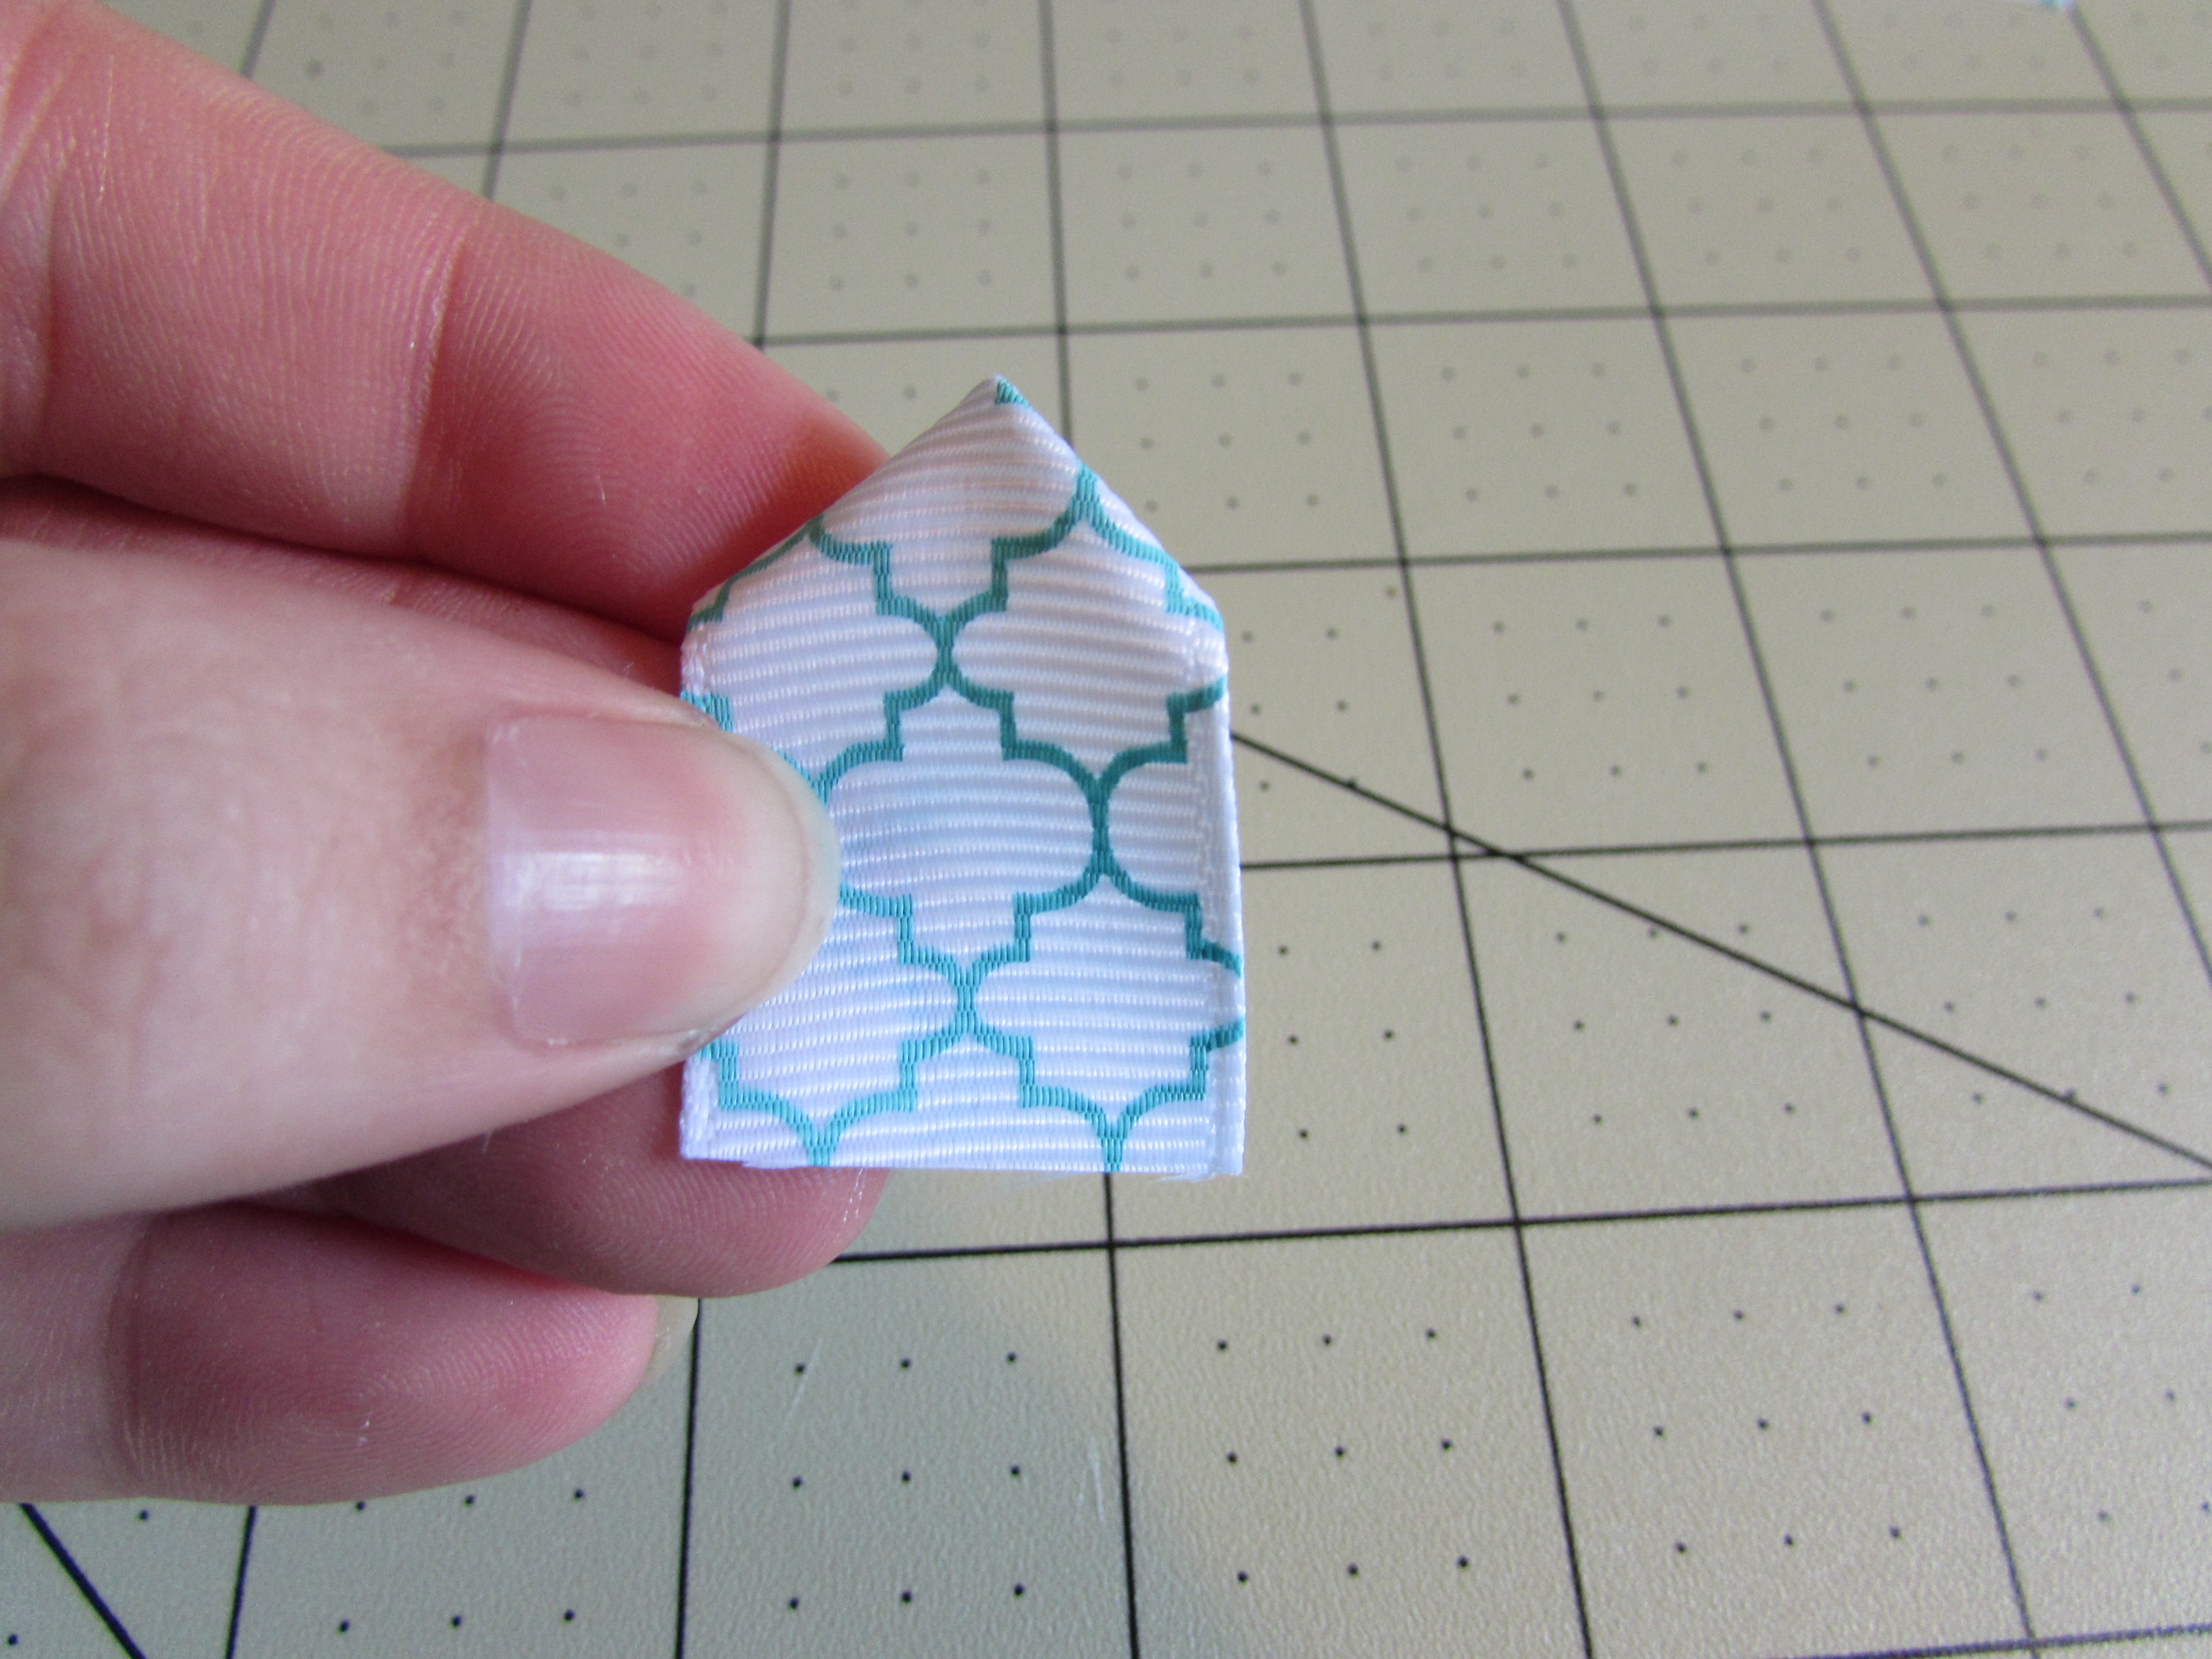
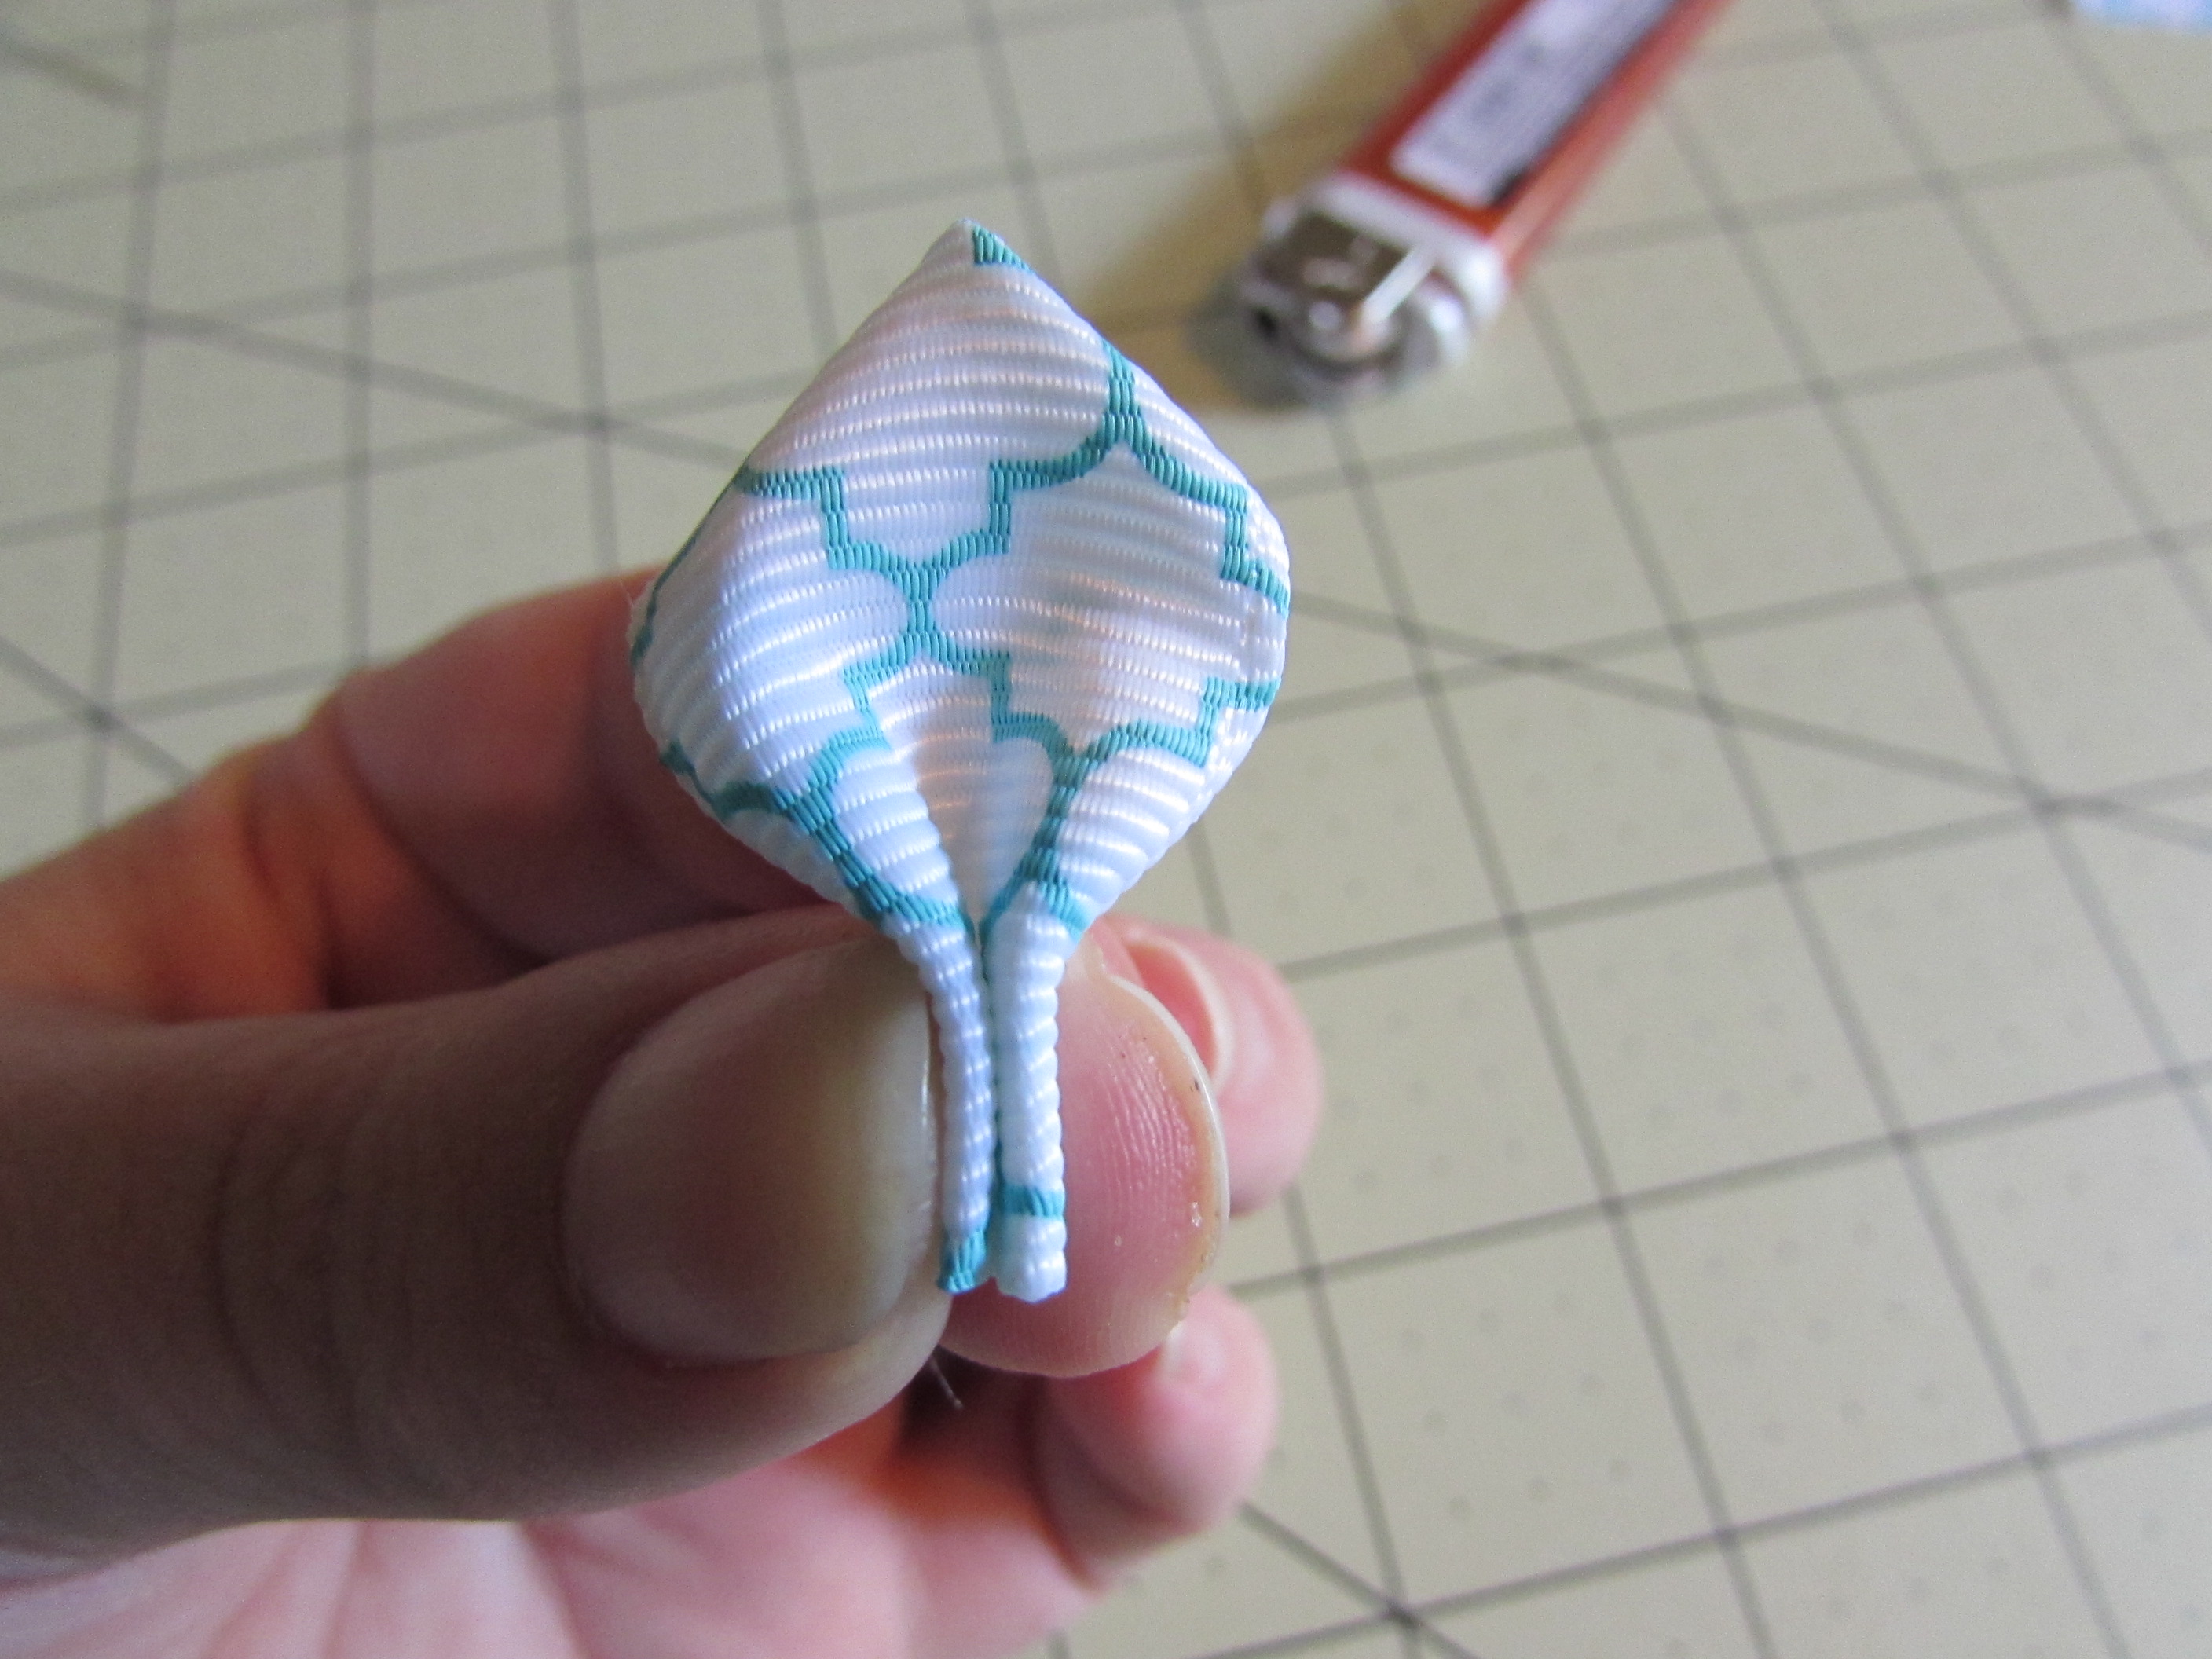
 Step 5: Flip over & heat seal
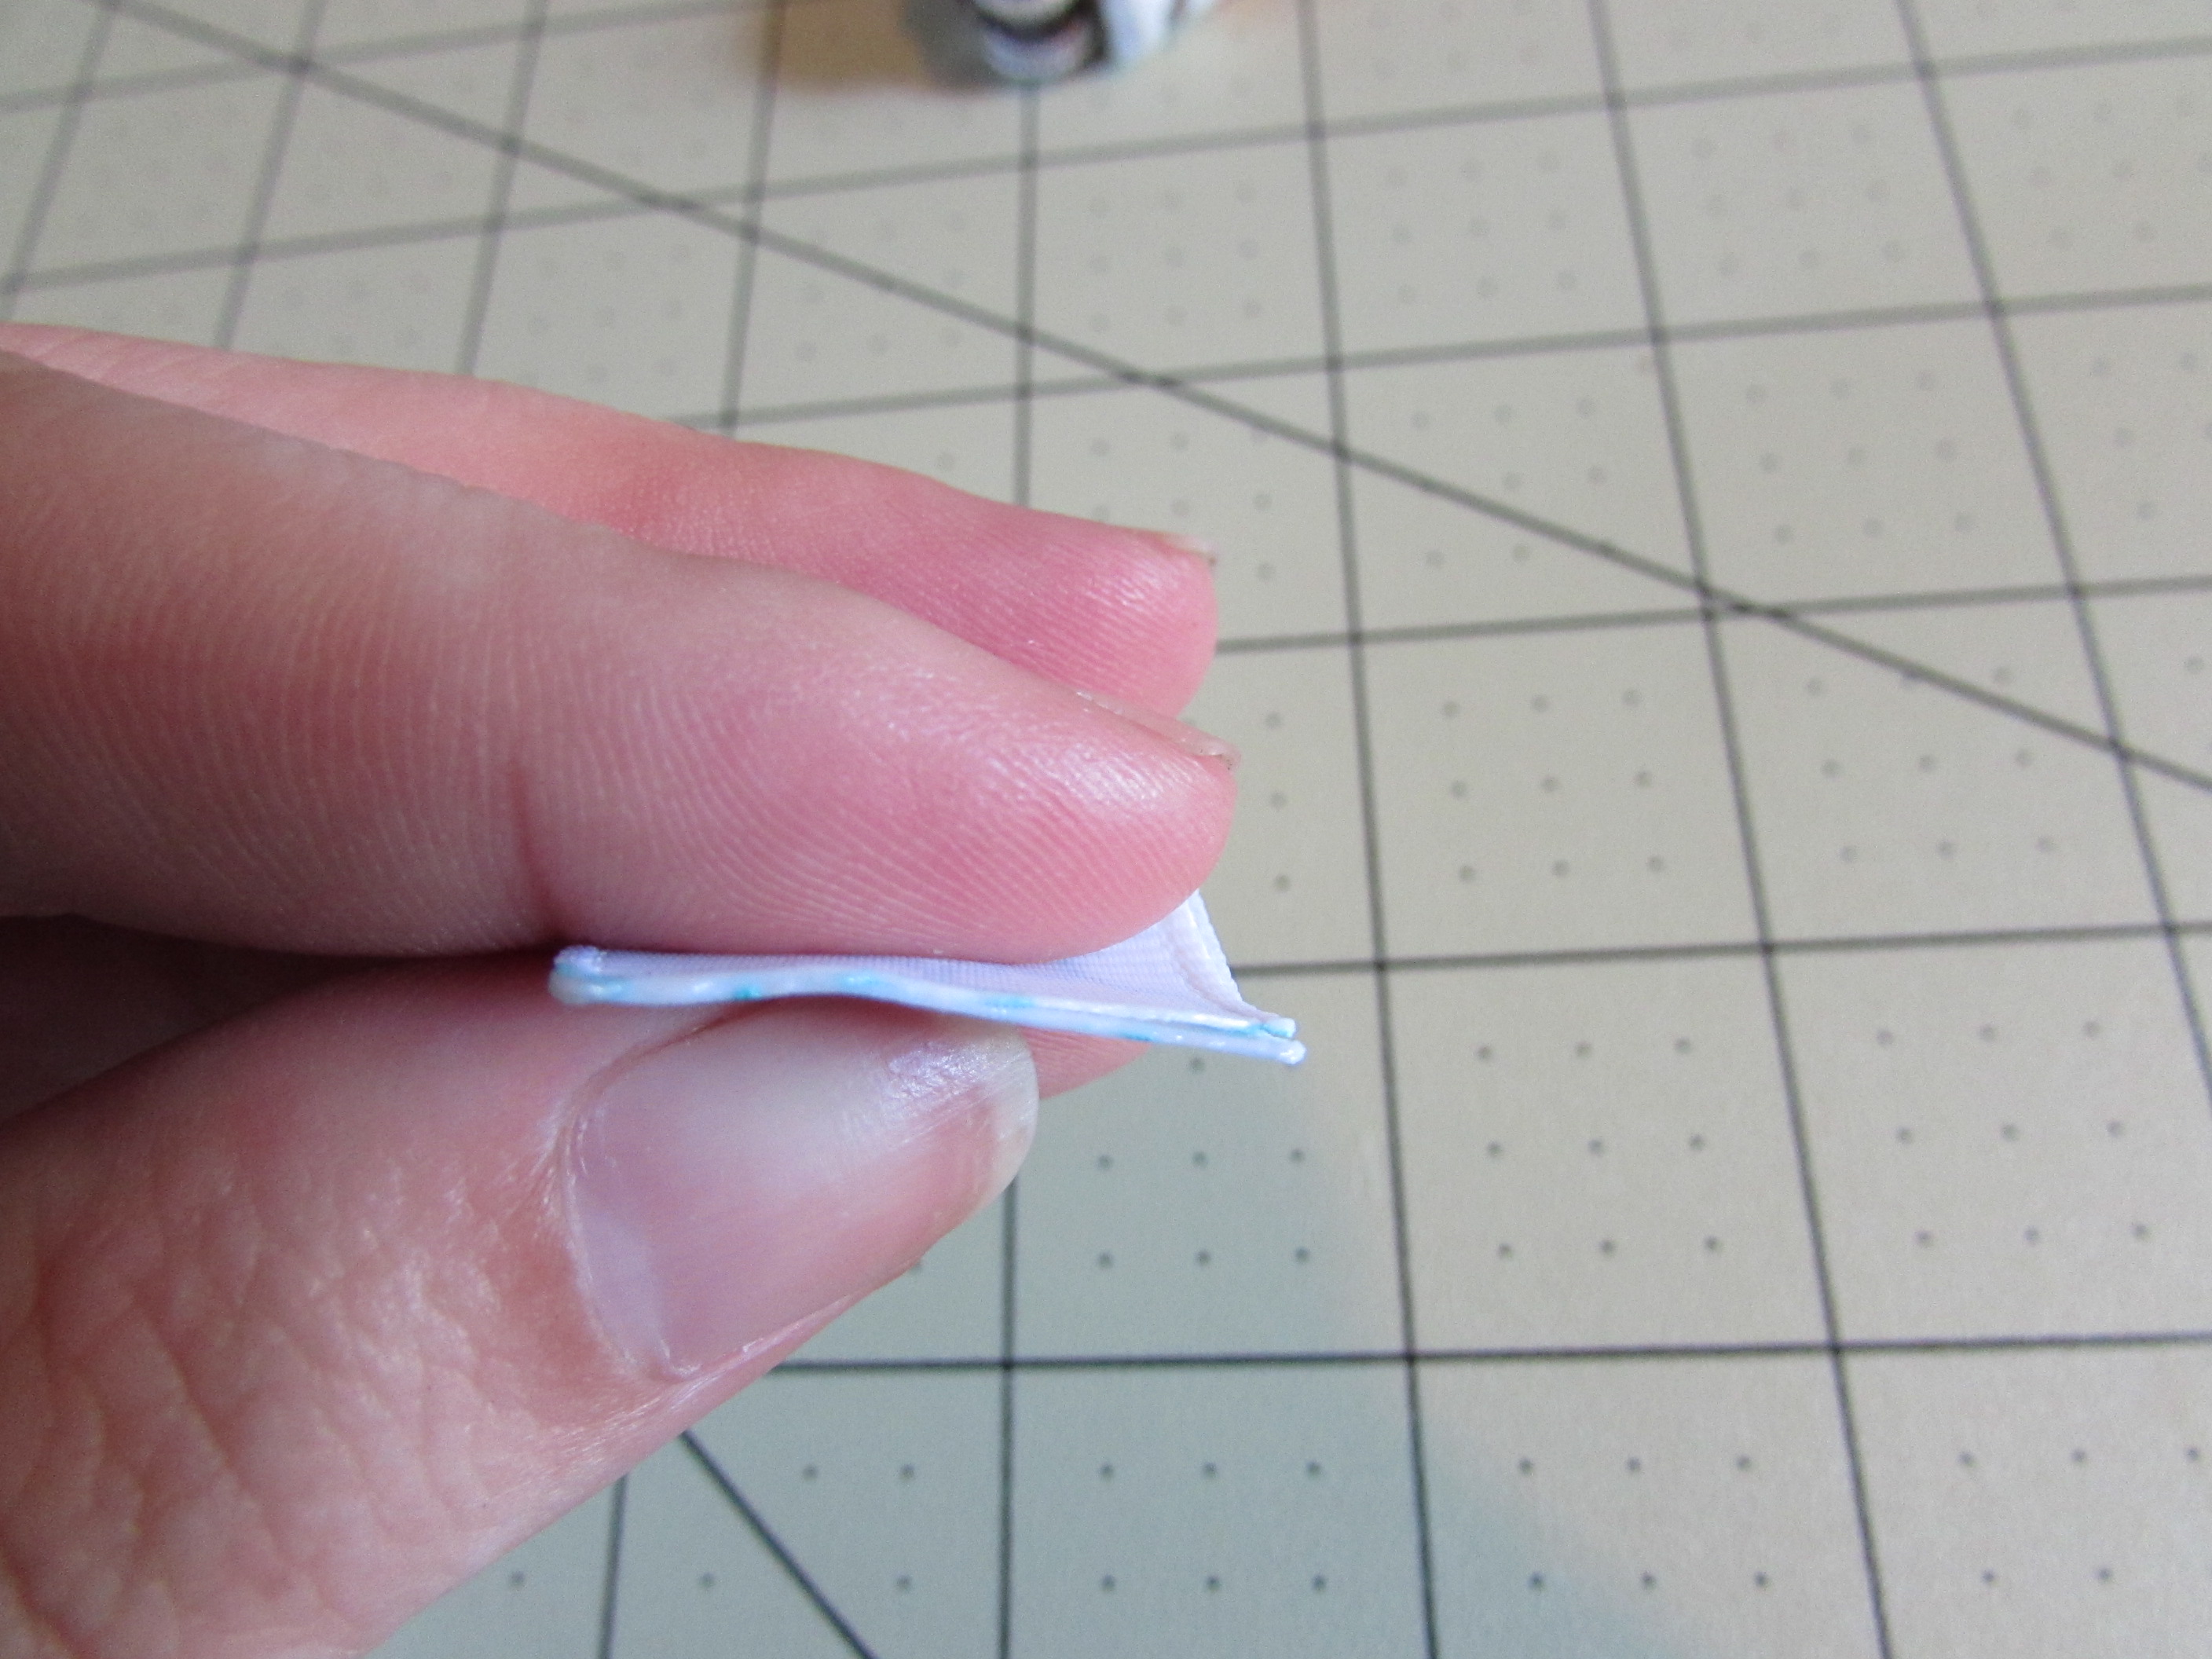 Step 6: Now take and crease the bottom where you heat sealed the ends
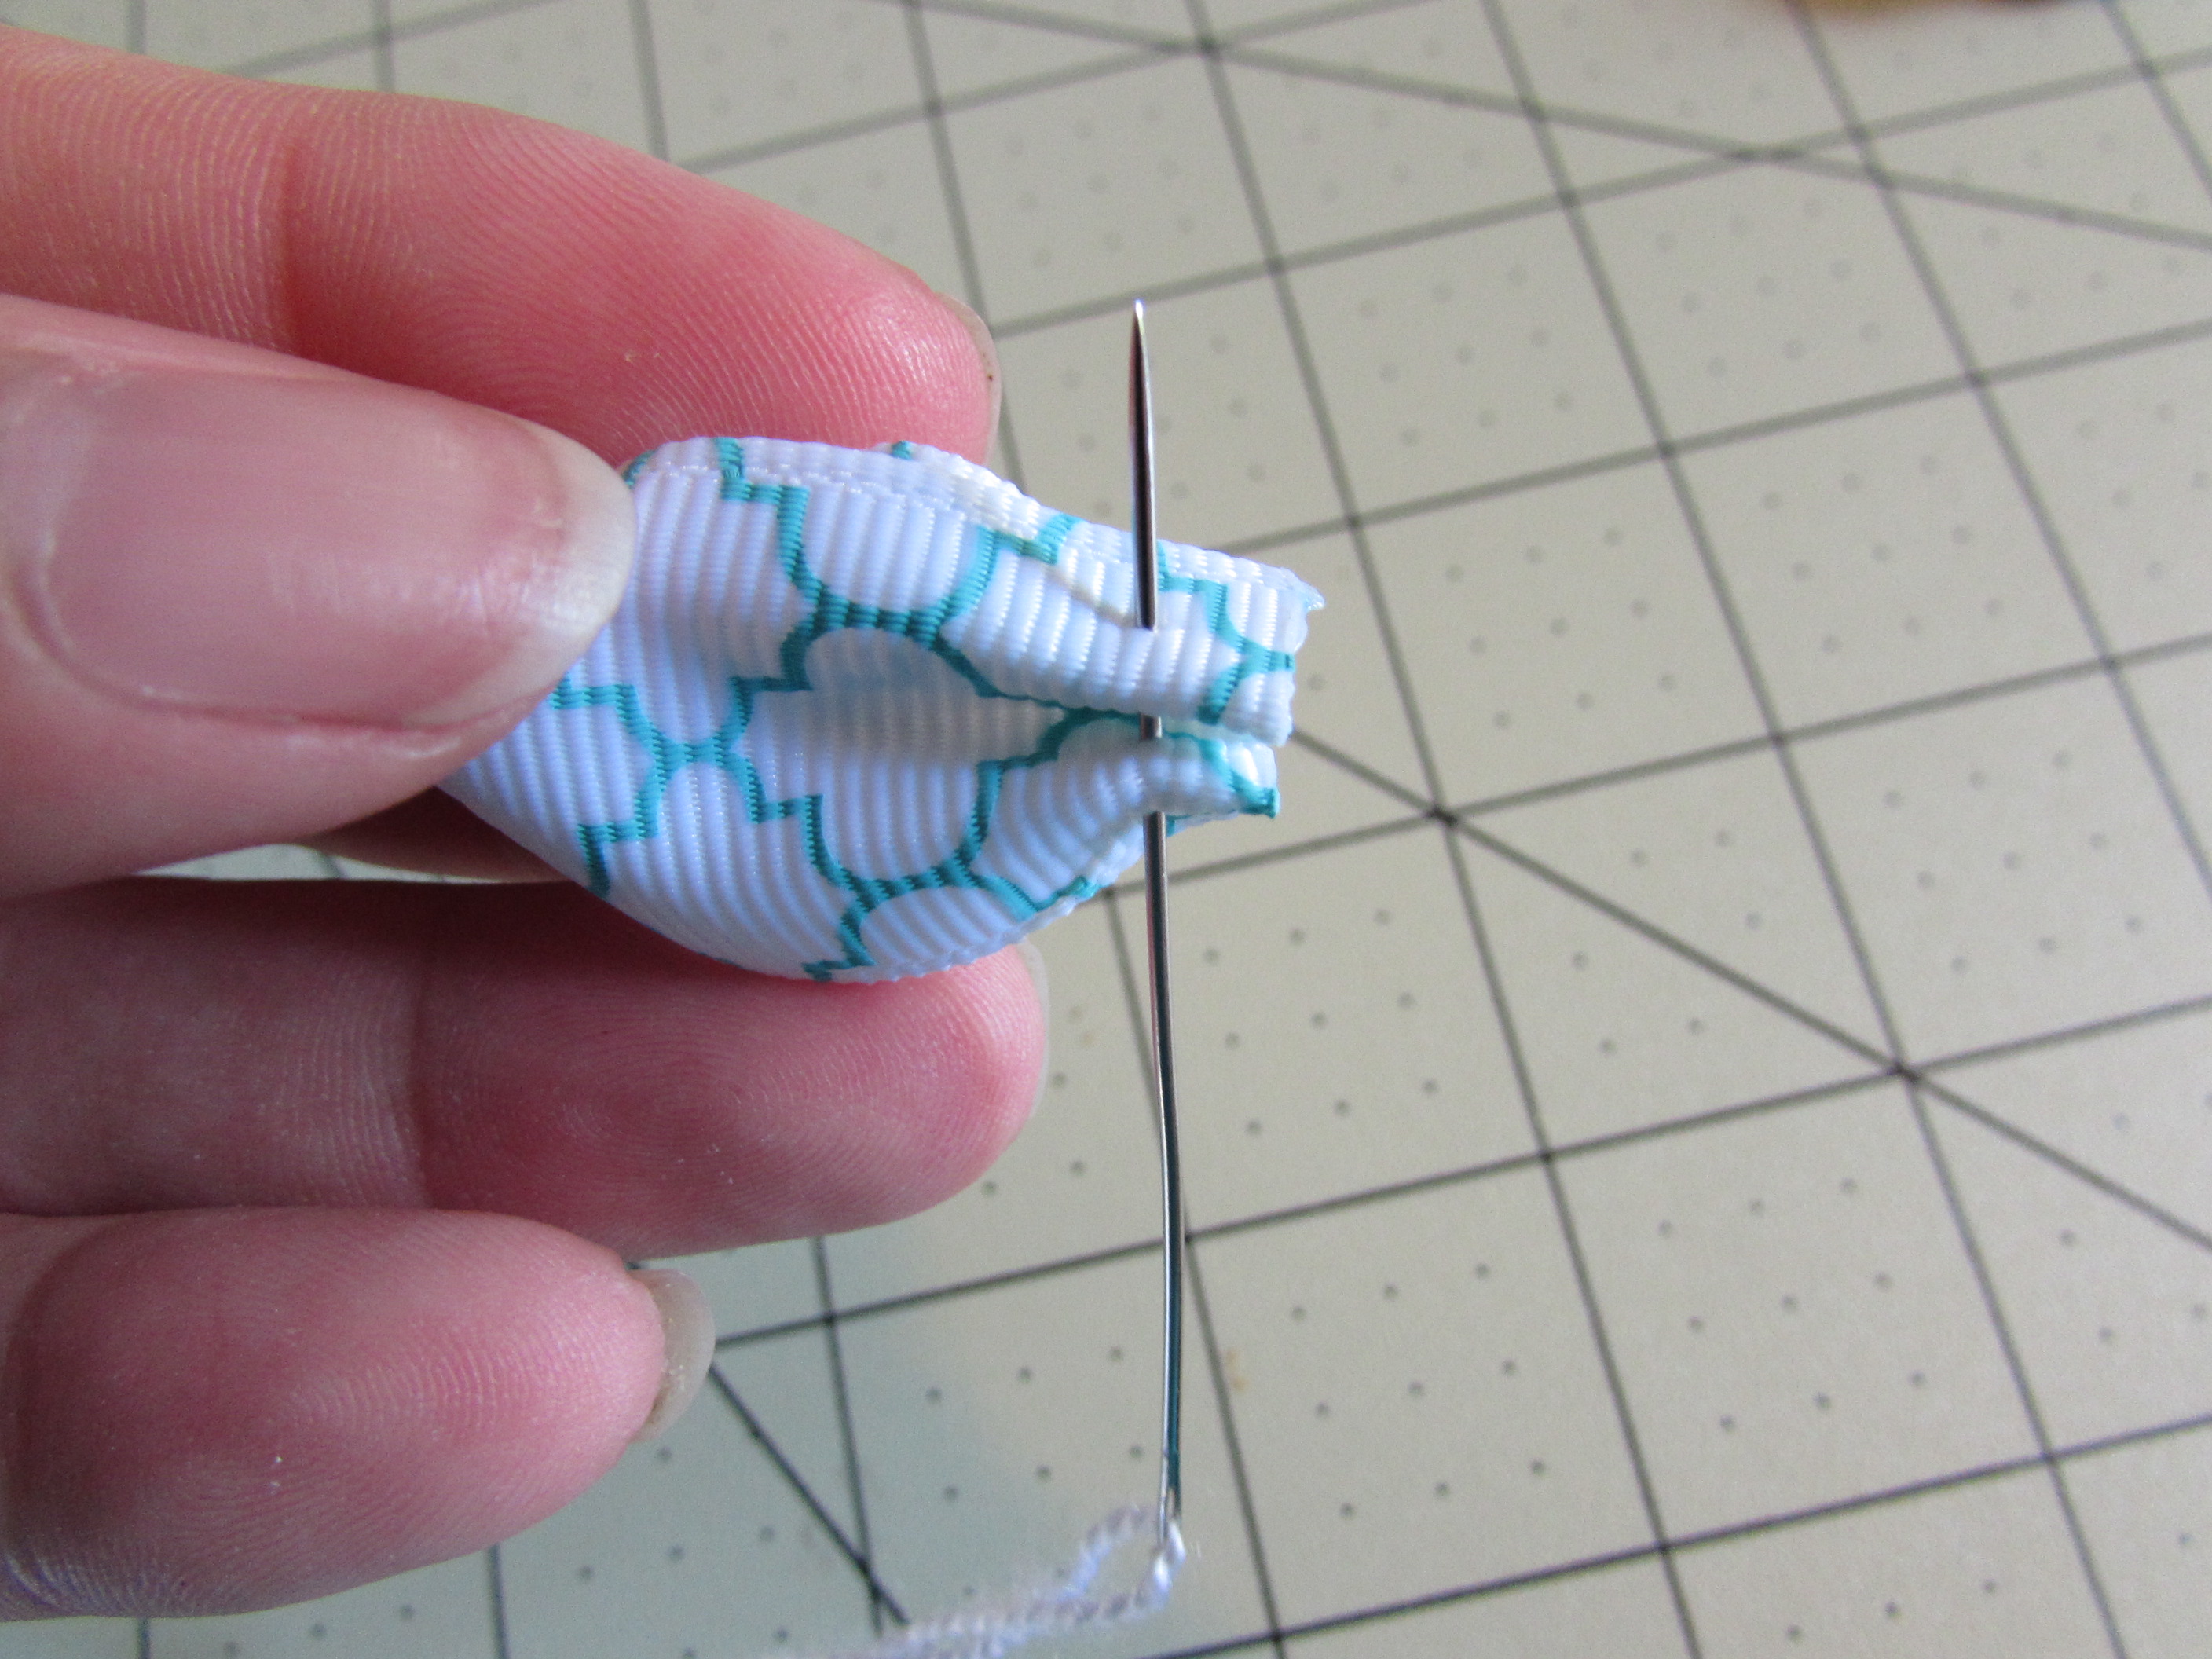
 Step 7: Take your needle and thread {{ be sure you have a knot on the end }} and sew through the crease about 1/4" from the end.
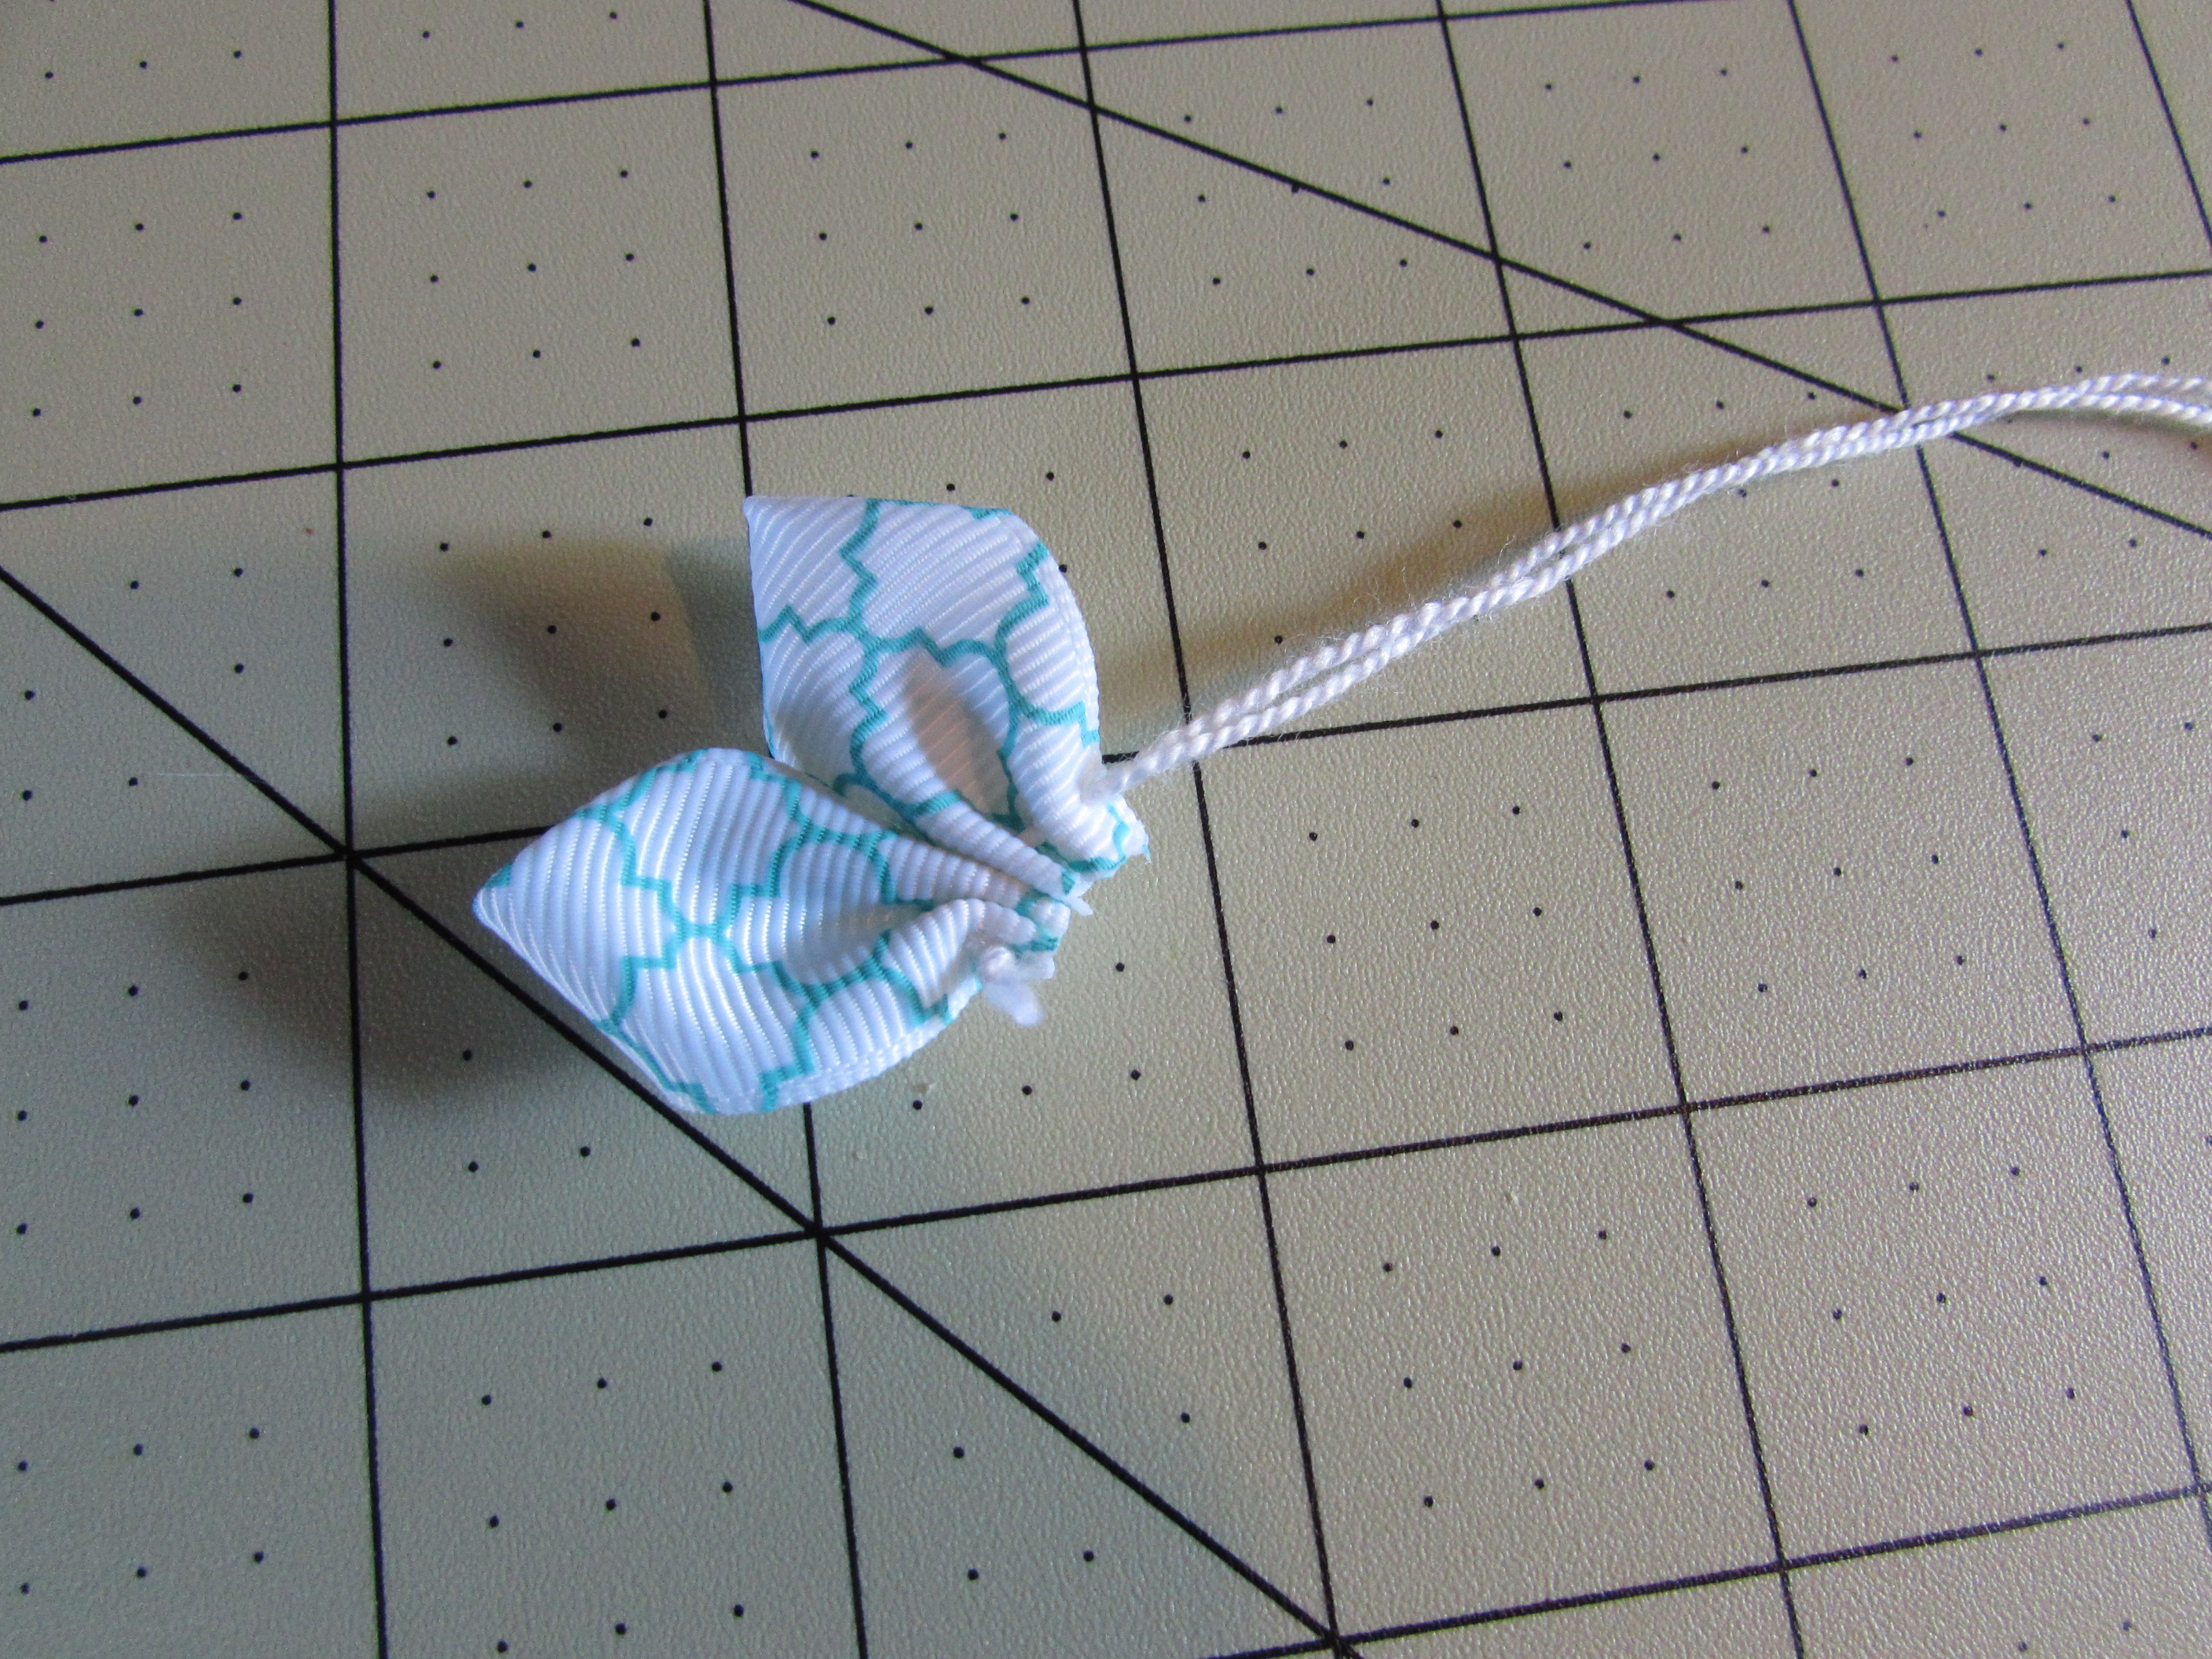
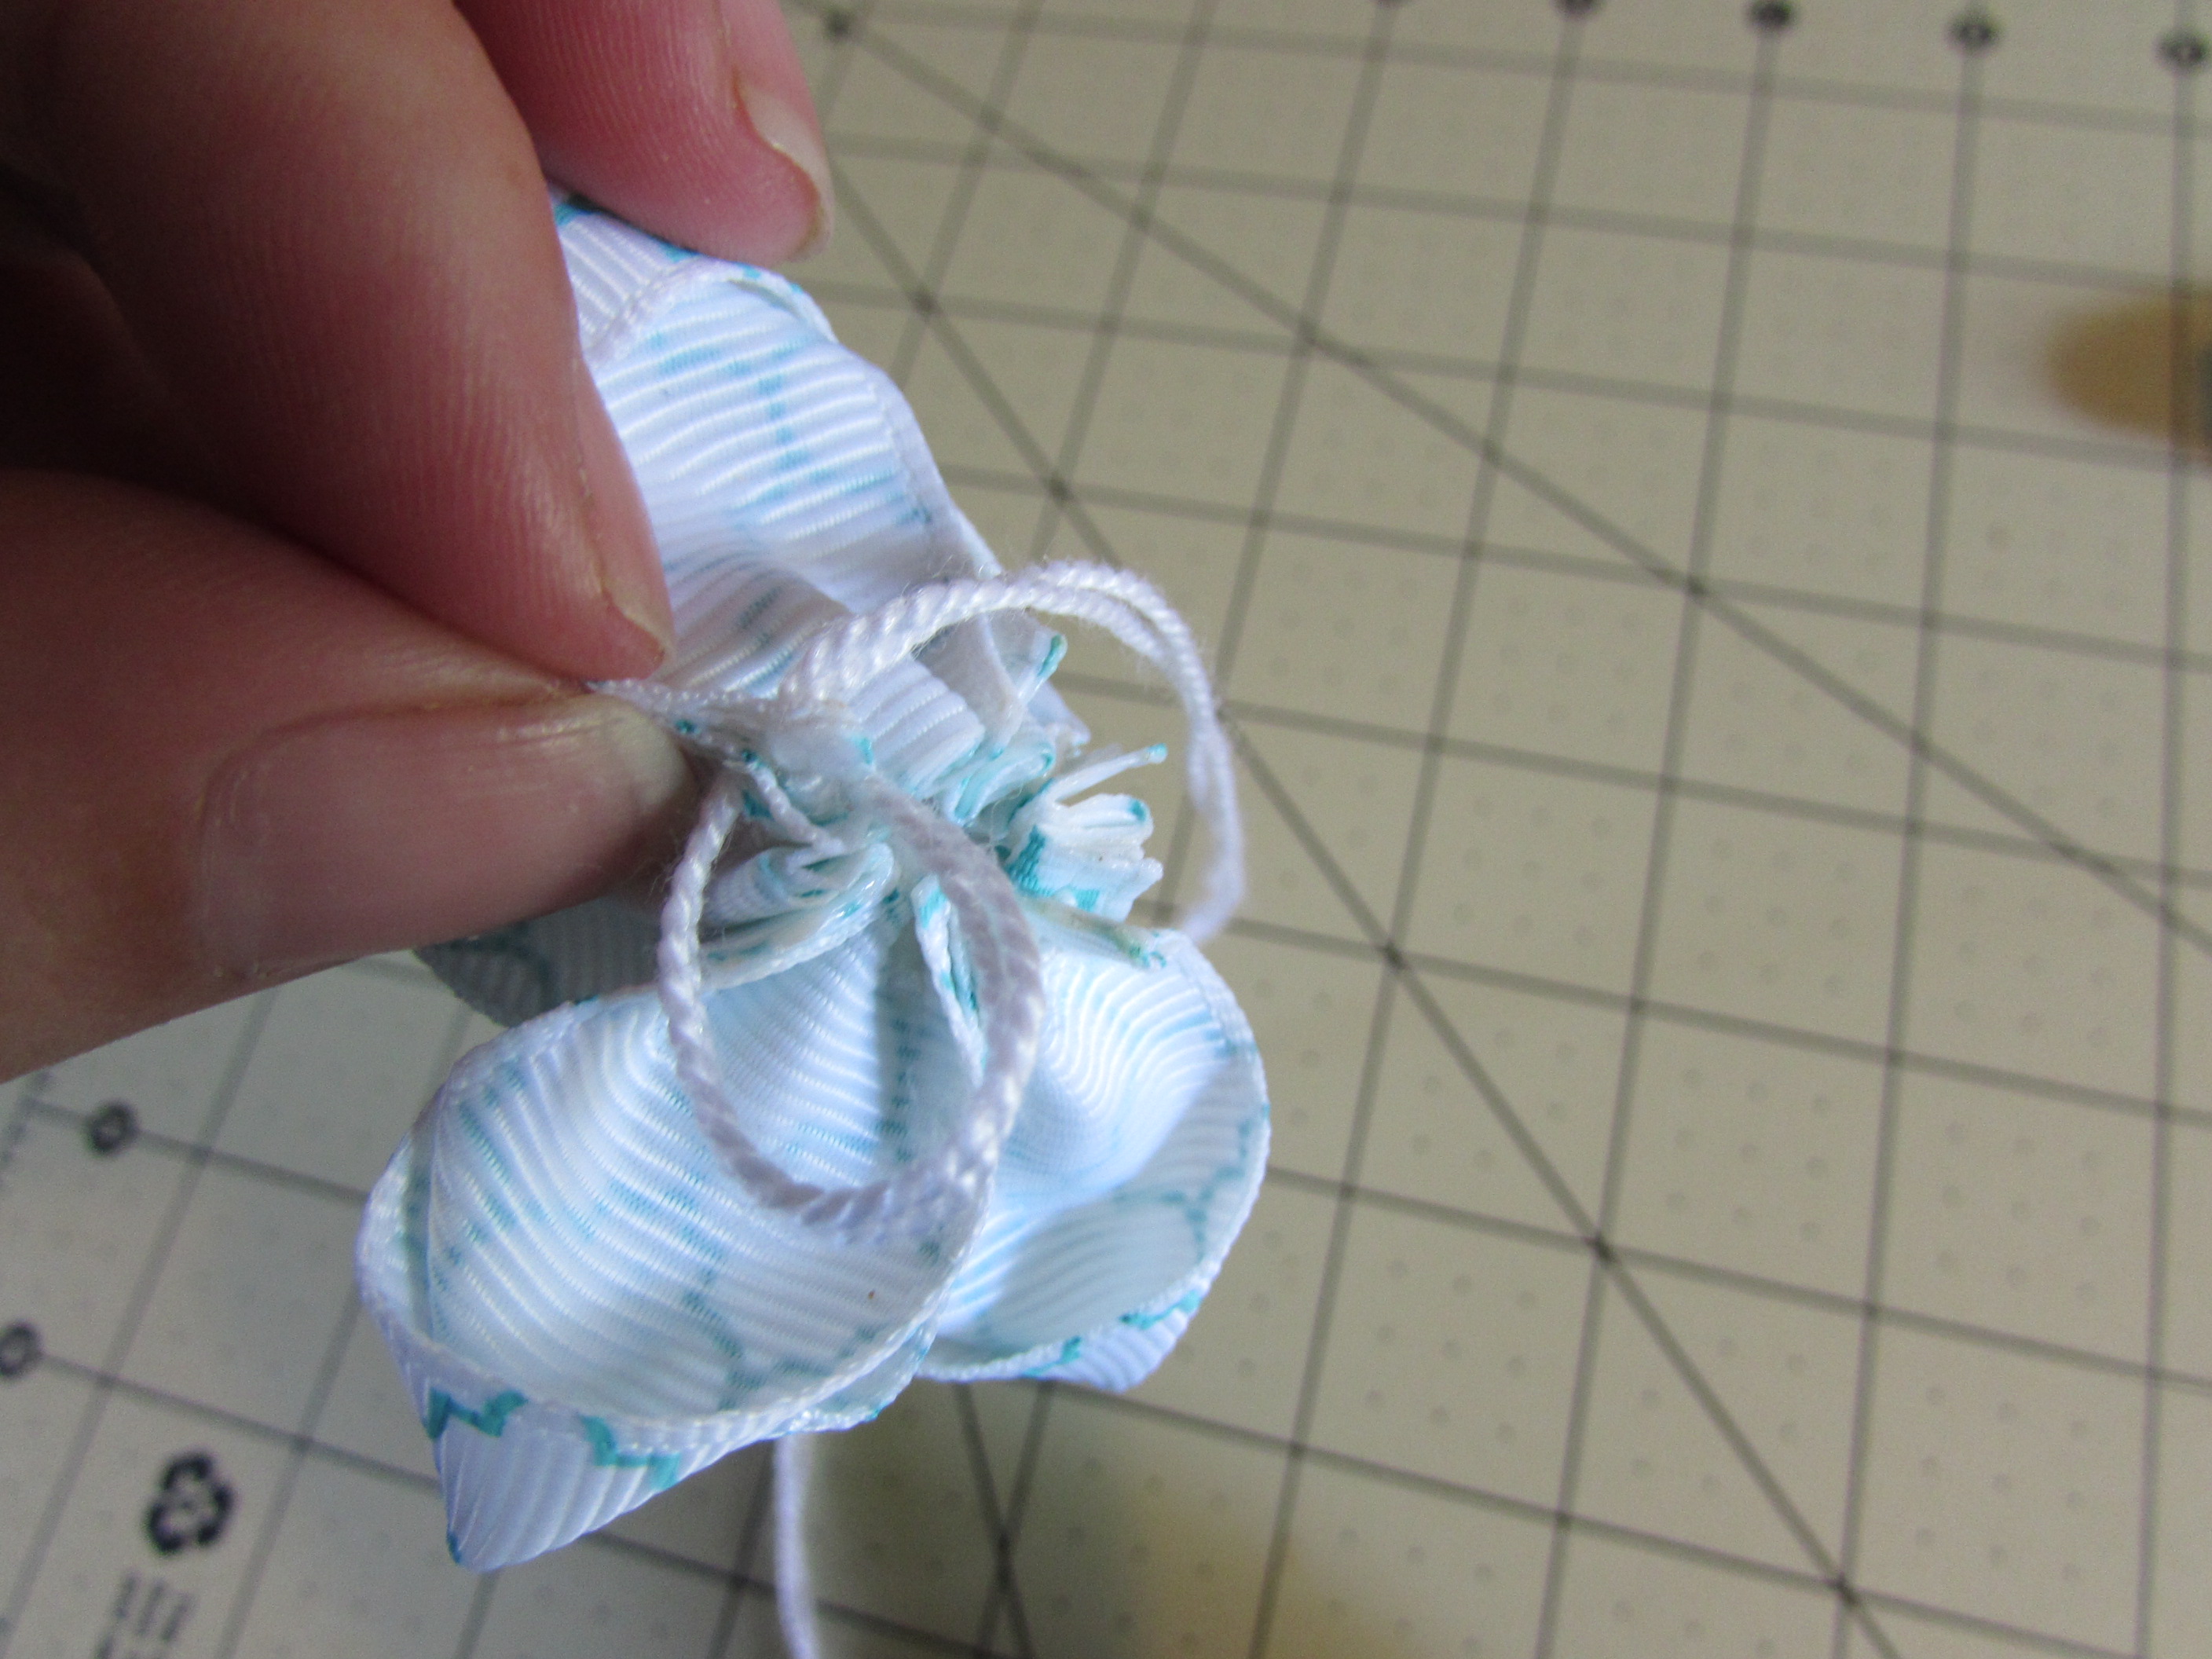
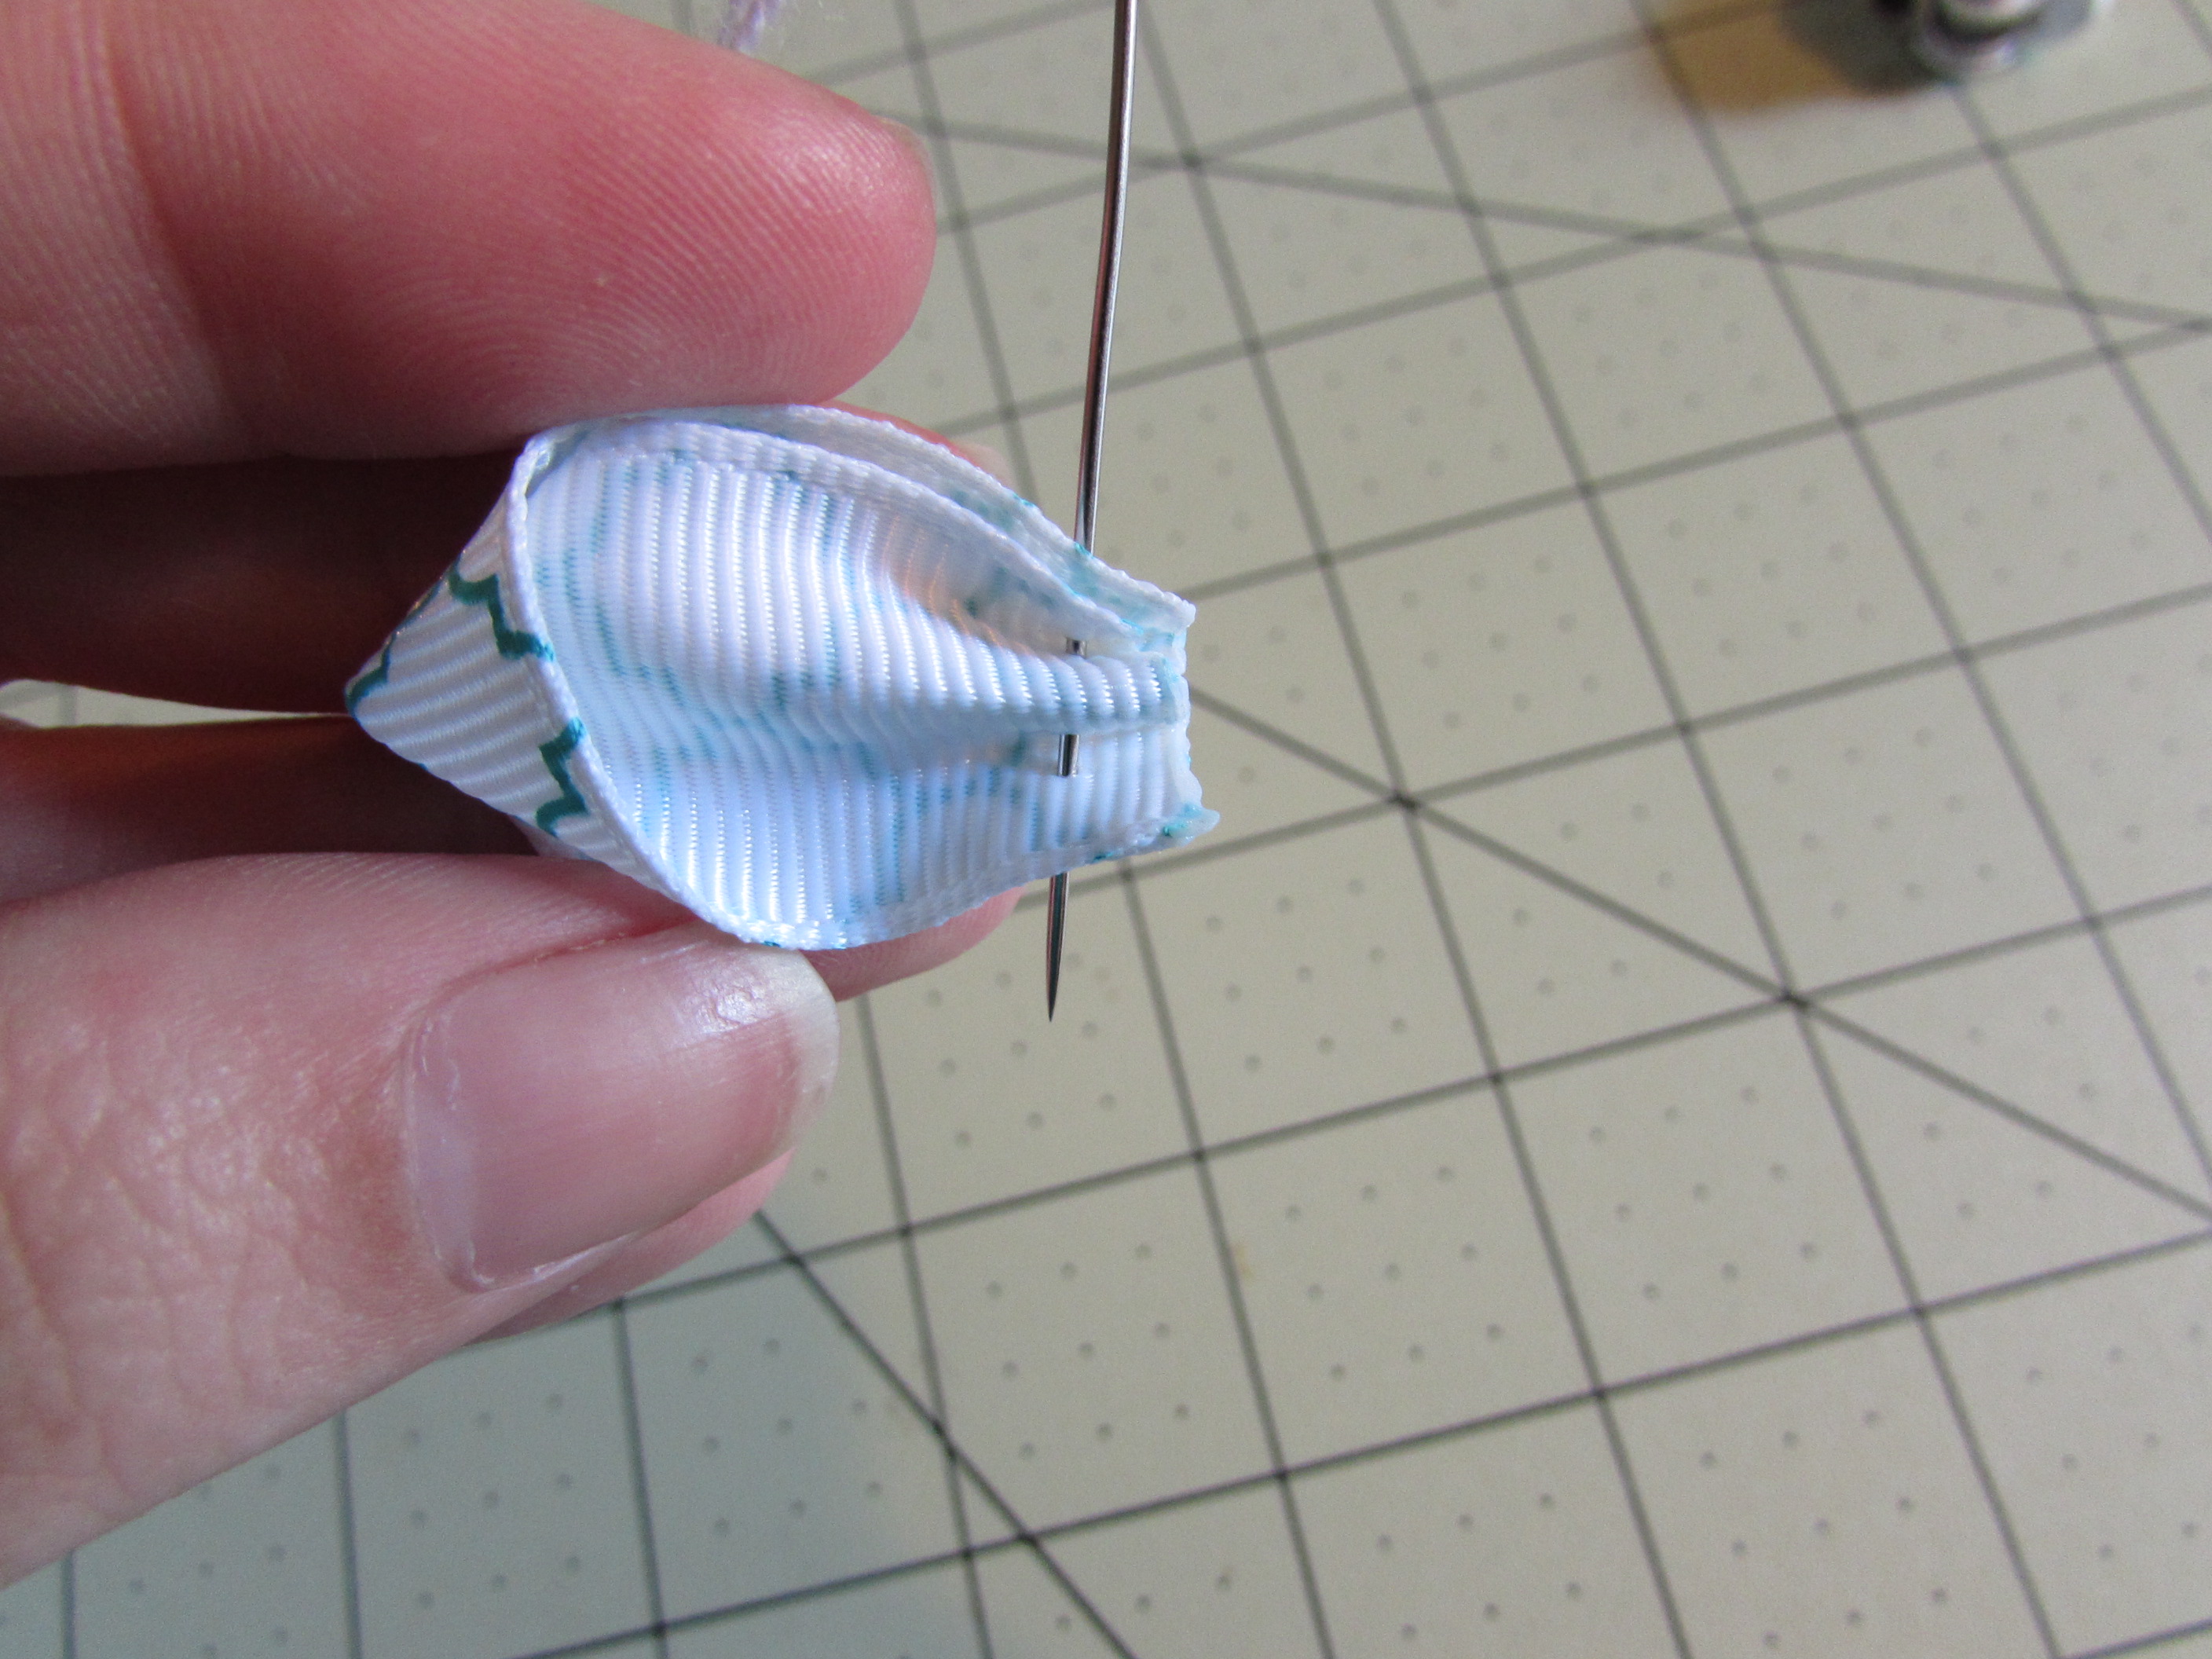 Step 8: Repeat those steps for all remaining pieces
- at this time you can go ahead and pull the petals down your thread to the knot
Step 8: Repeat those steps for all remaining pieces
- at this time you can go ahead and pull the petals down your thread to the knot
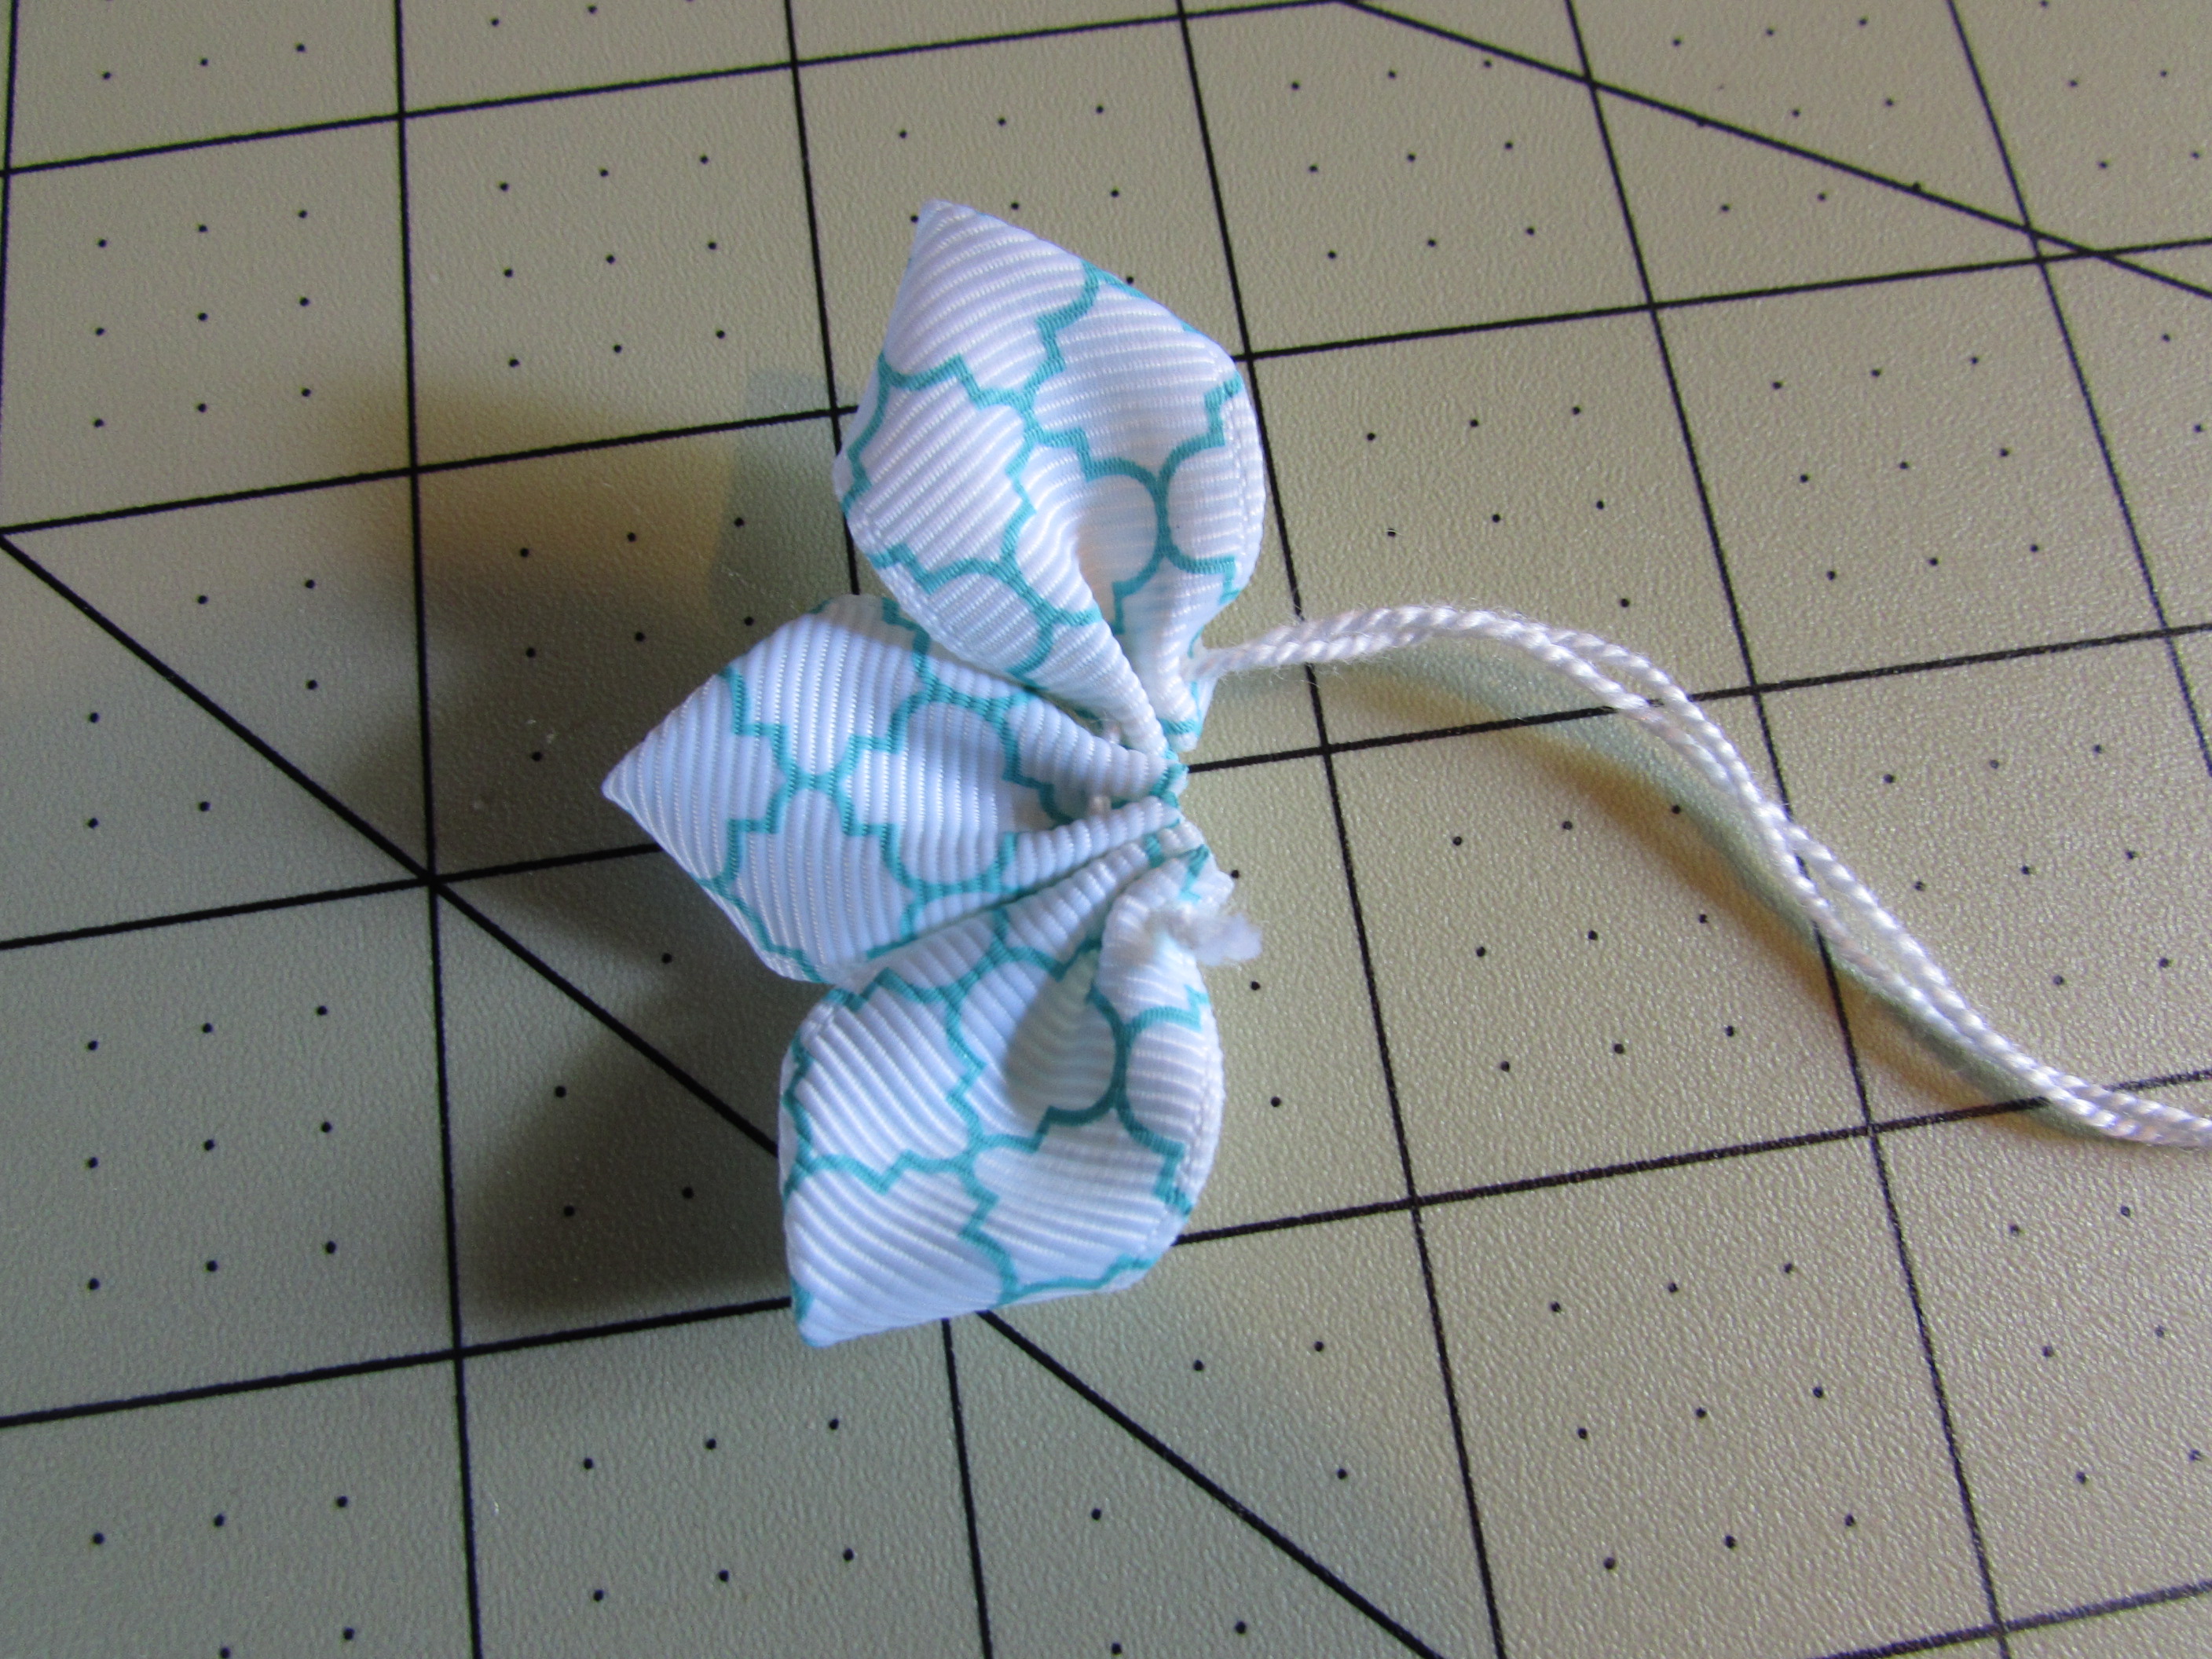
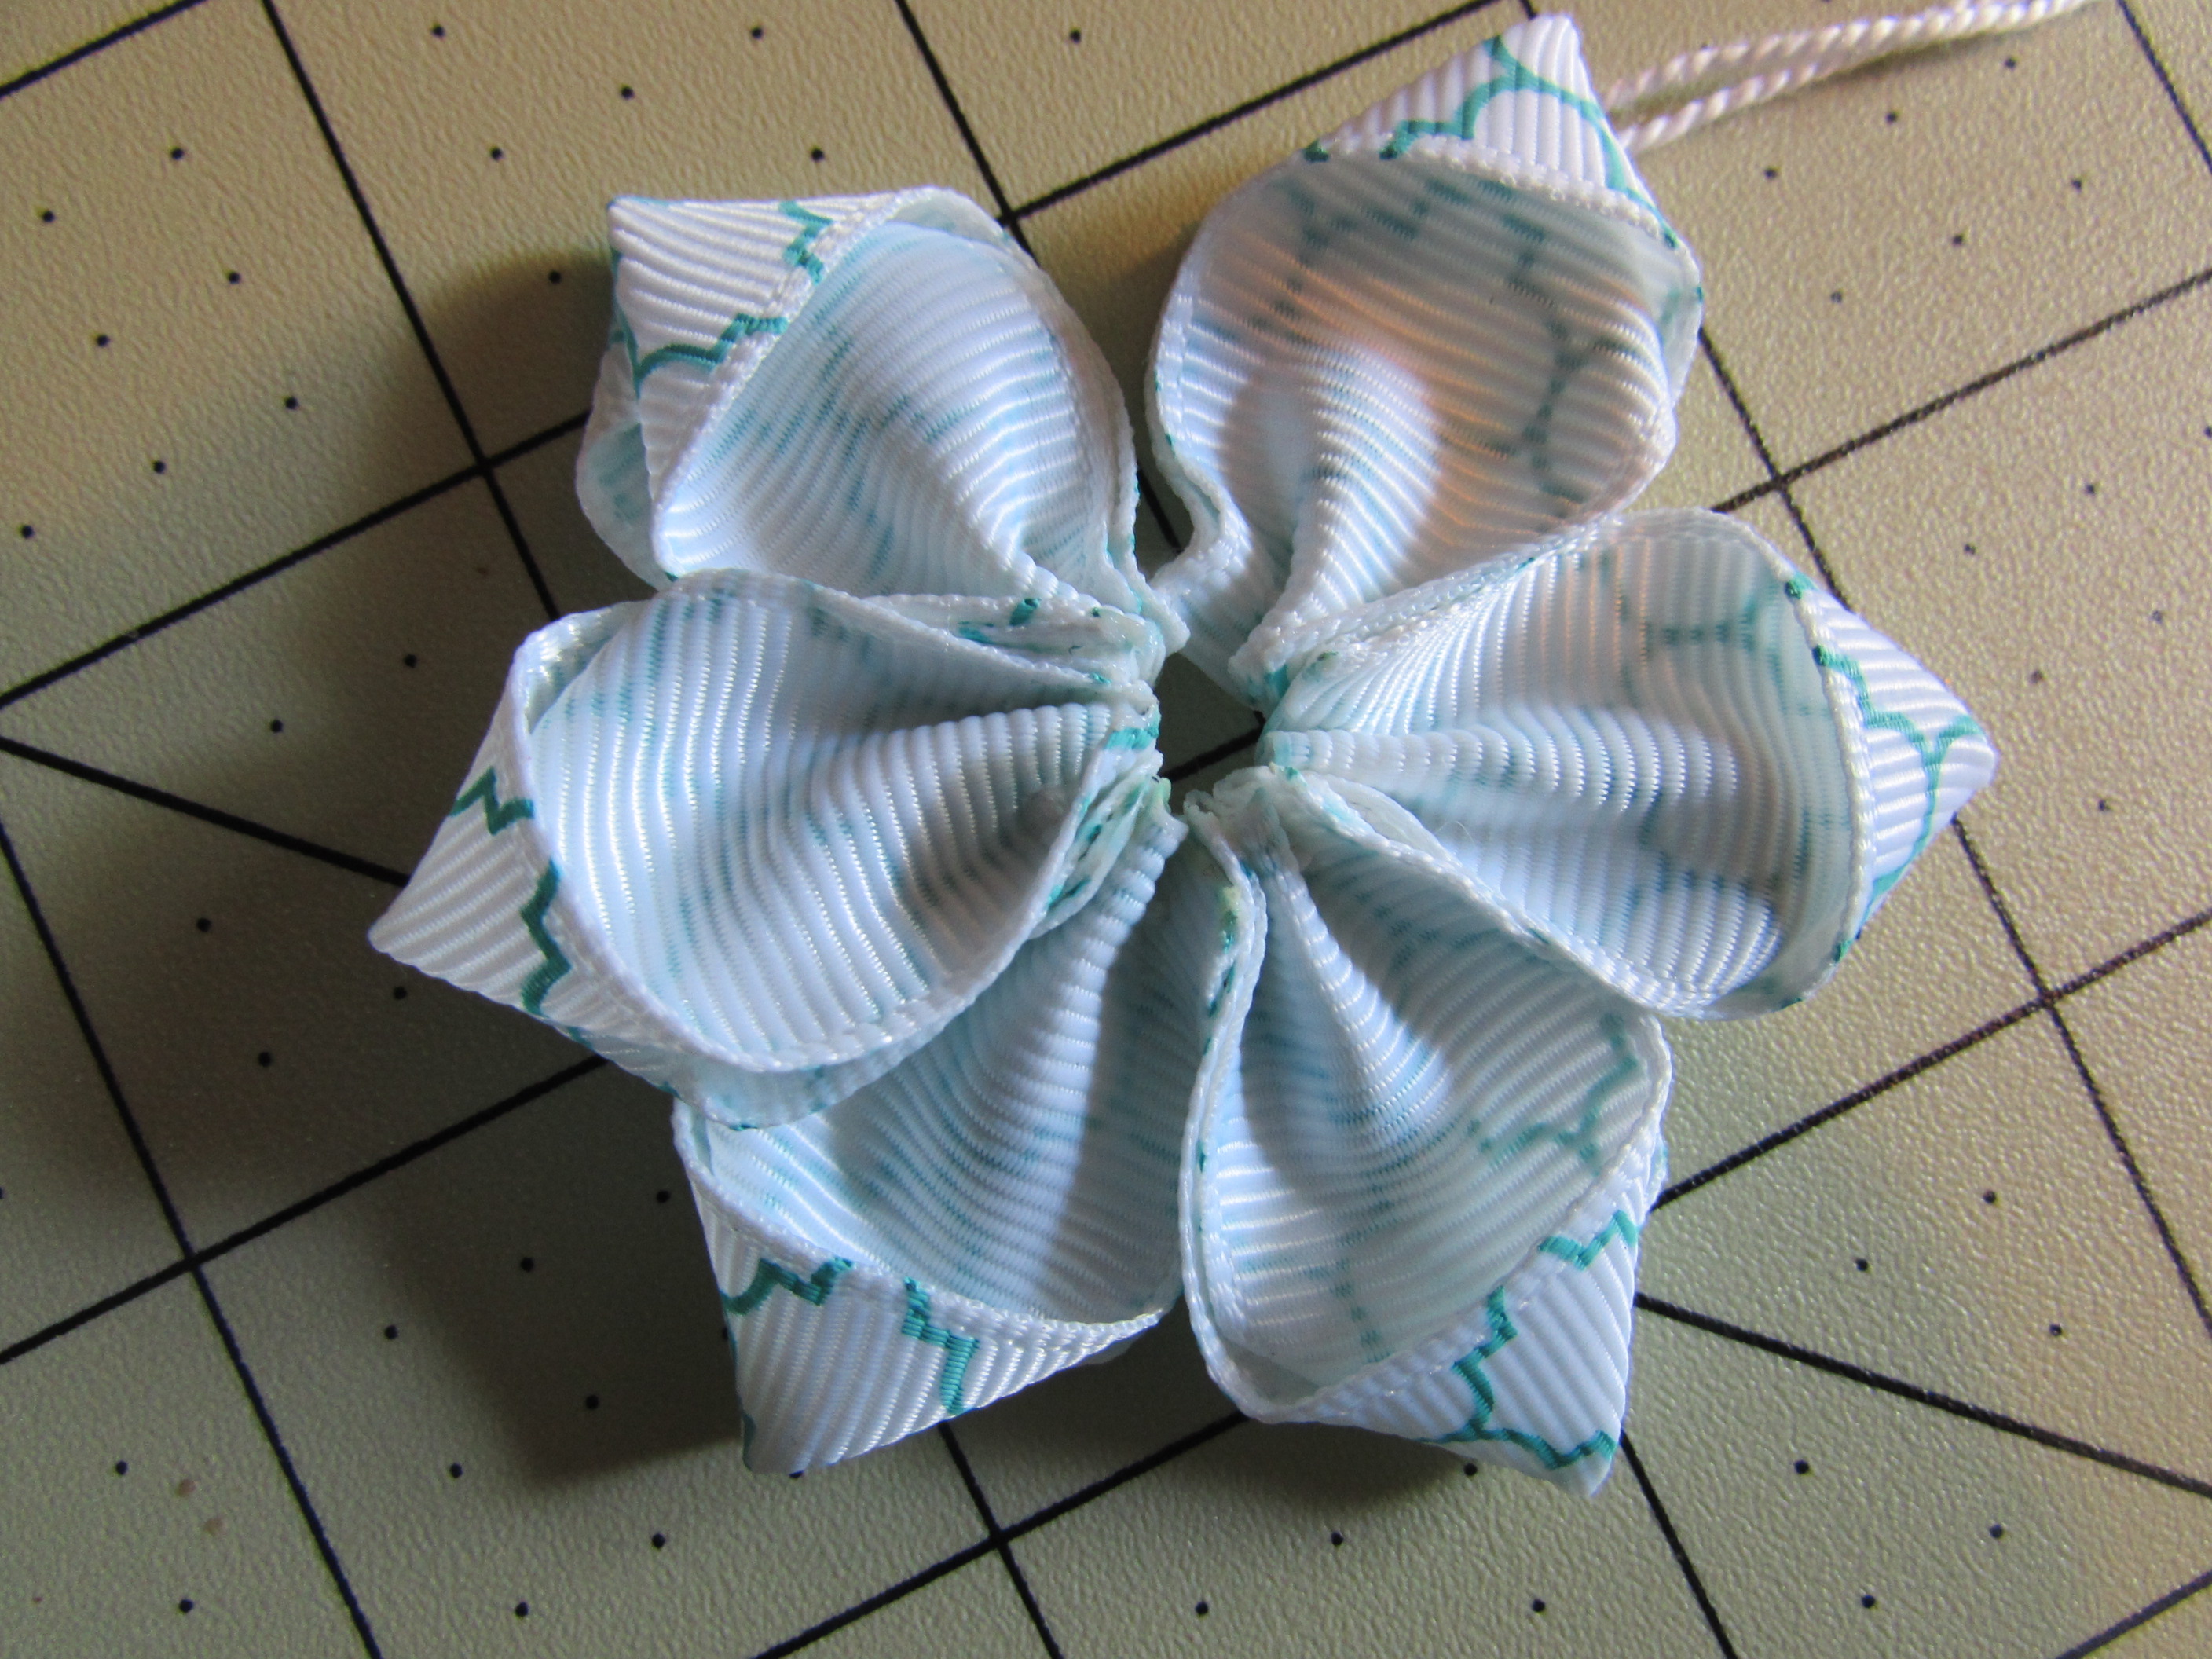
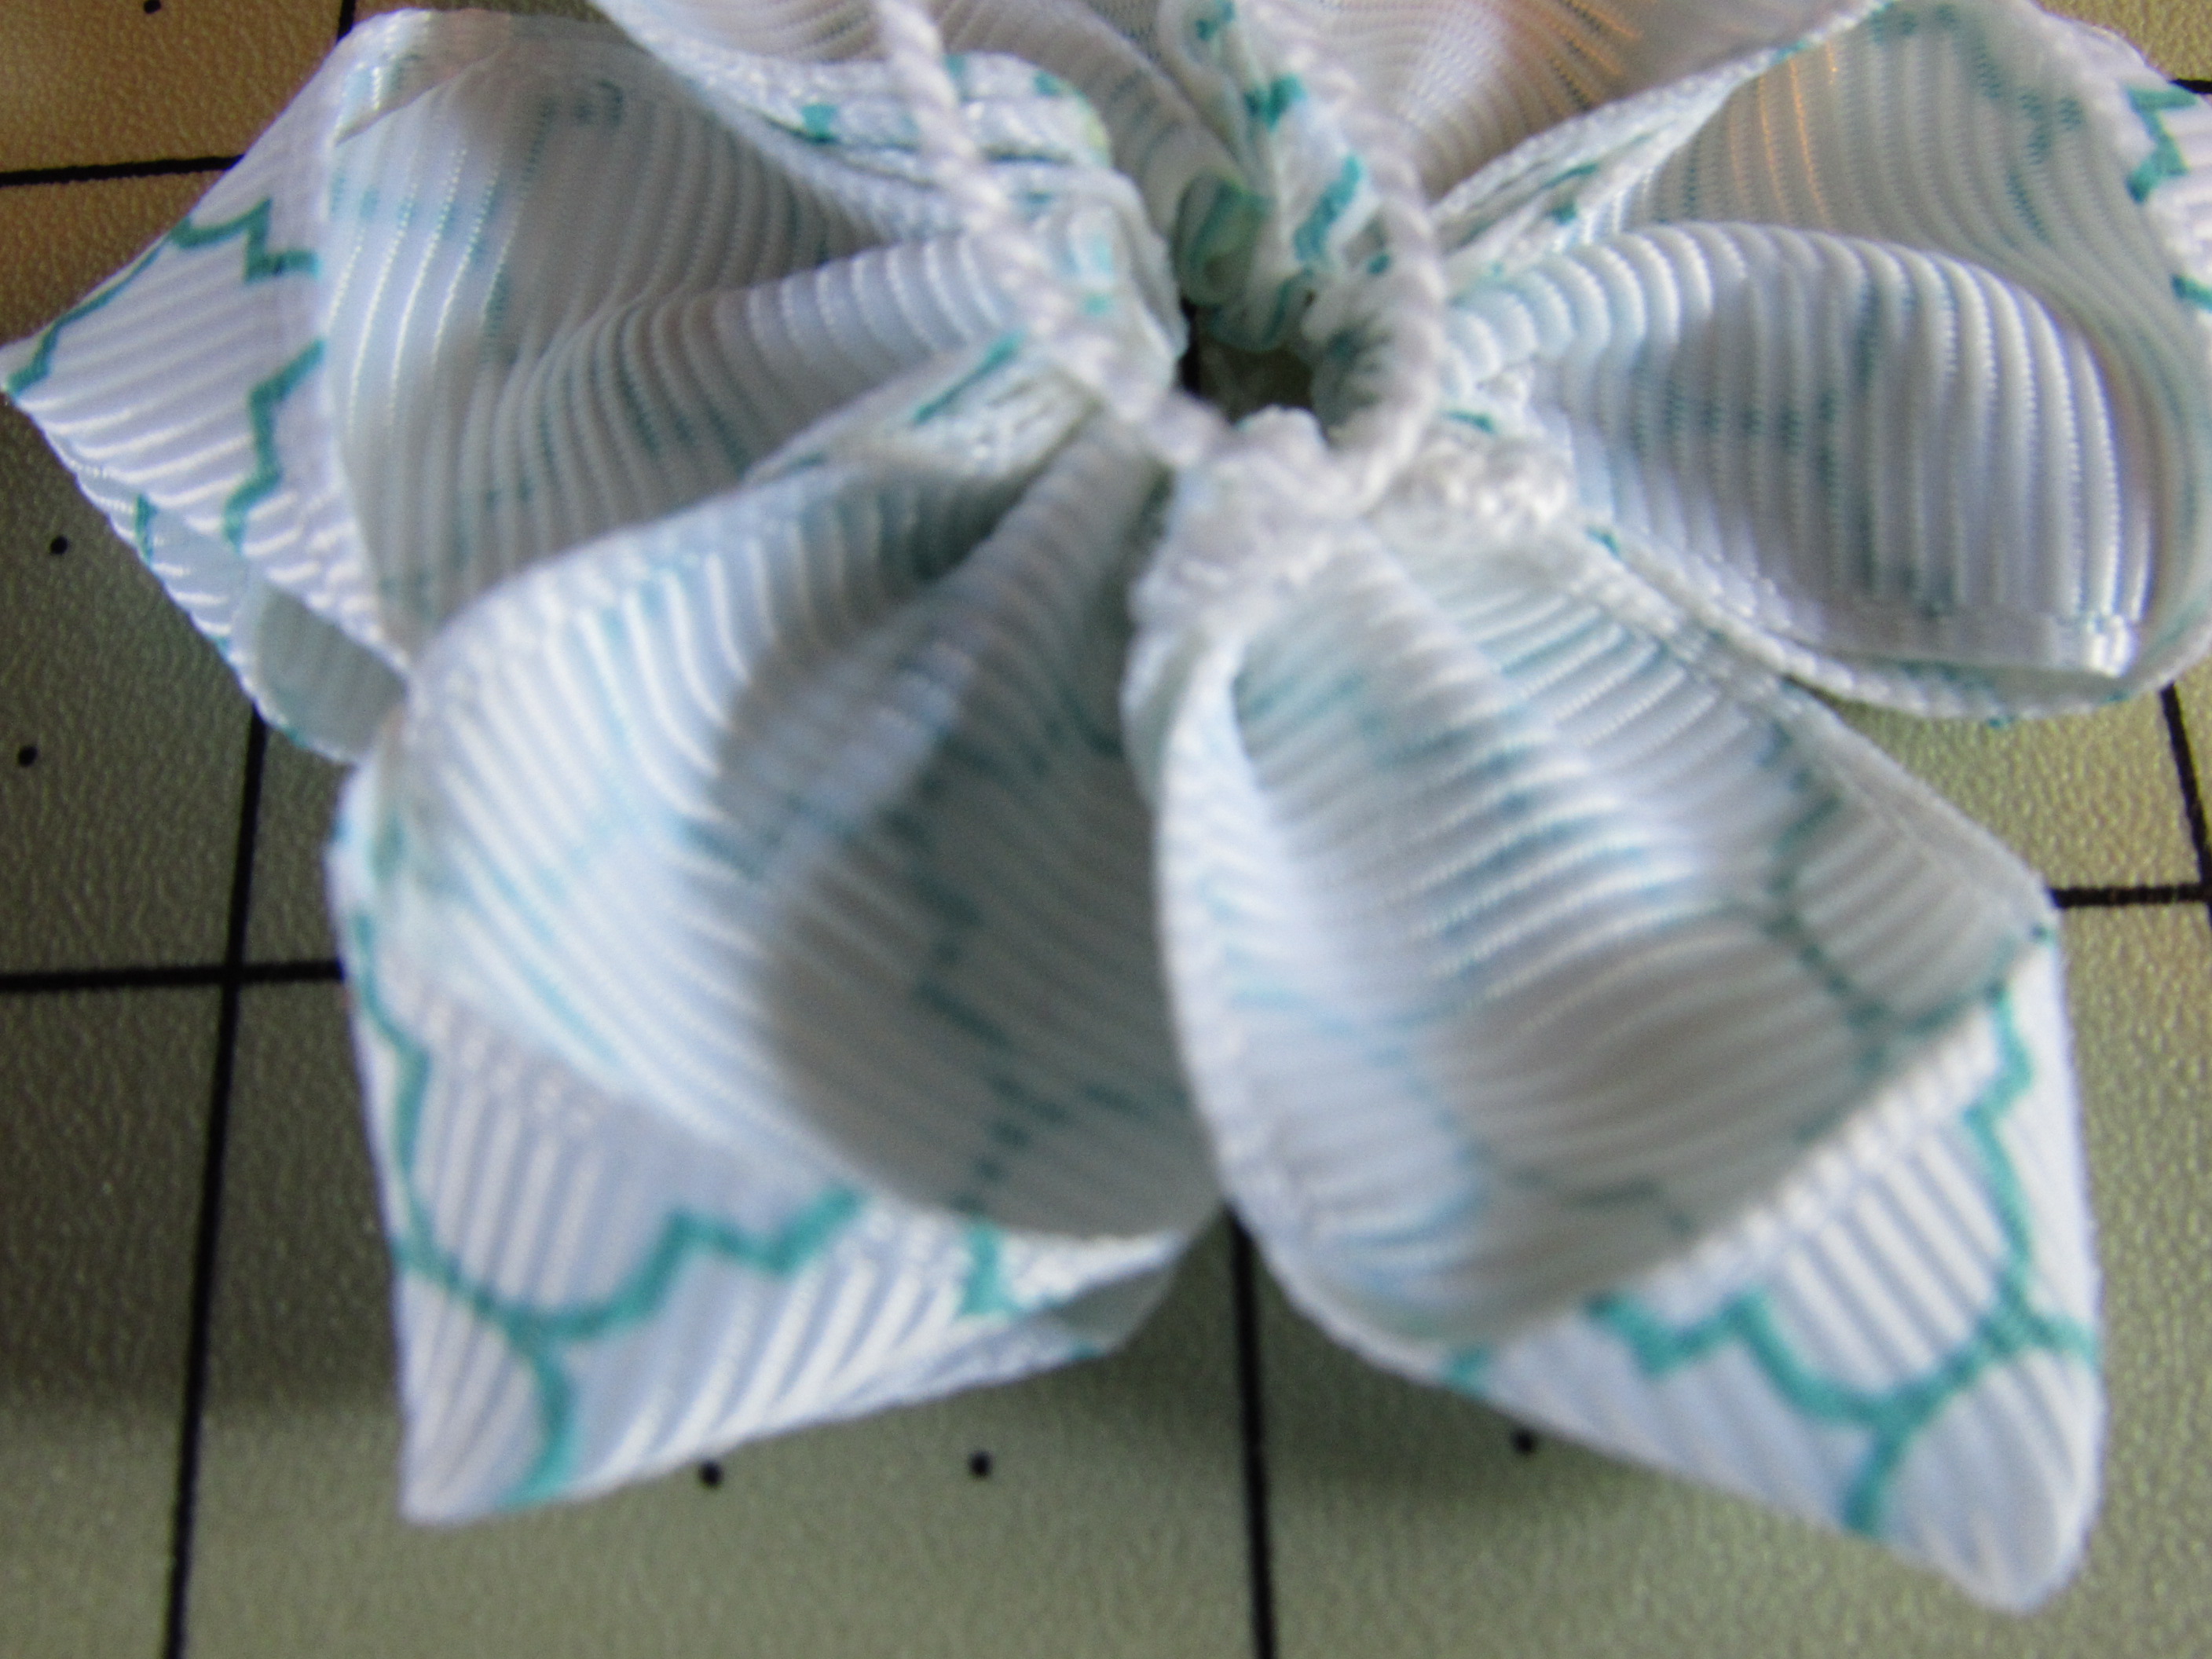
 Step 9: Now you have all have the petals sewn and ready to finish it
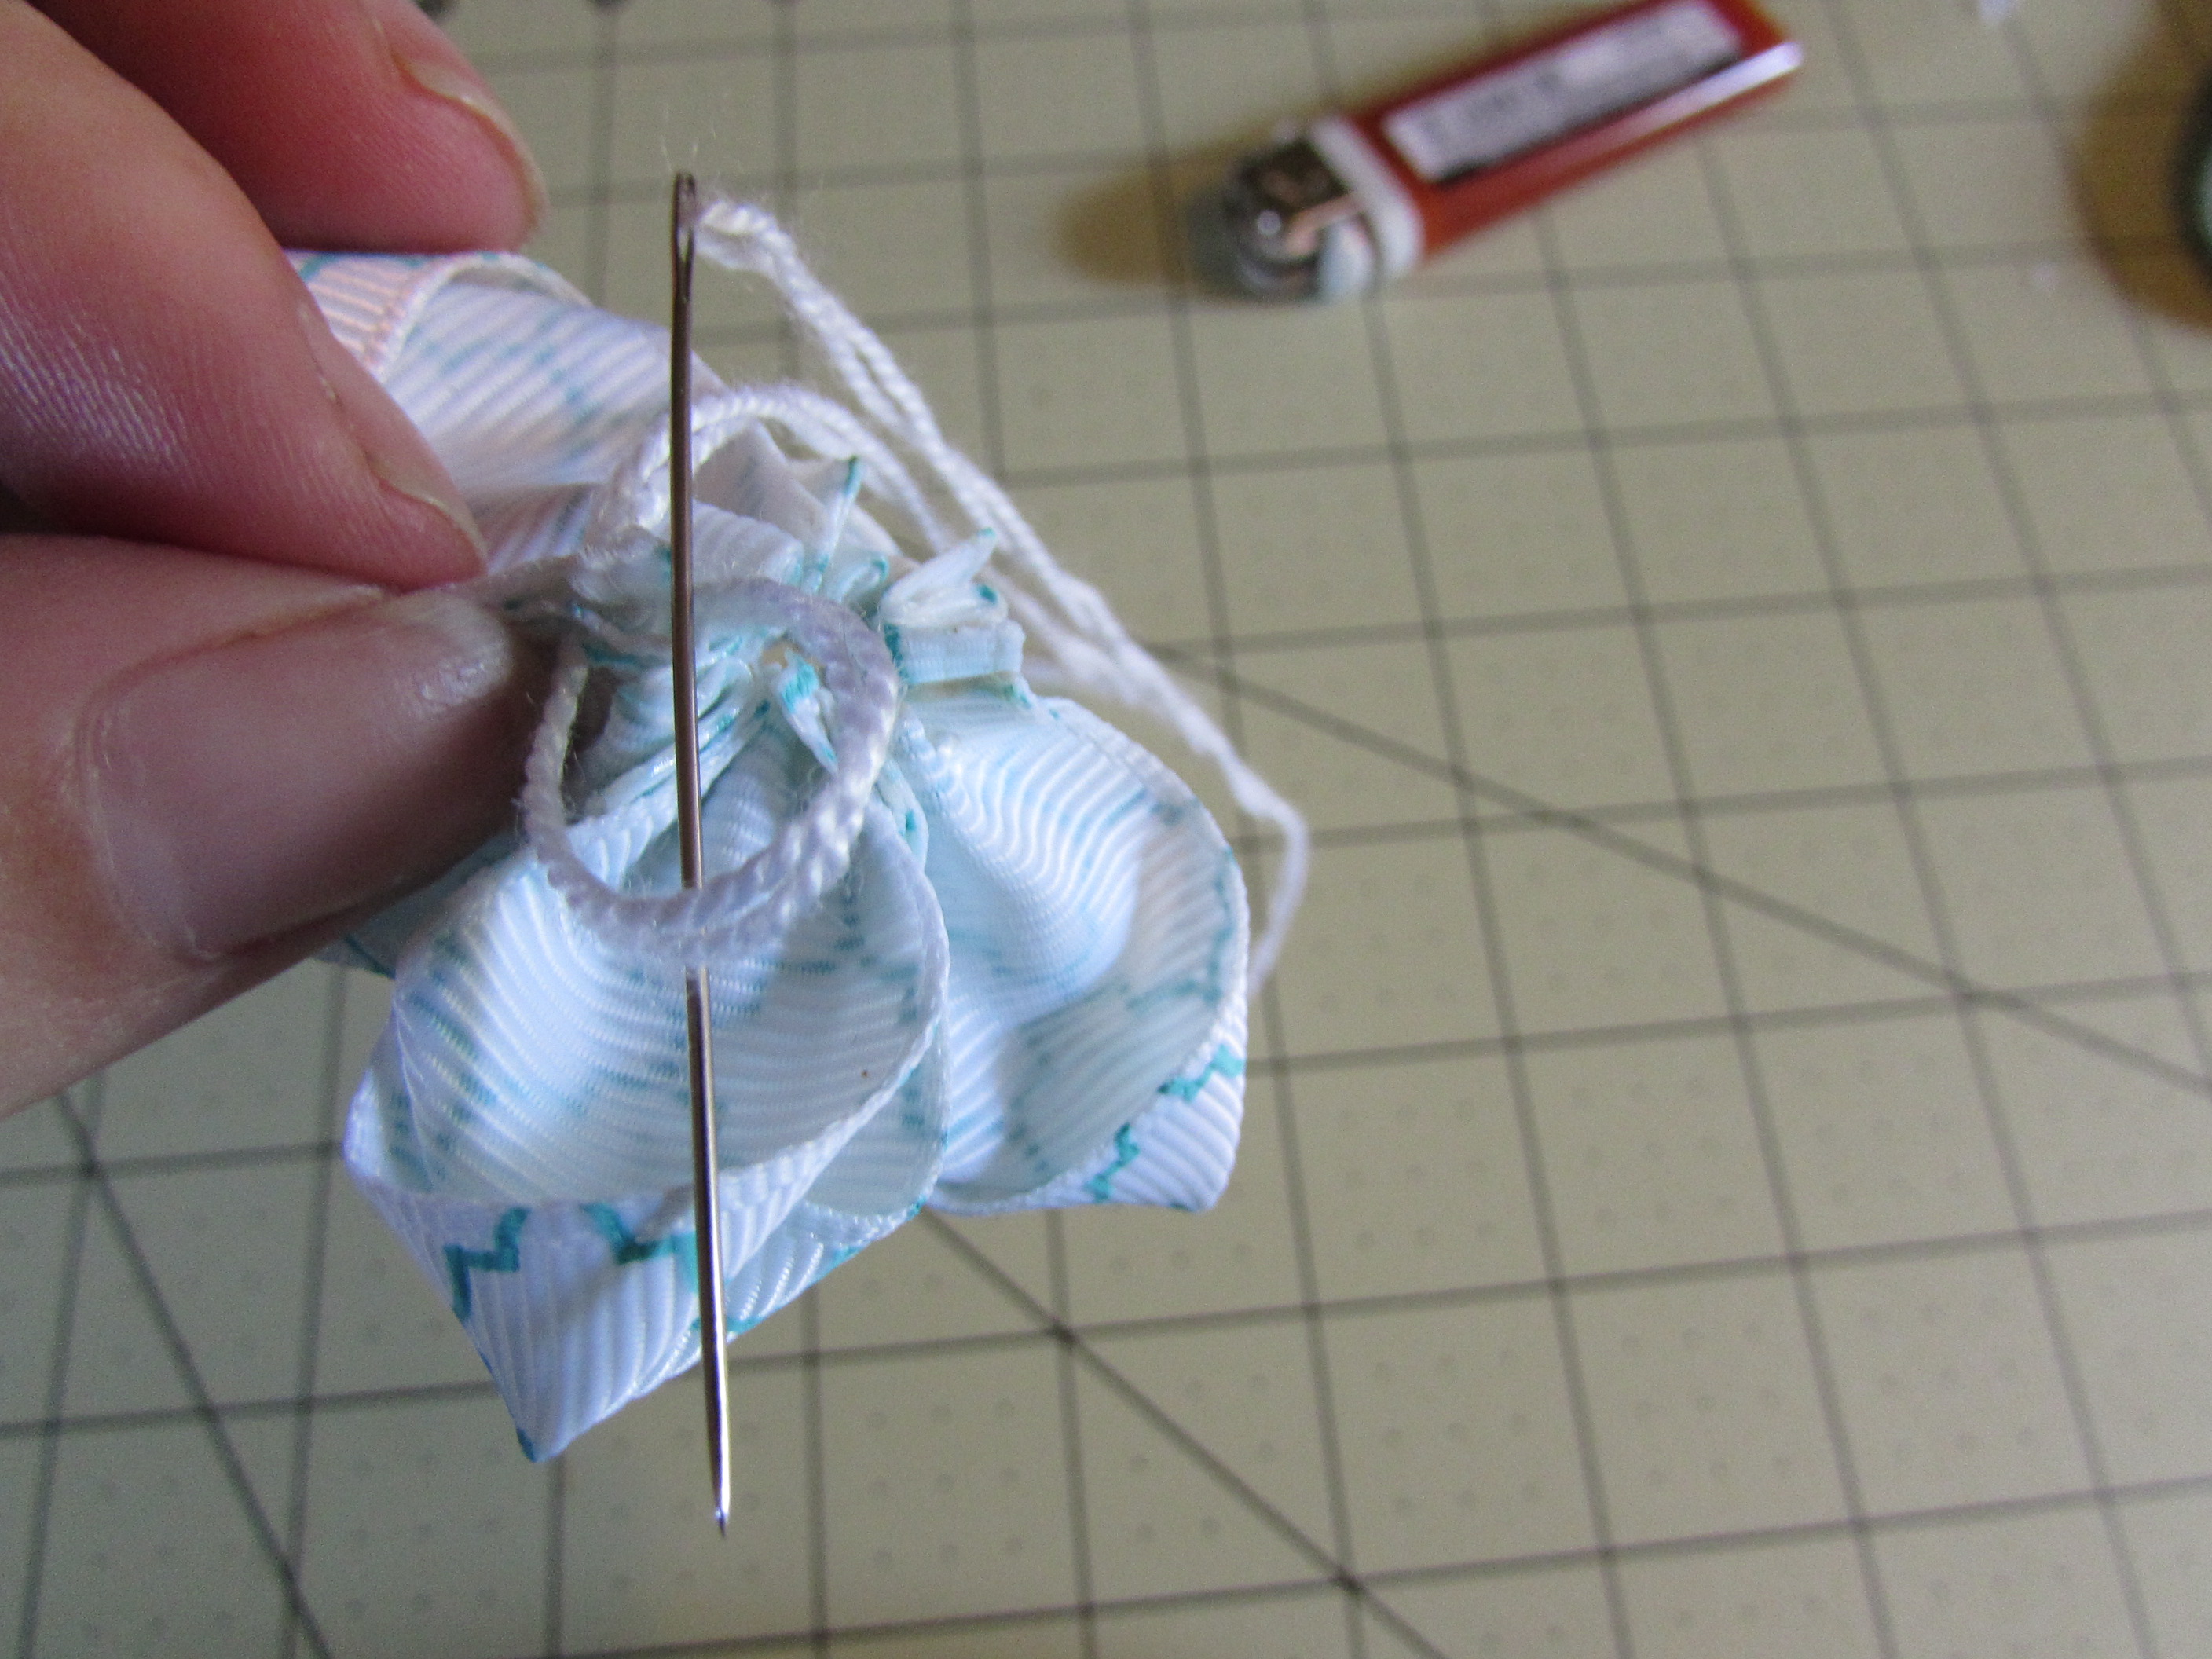
 Step 10: Flip your flower over
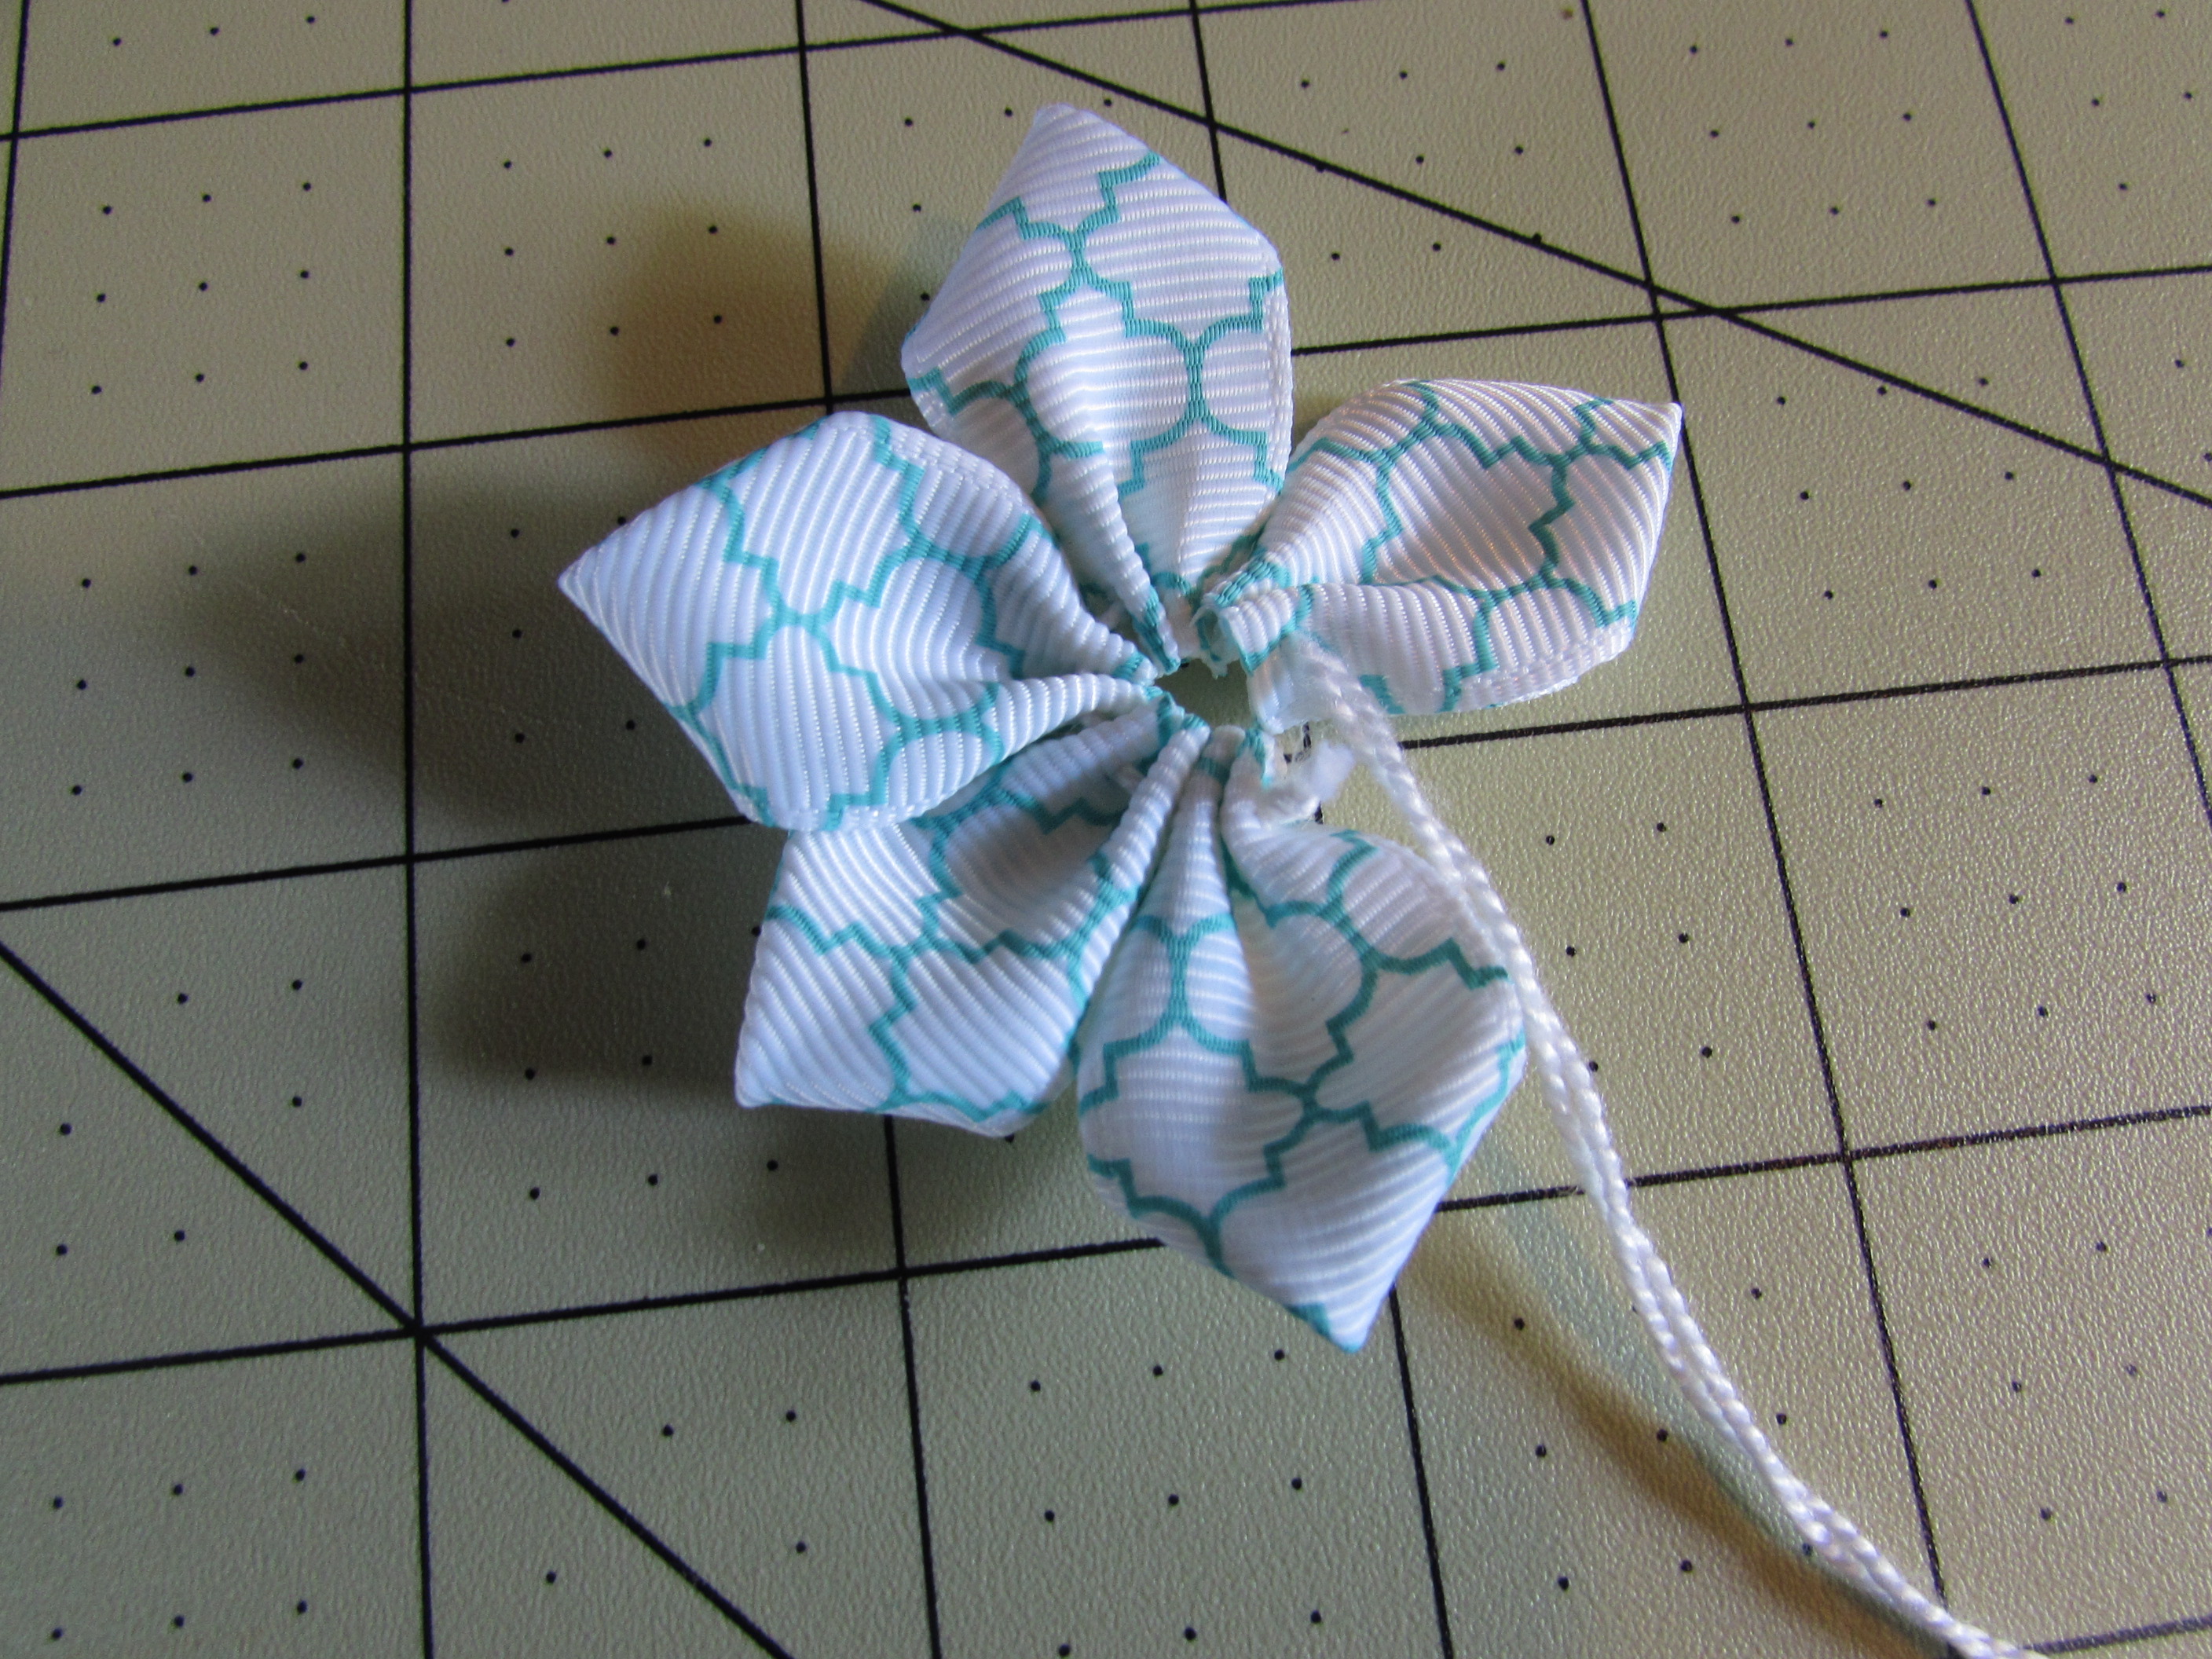
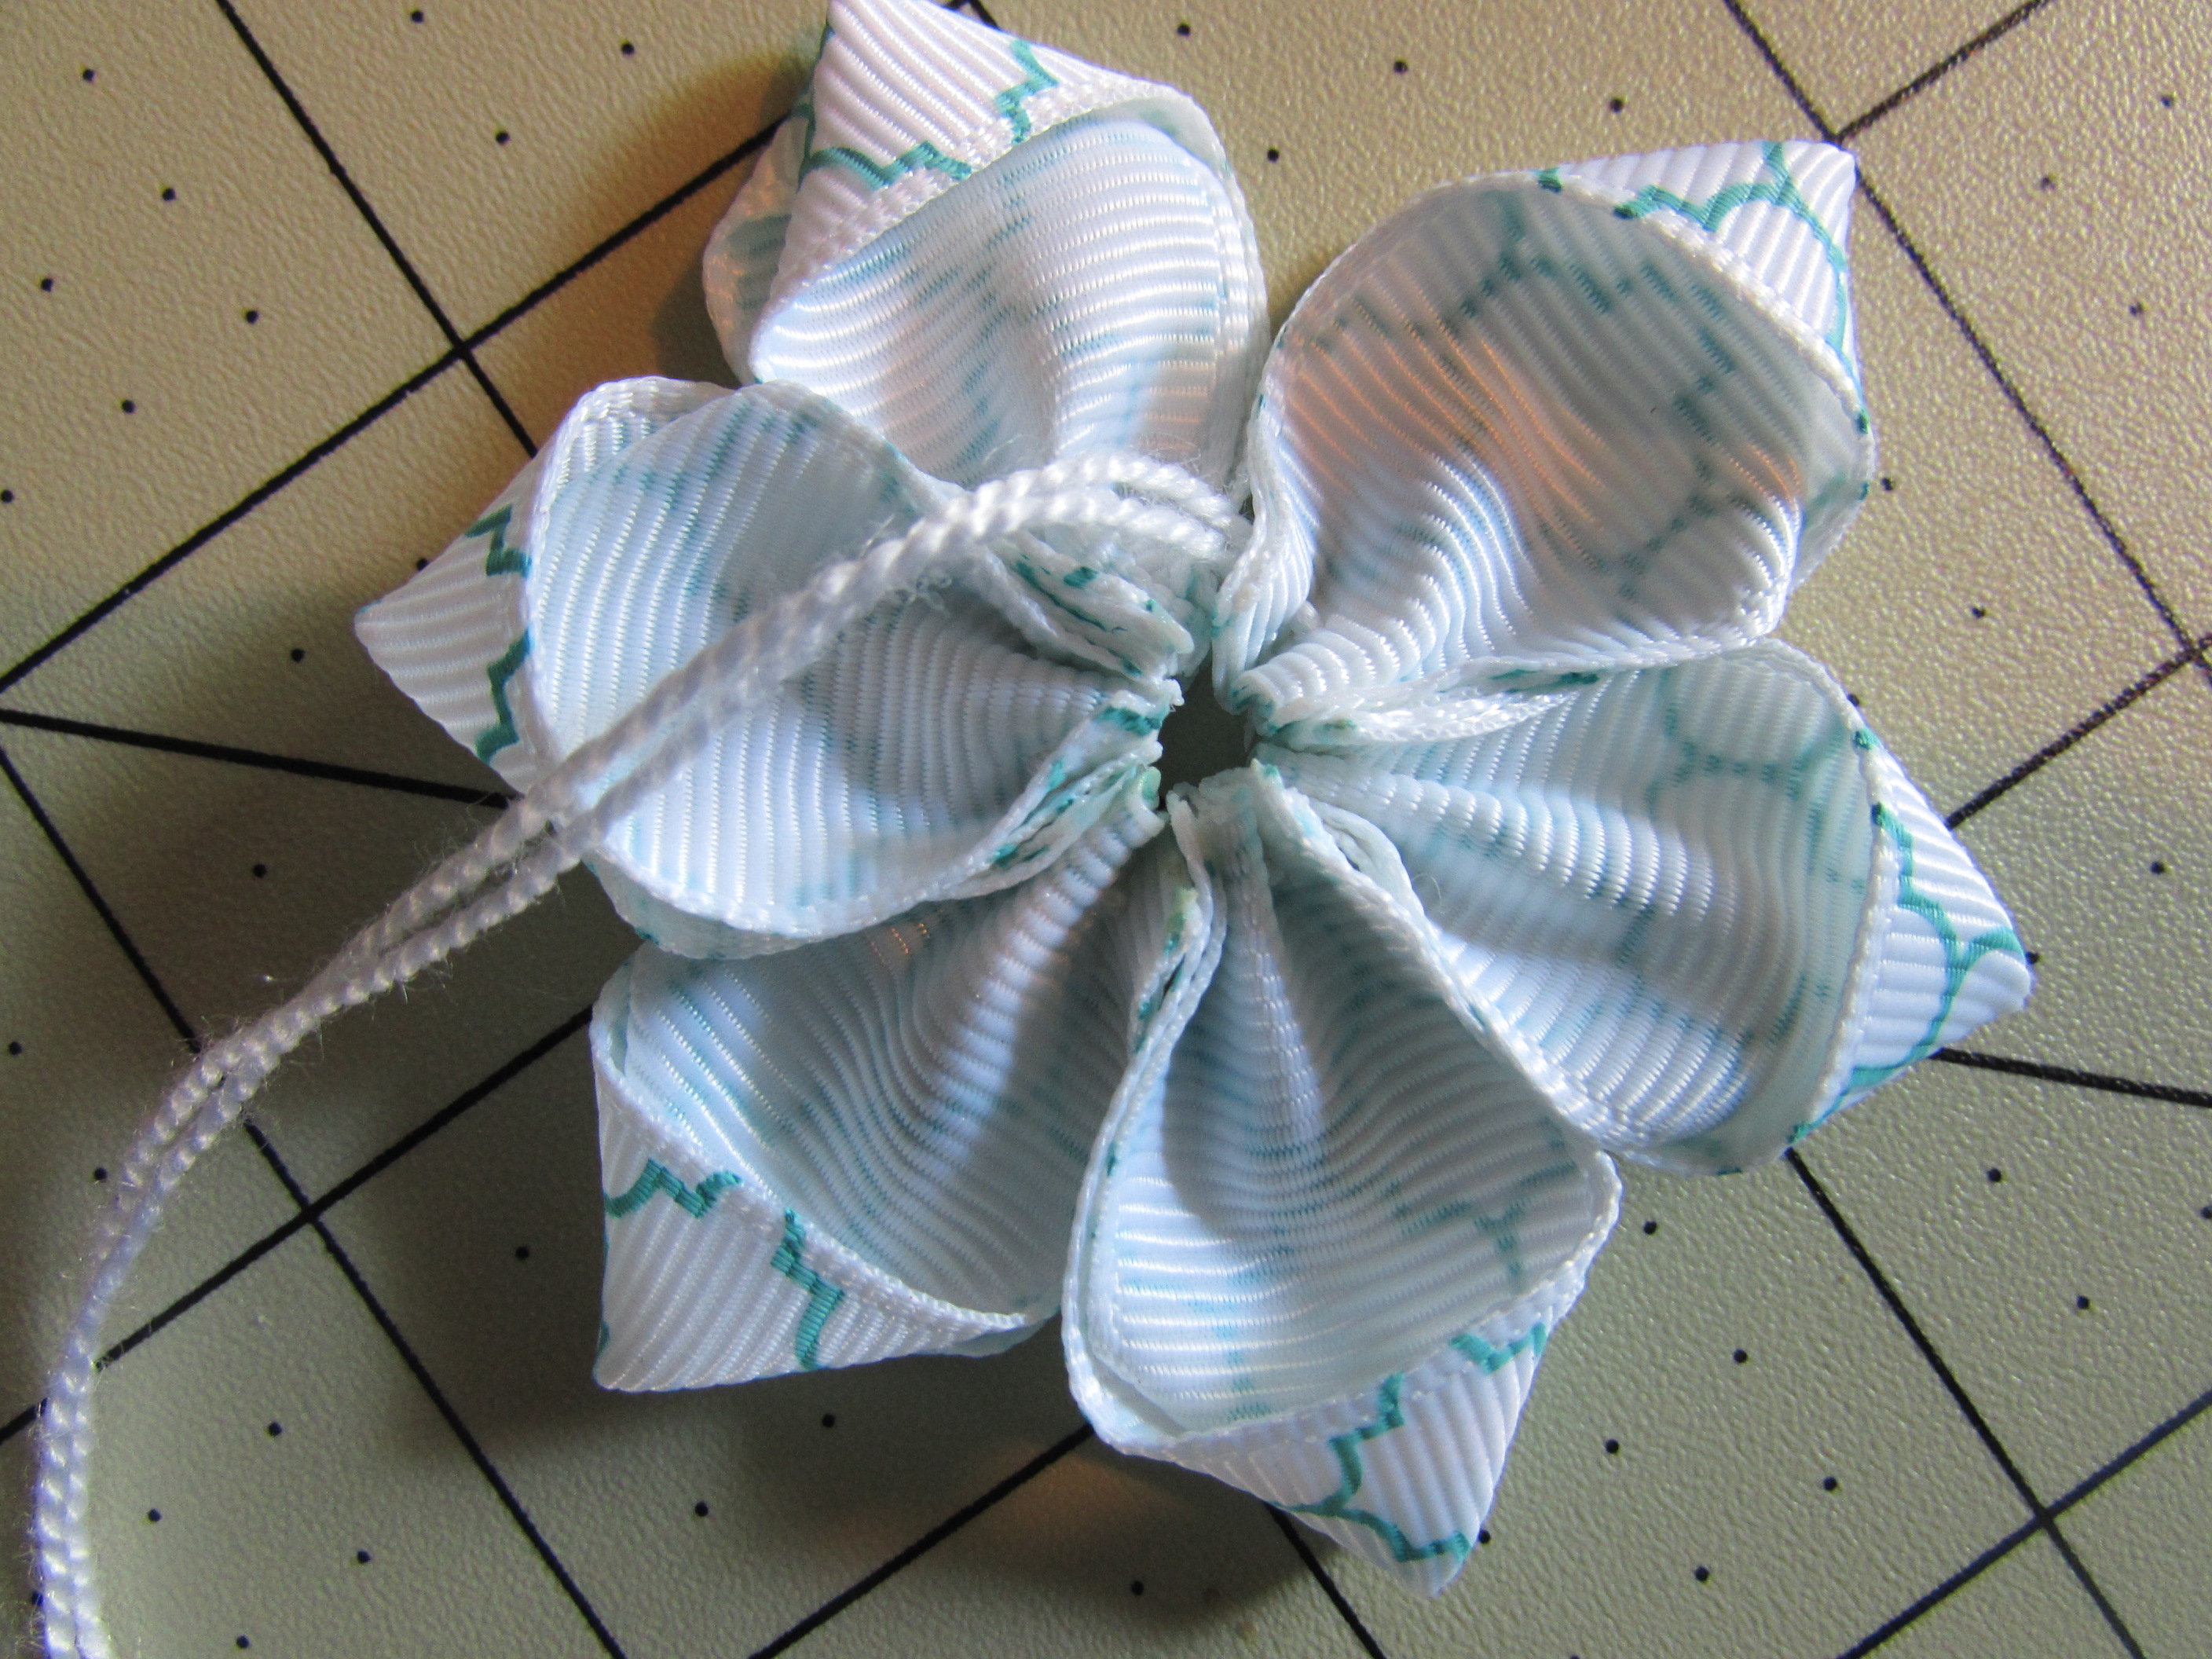
 Step 11: Pull your needle and thread up on top of your flower
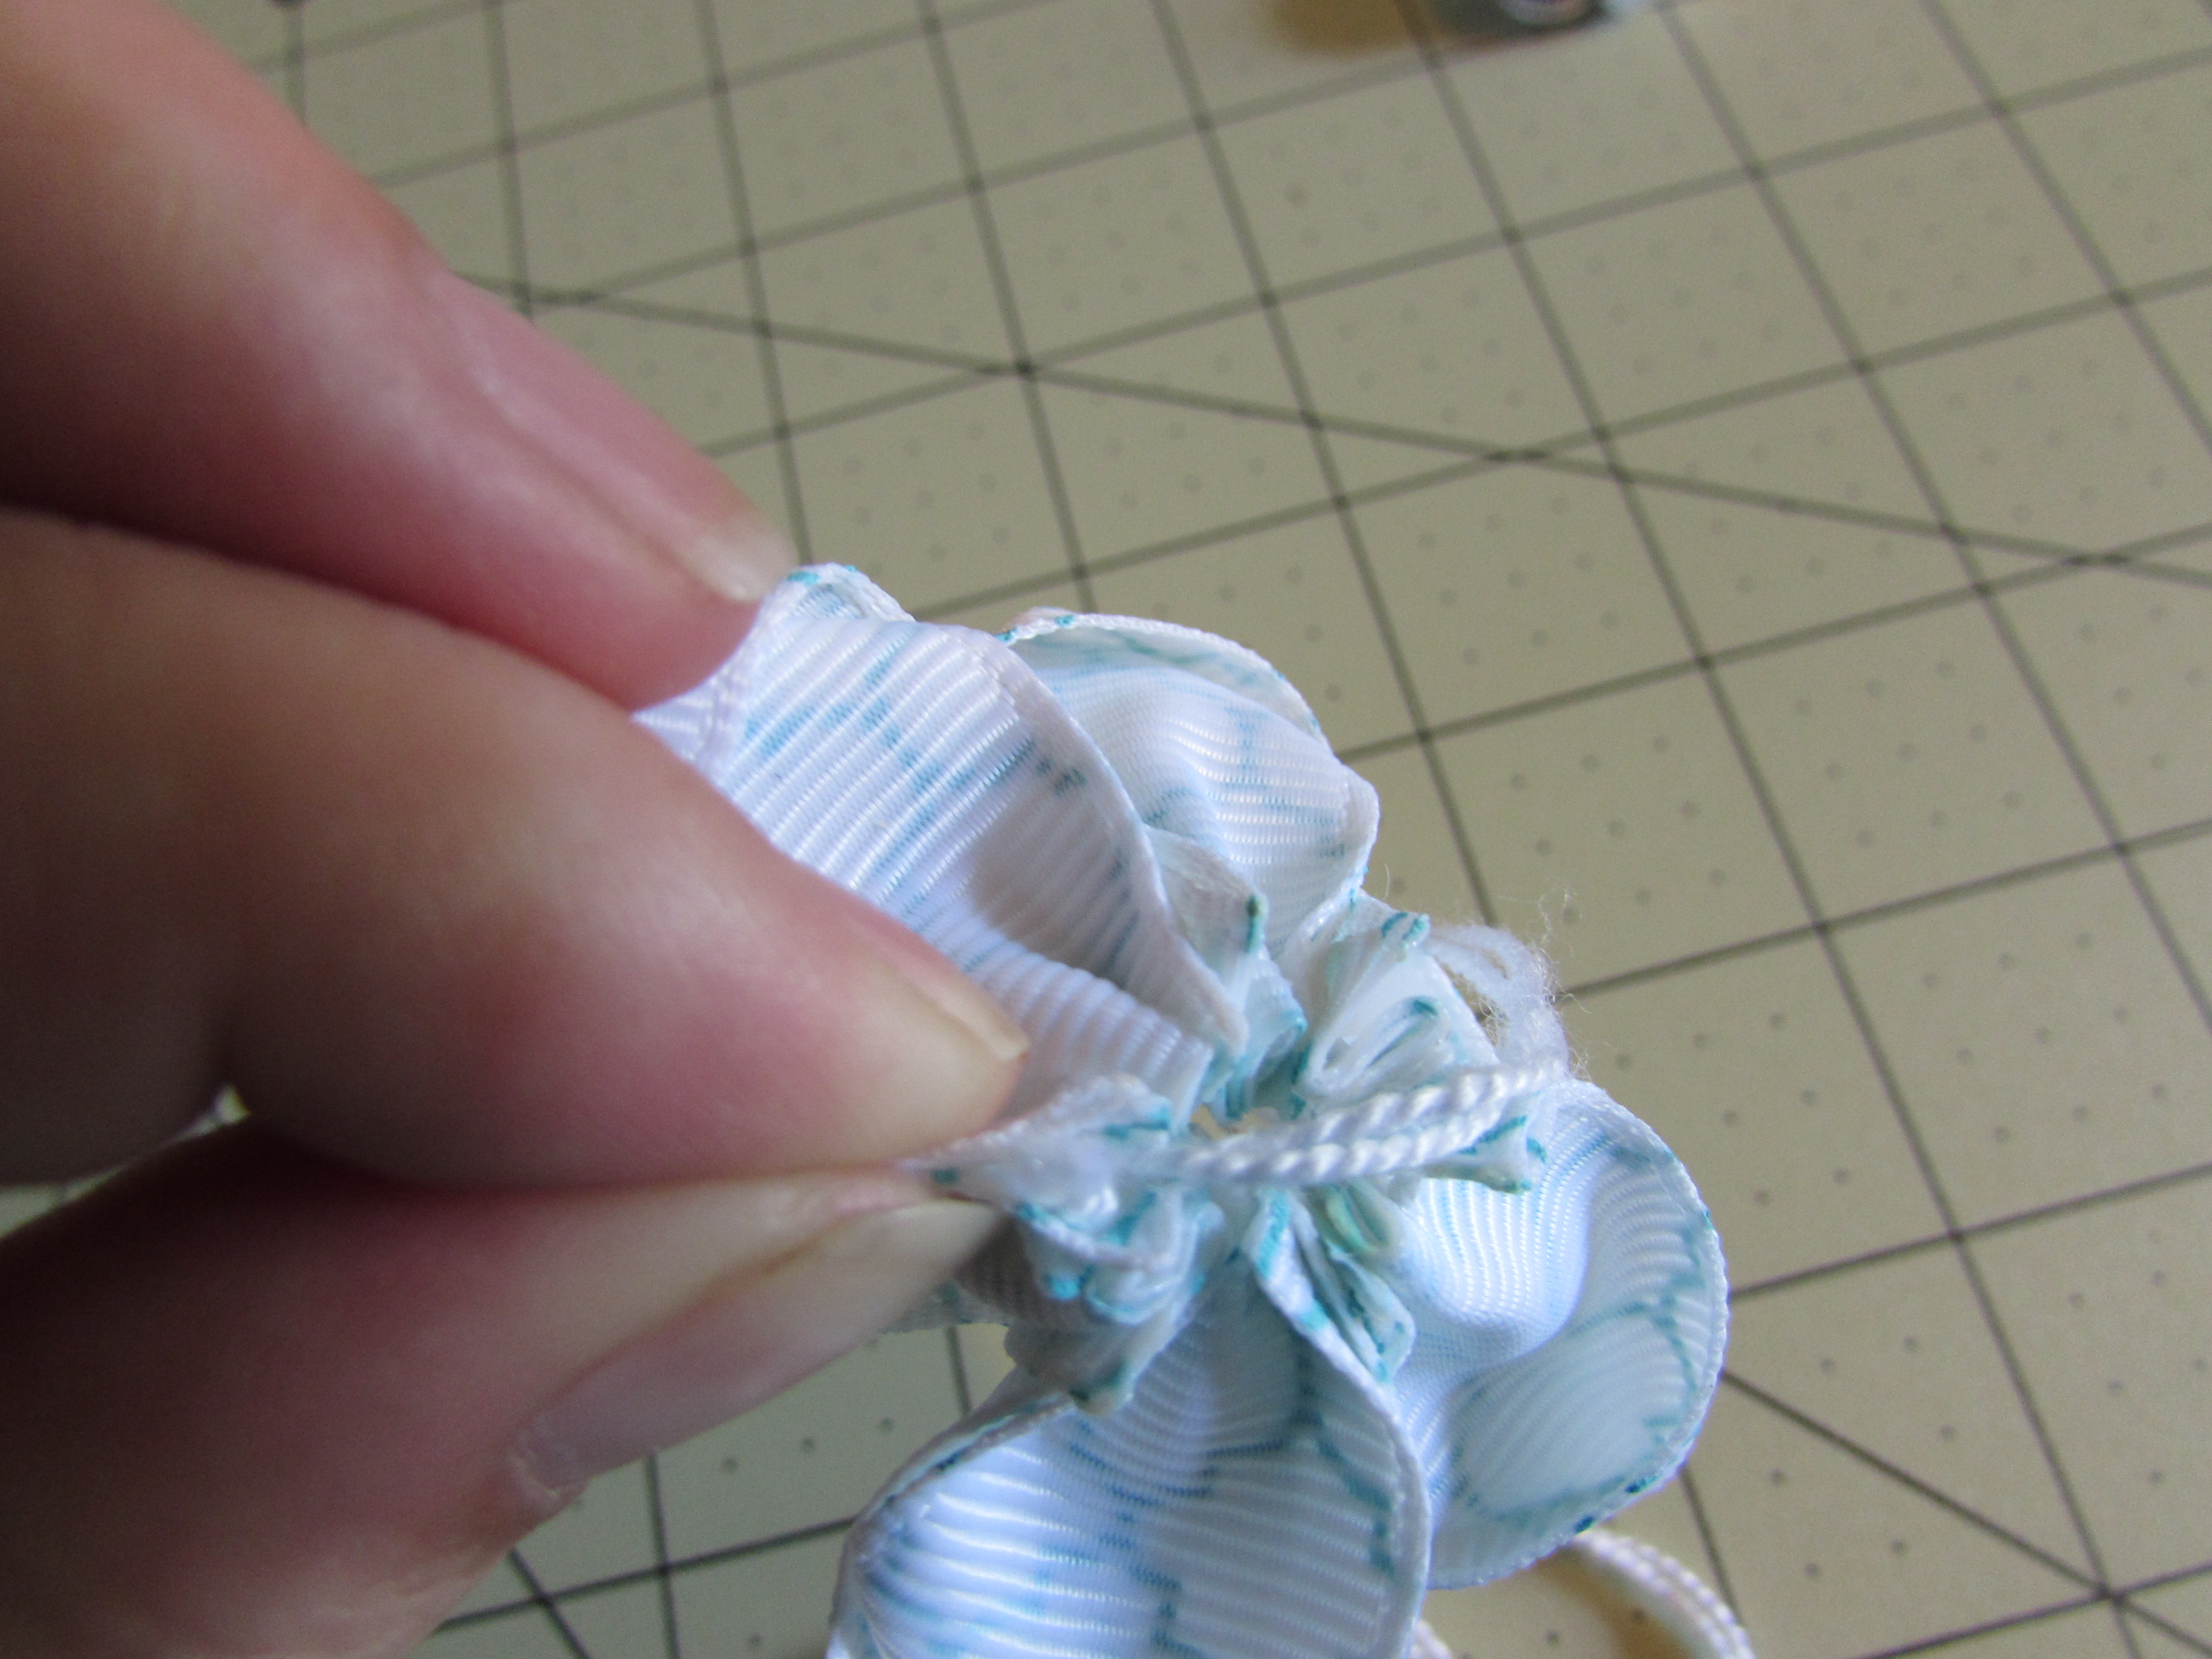
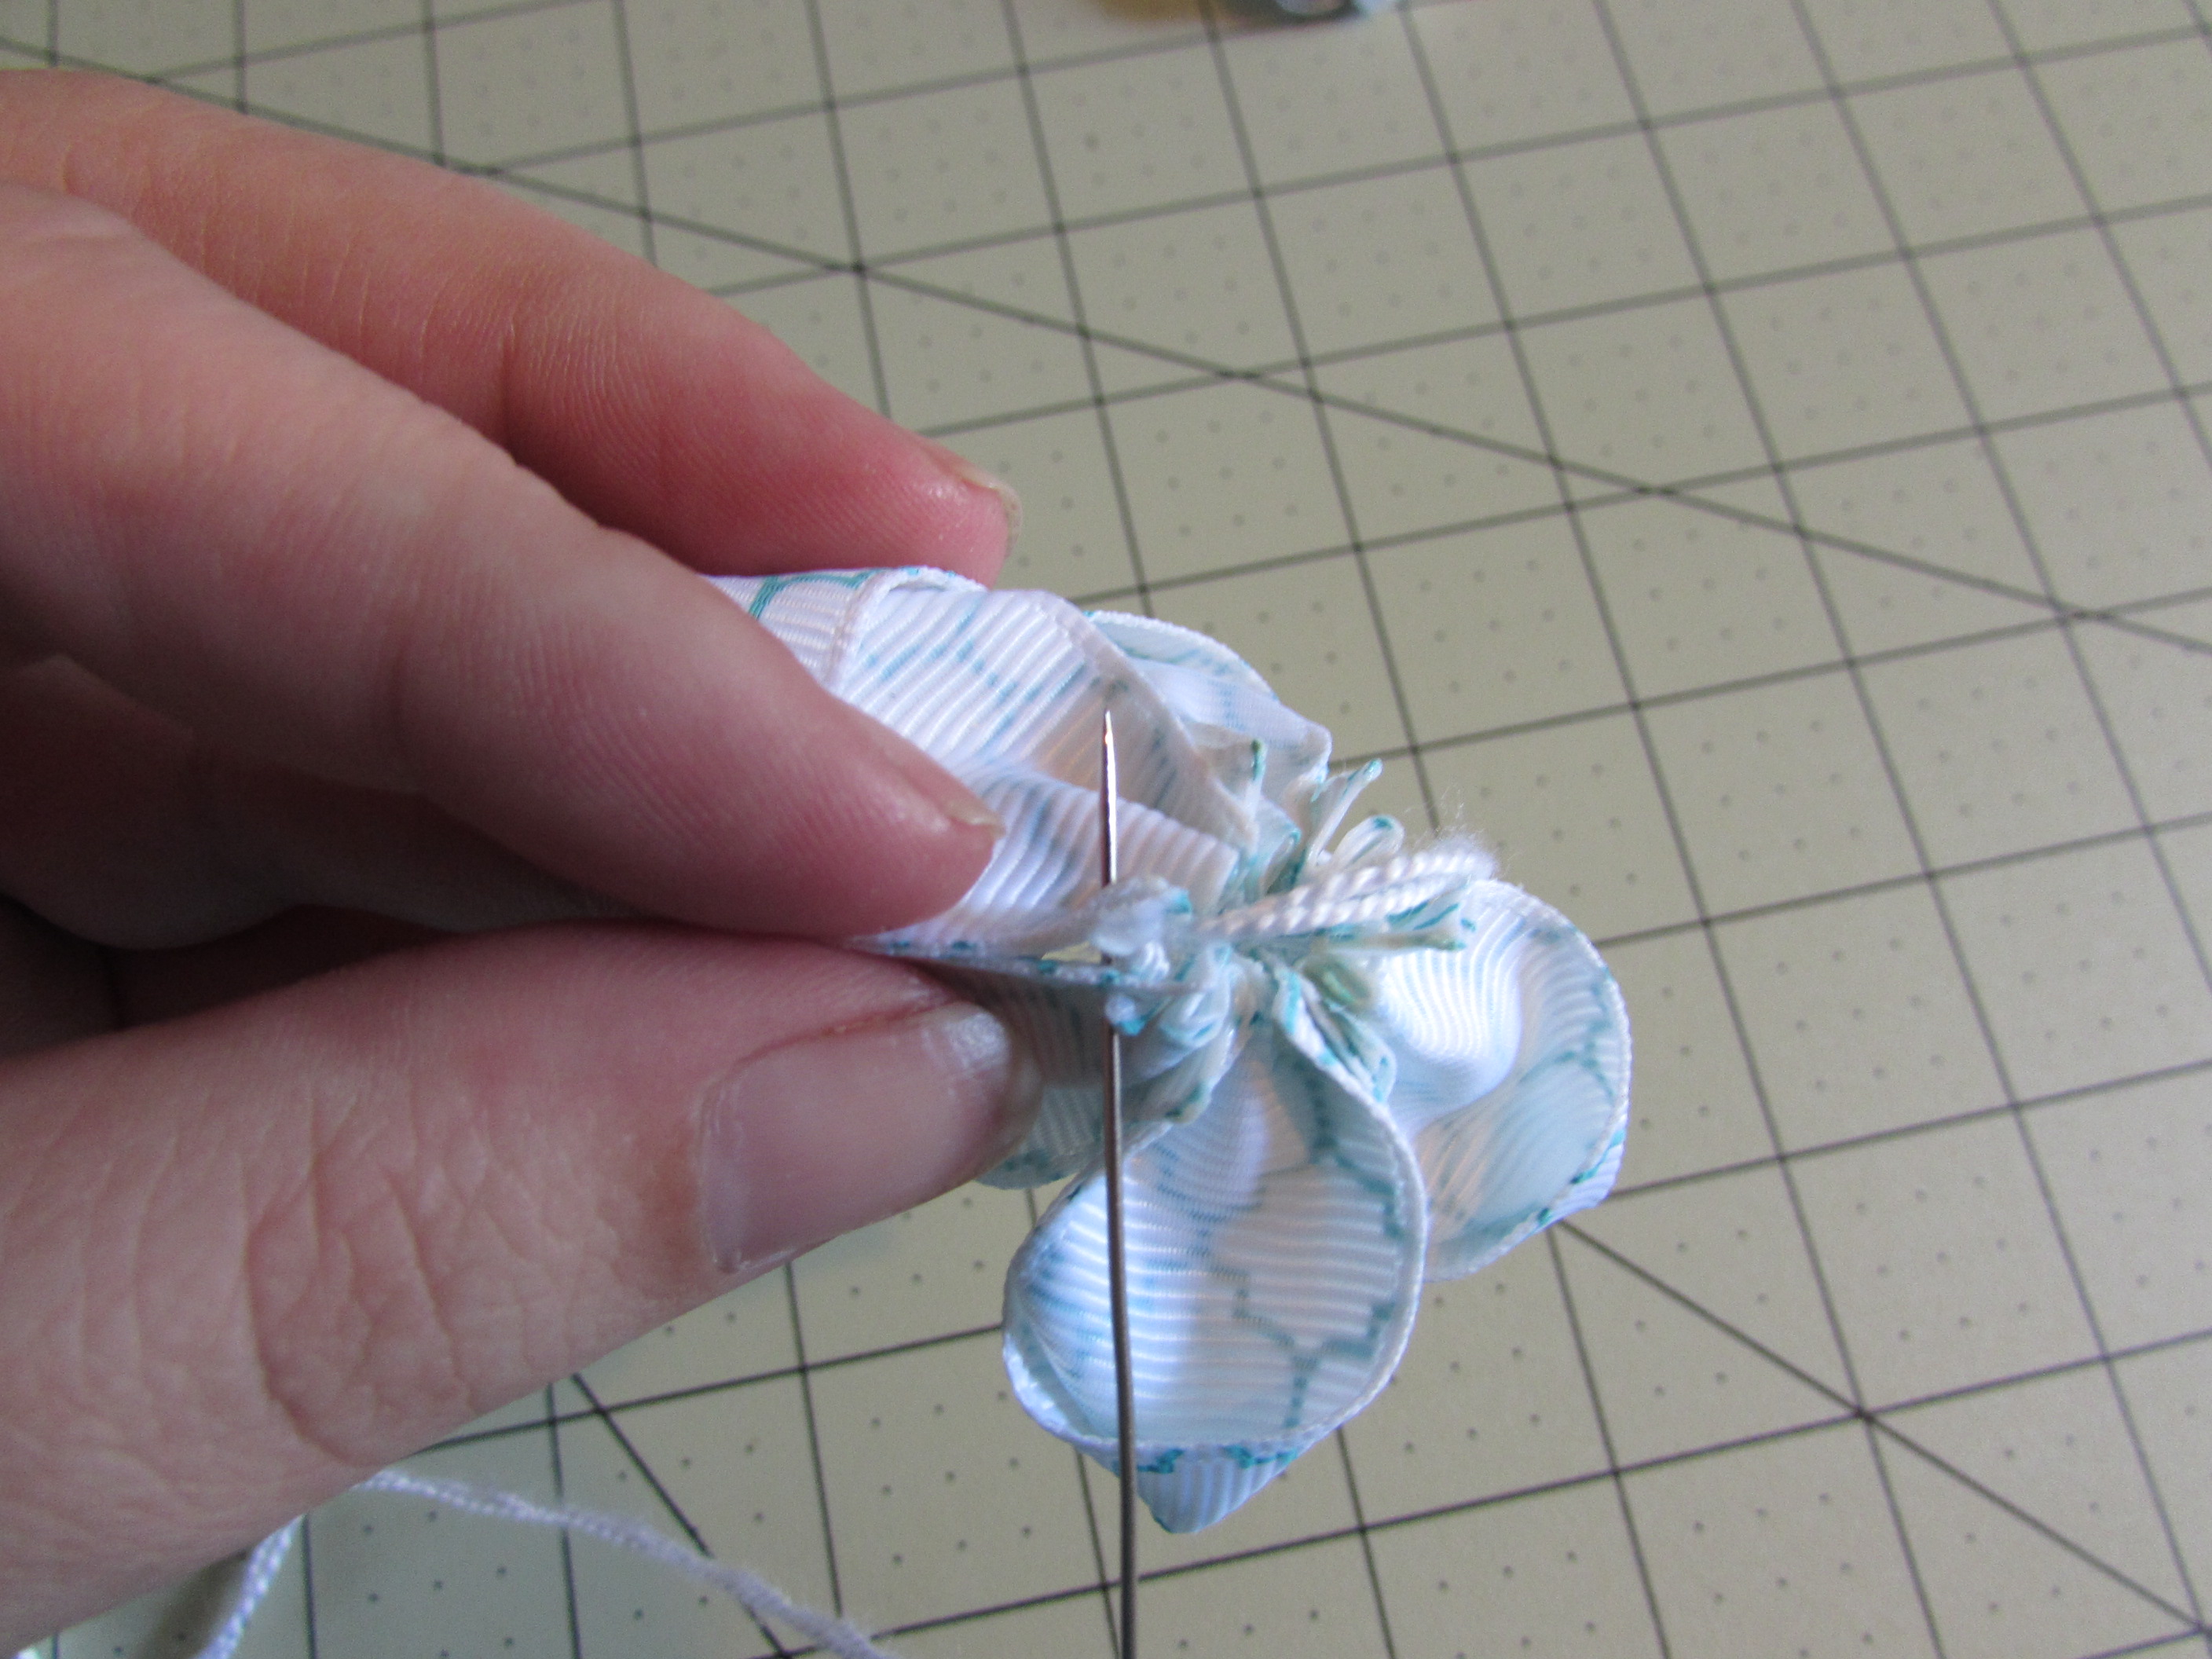
 Step 12: Take your first and your last petal and sew them together {{ be careful not to sew in the front of the flower }} sew a couple times on the backside of the flower
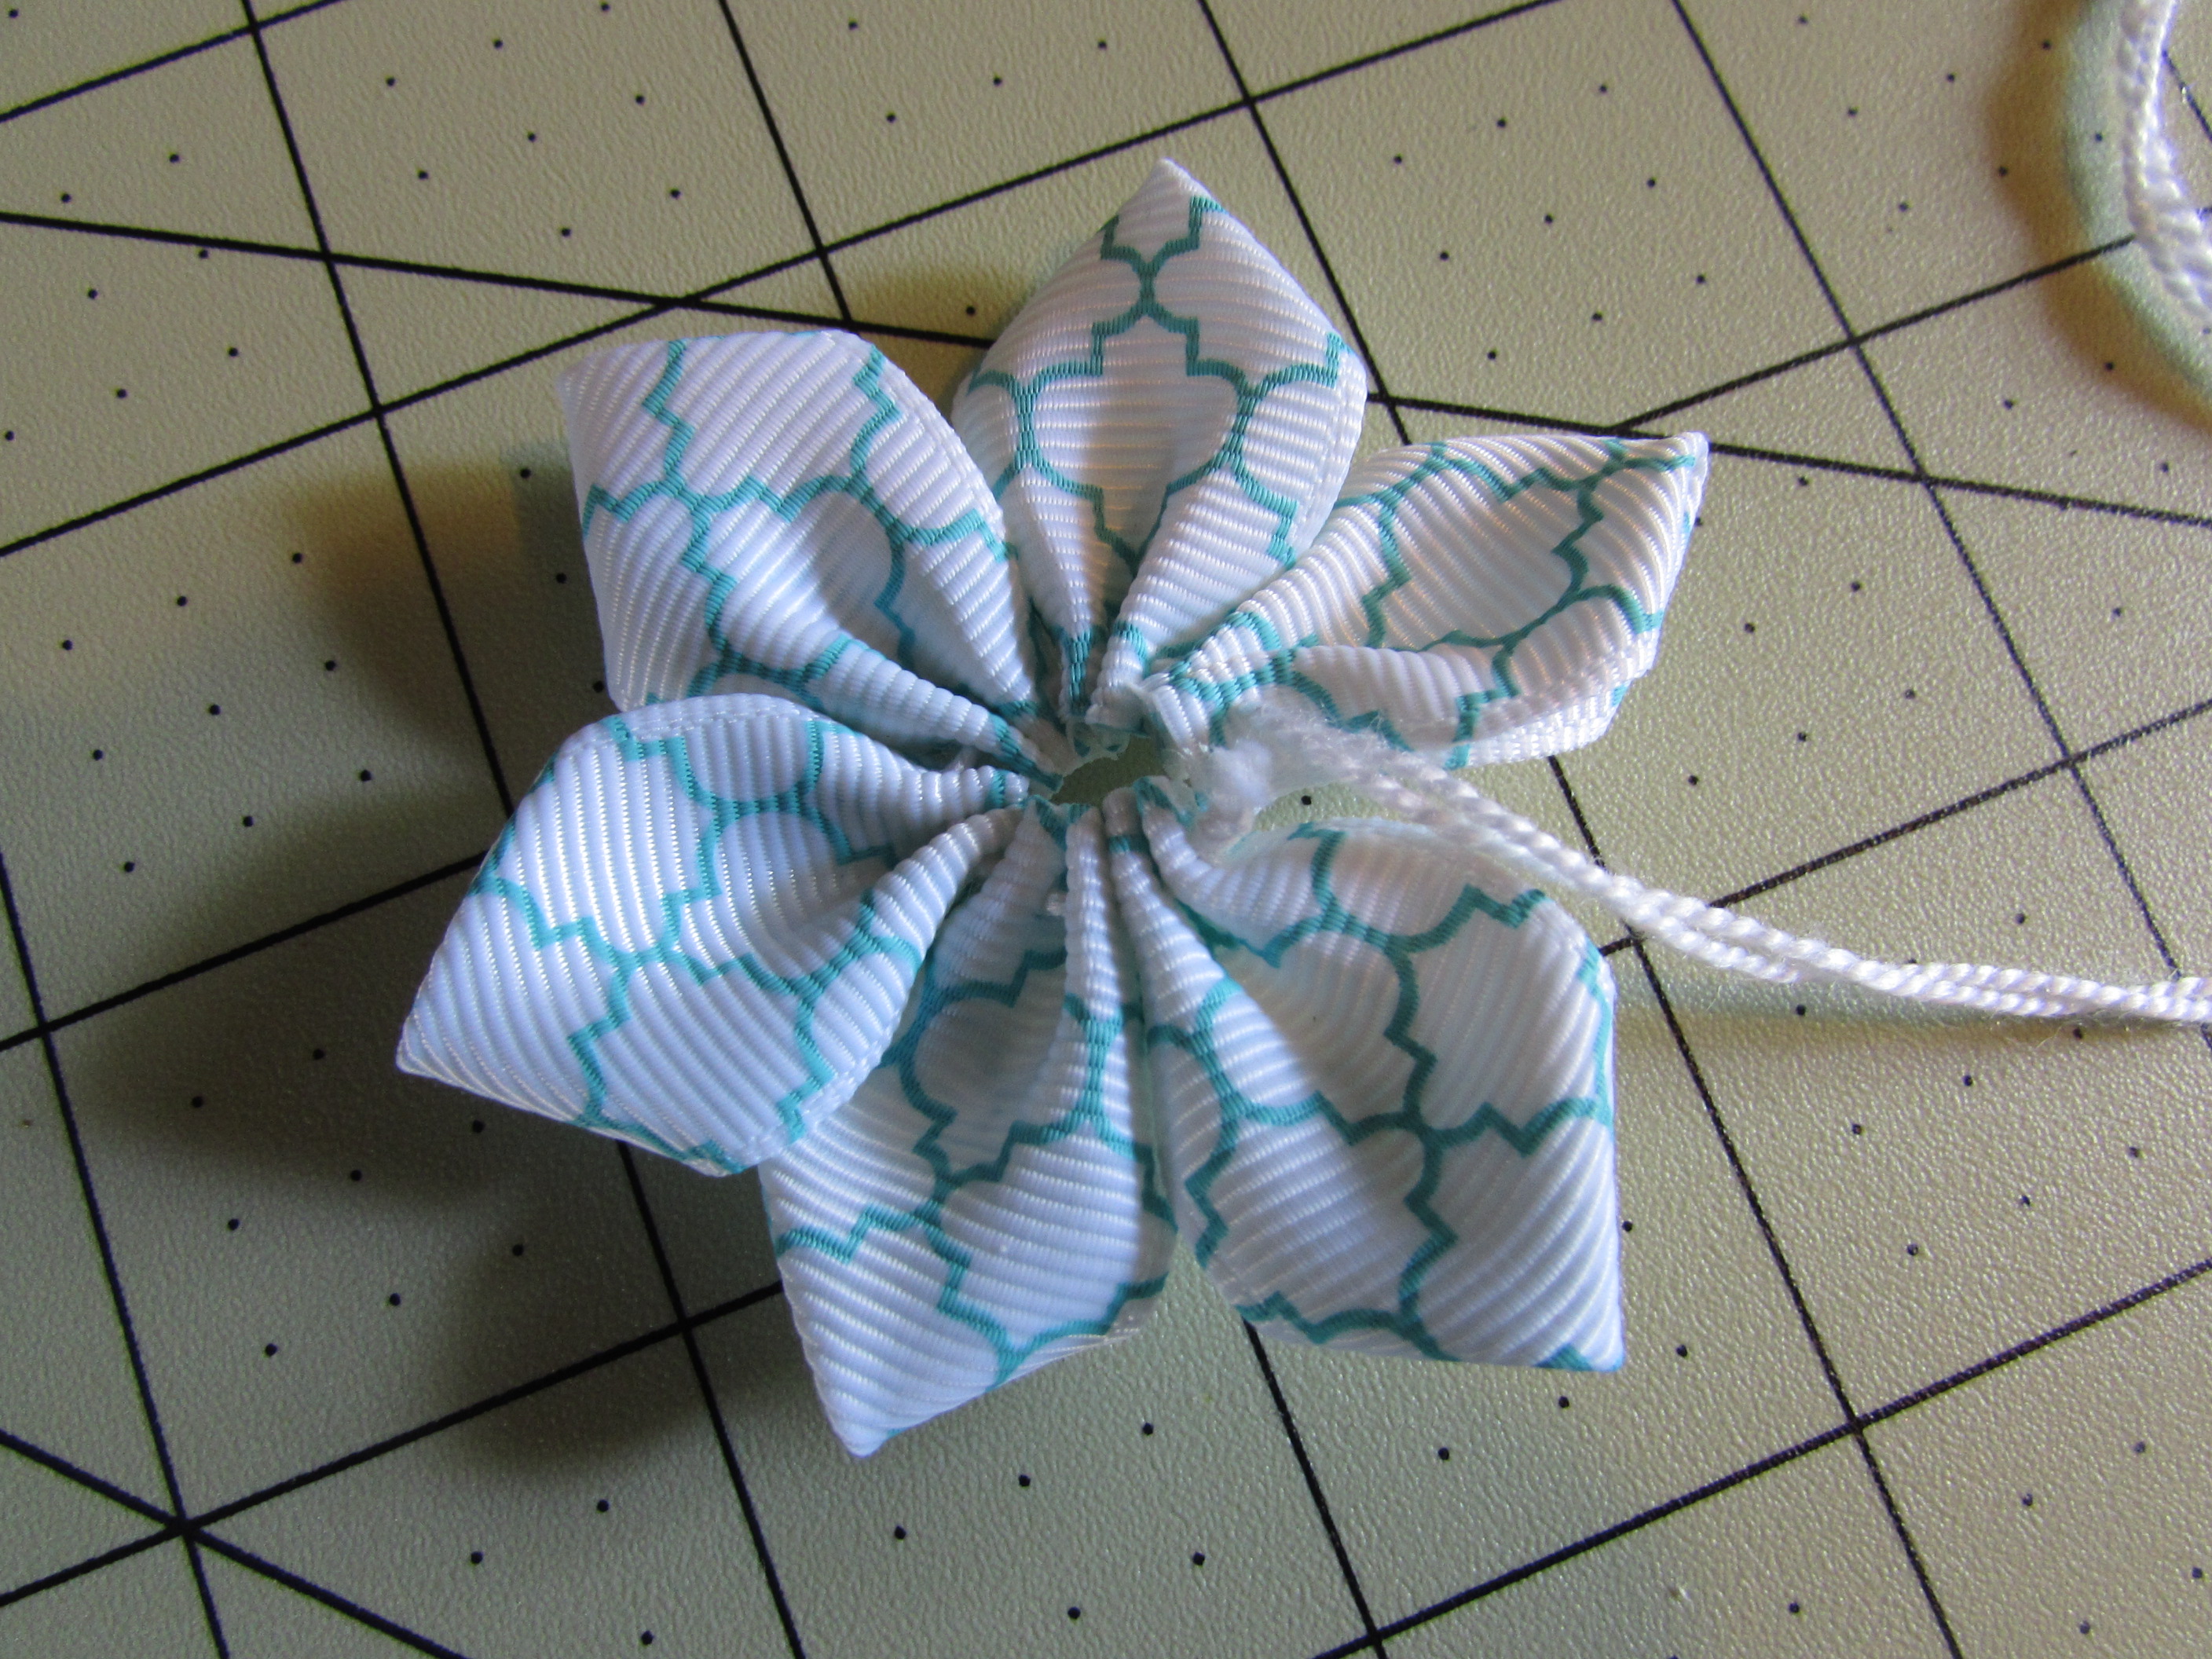
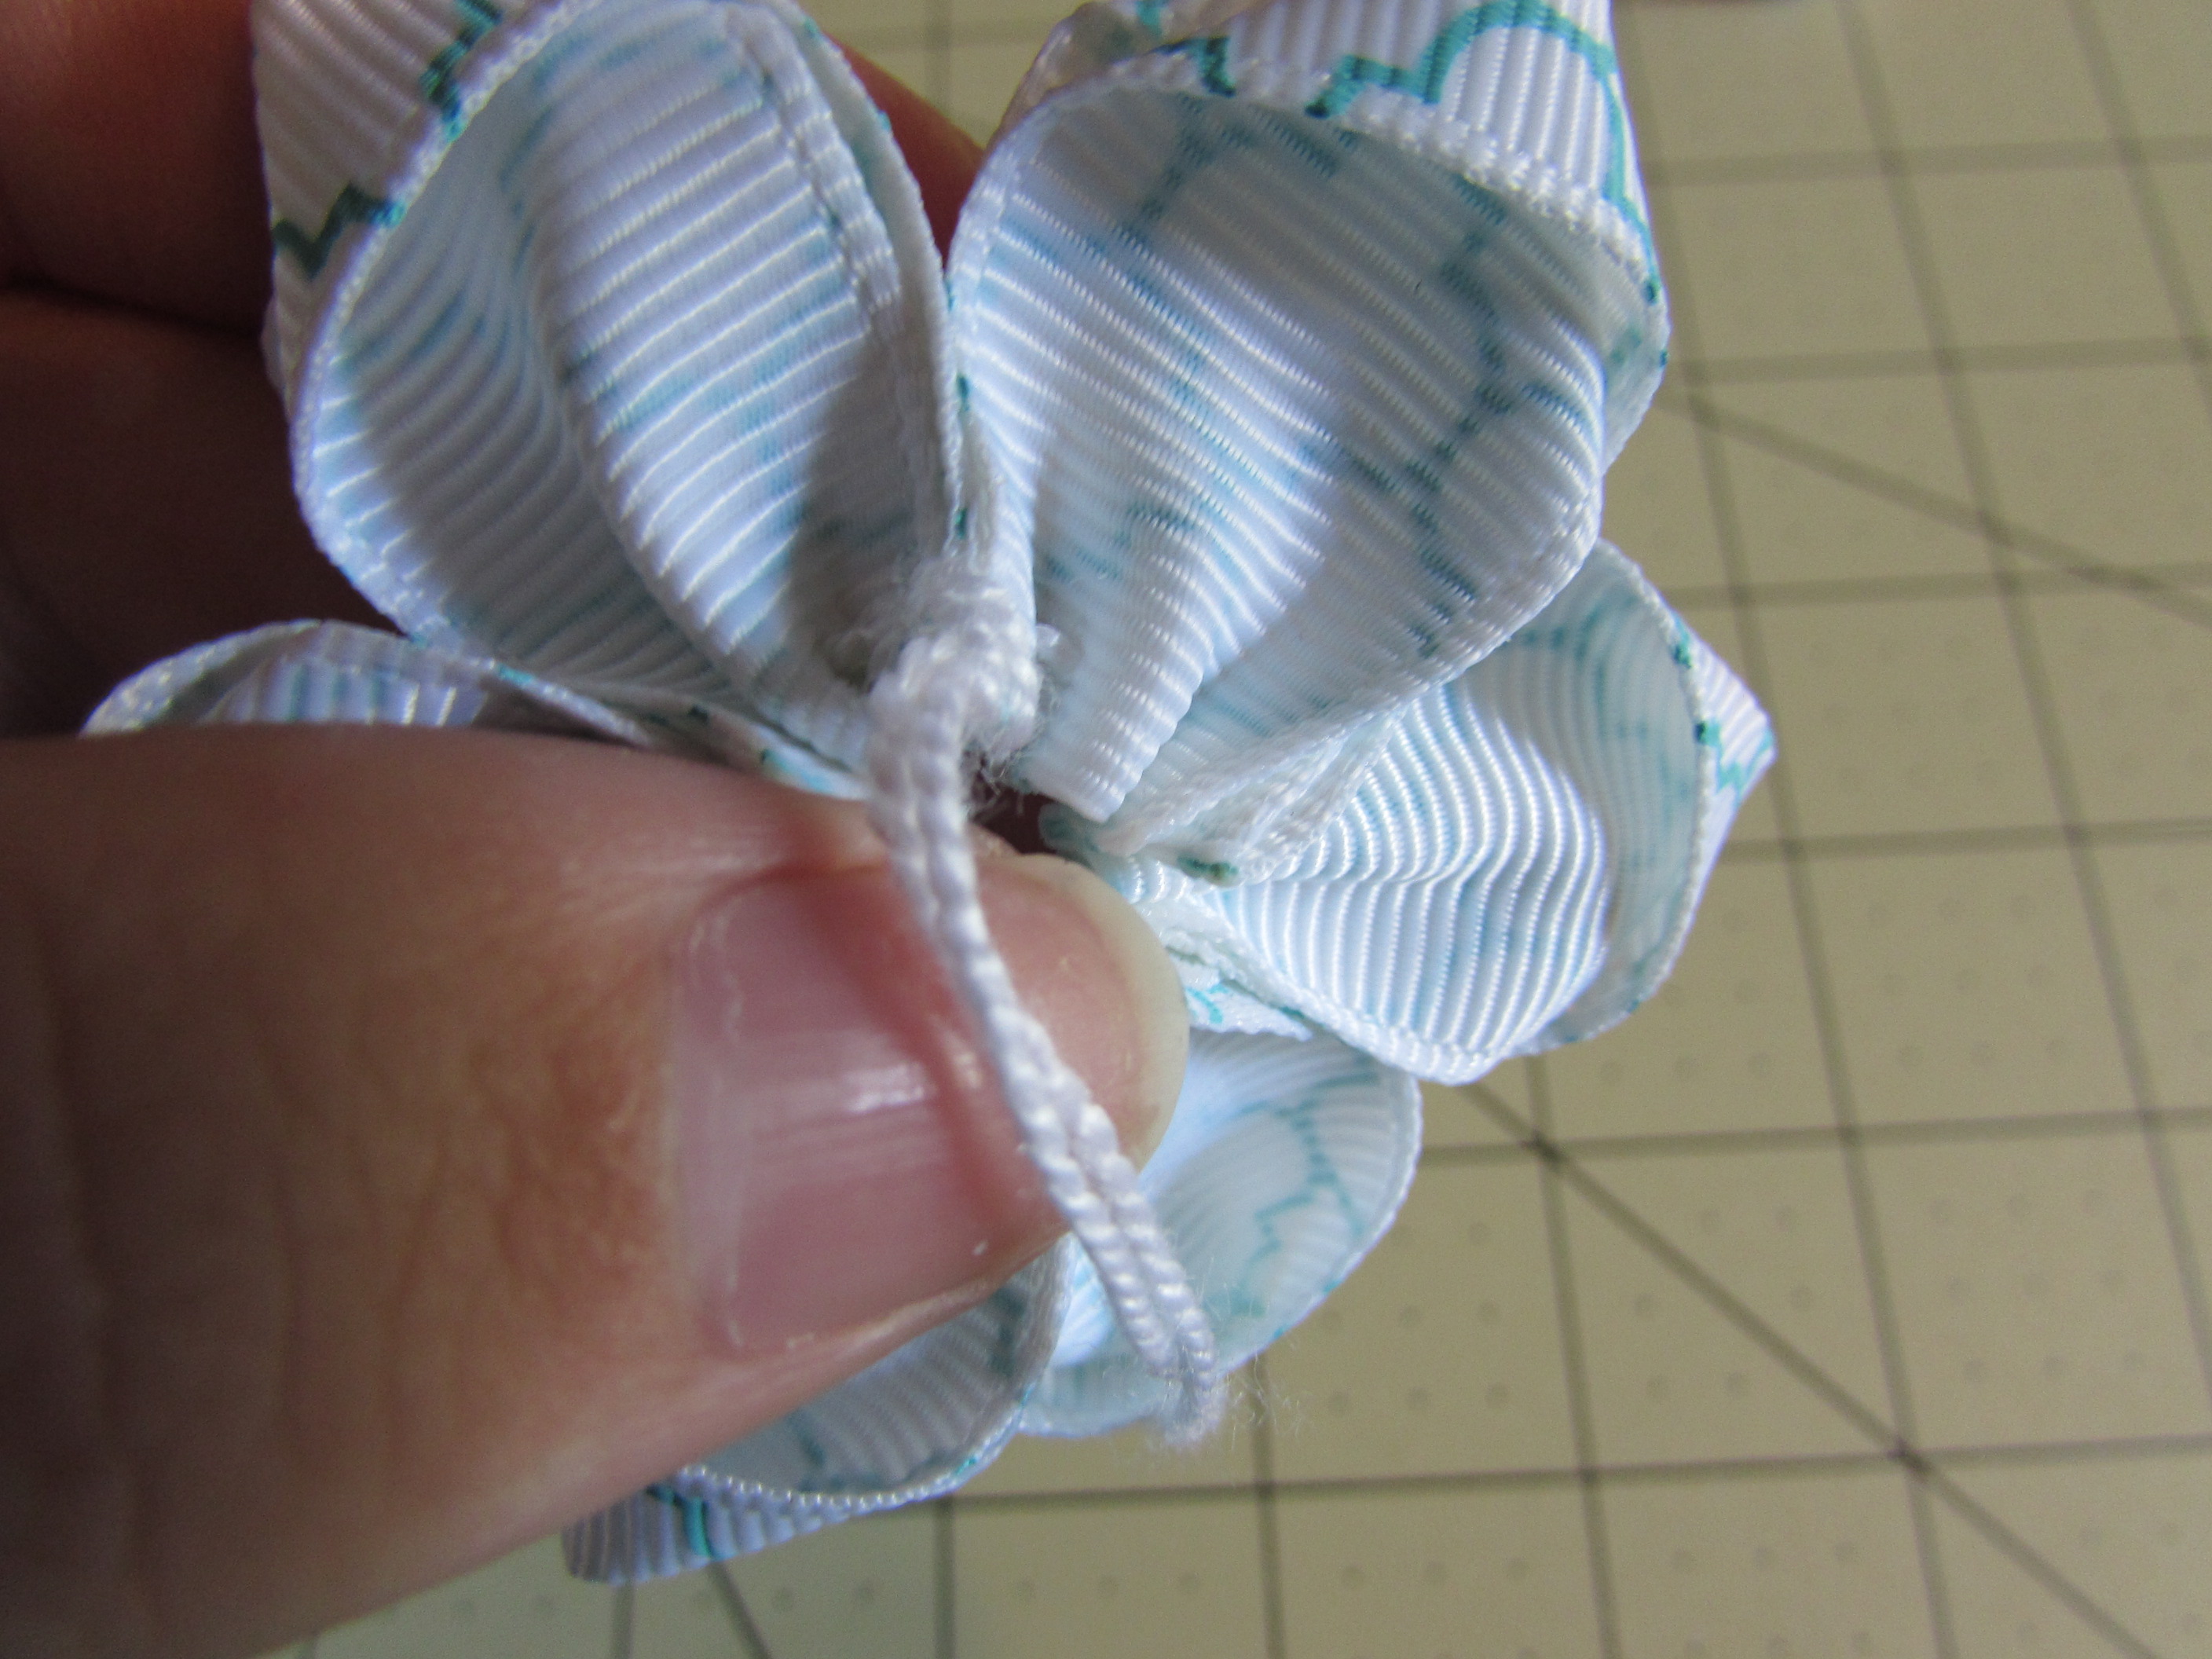 Step 13: You have now sewn your flower into place. Cut your thread off.
- Leave enough of the thread to where you can tie a couple knots as close to the flower as possible.
Step 13: You have now sewn your flower into place. Cut your thread off.
- Leave enough of the thread to where you can tie a couple knots as close to the flower as possible.
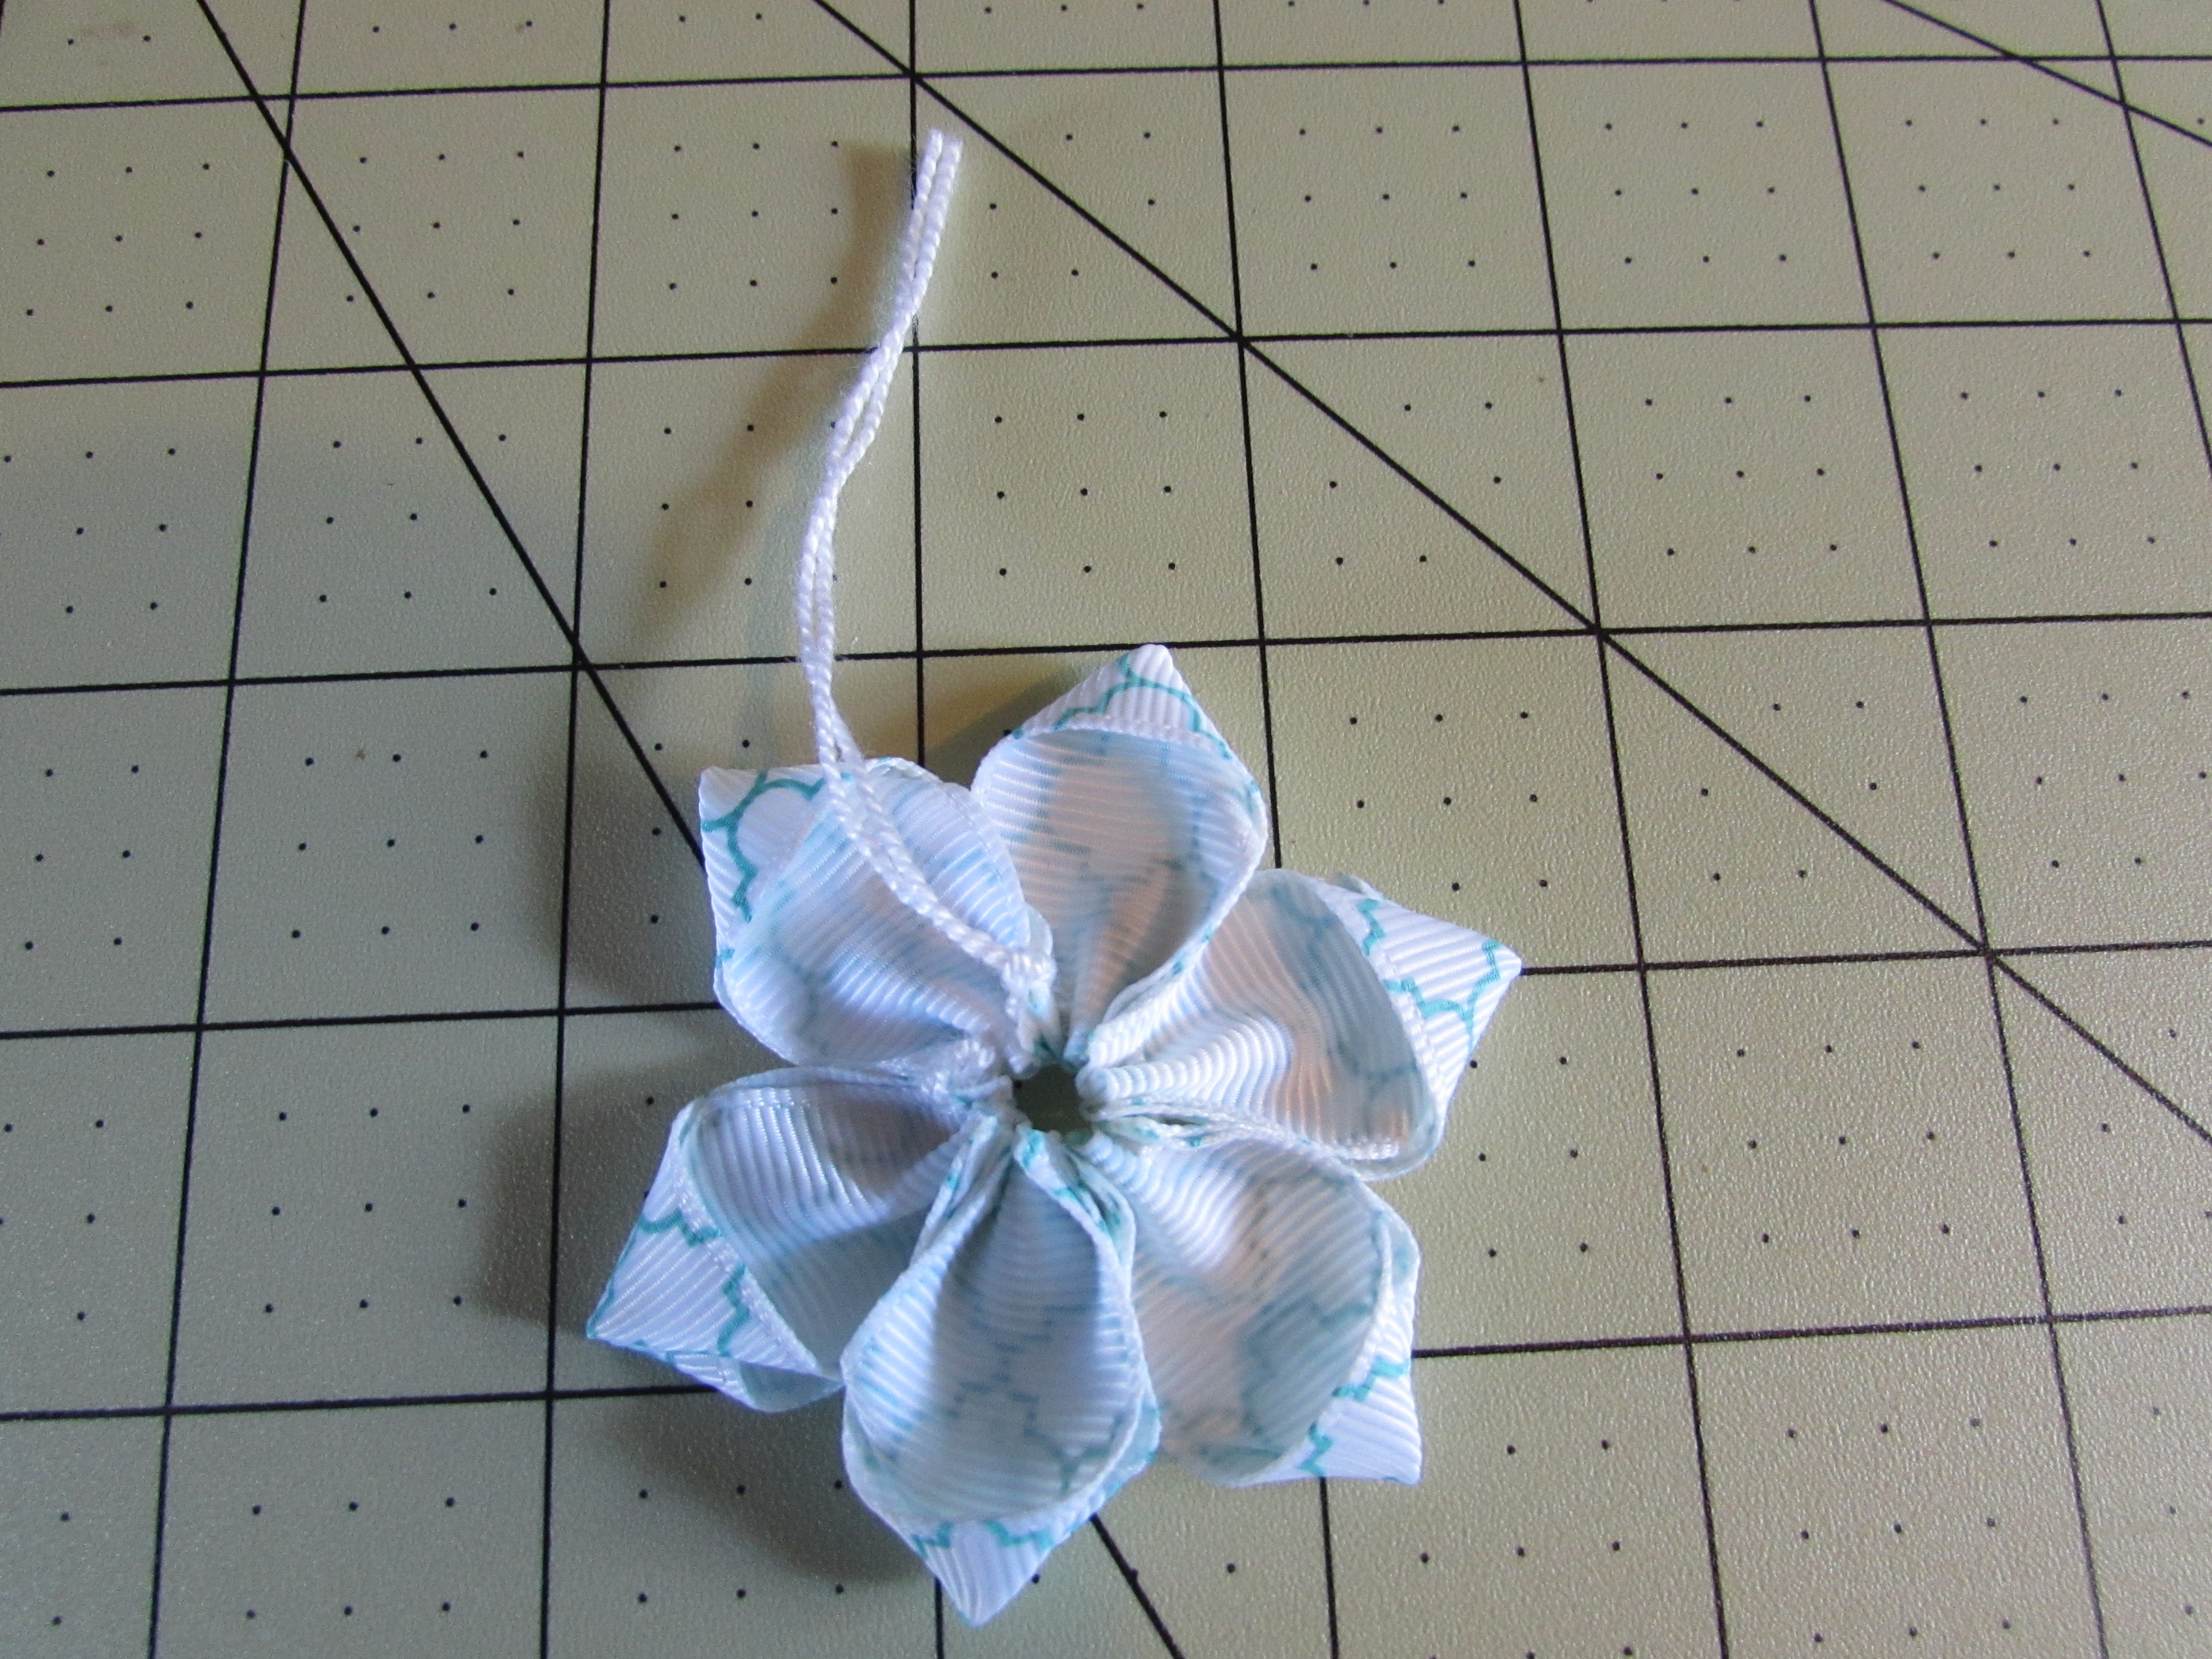 Step 14: Cut your extra thread
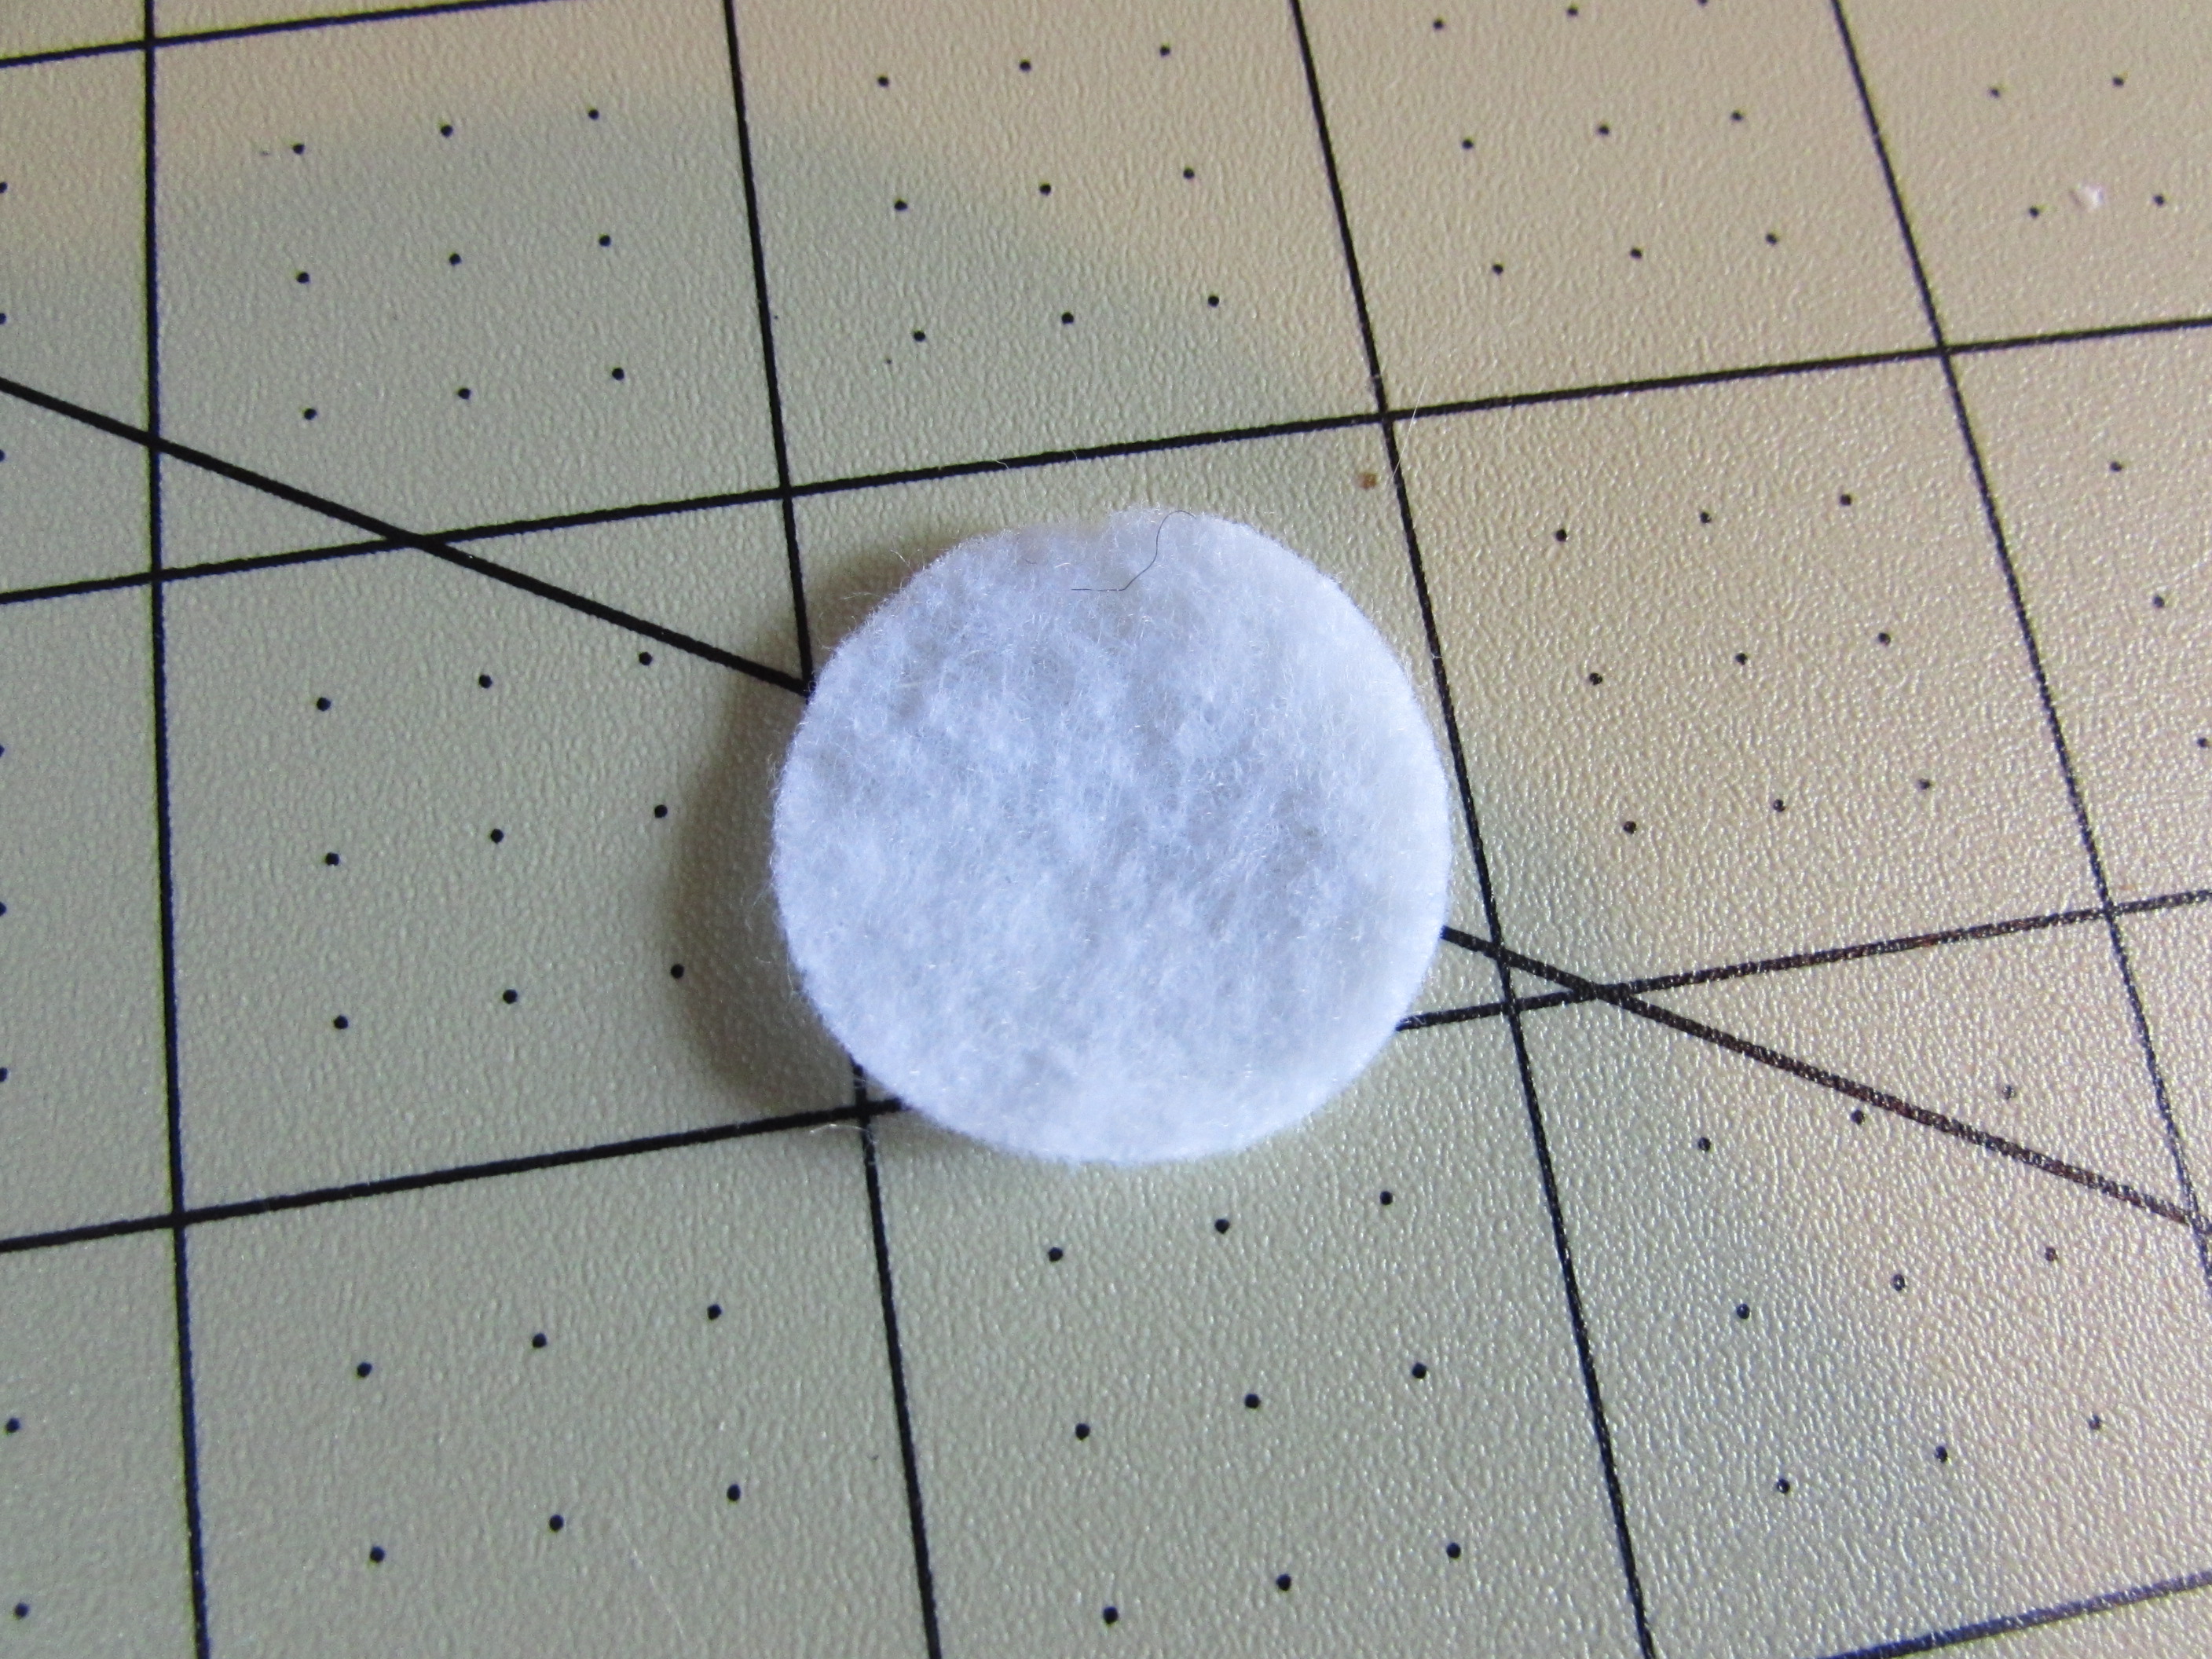
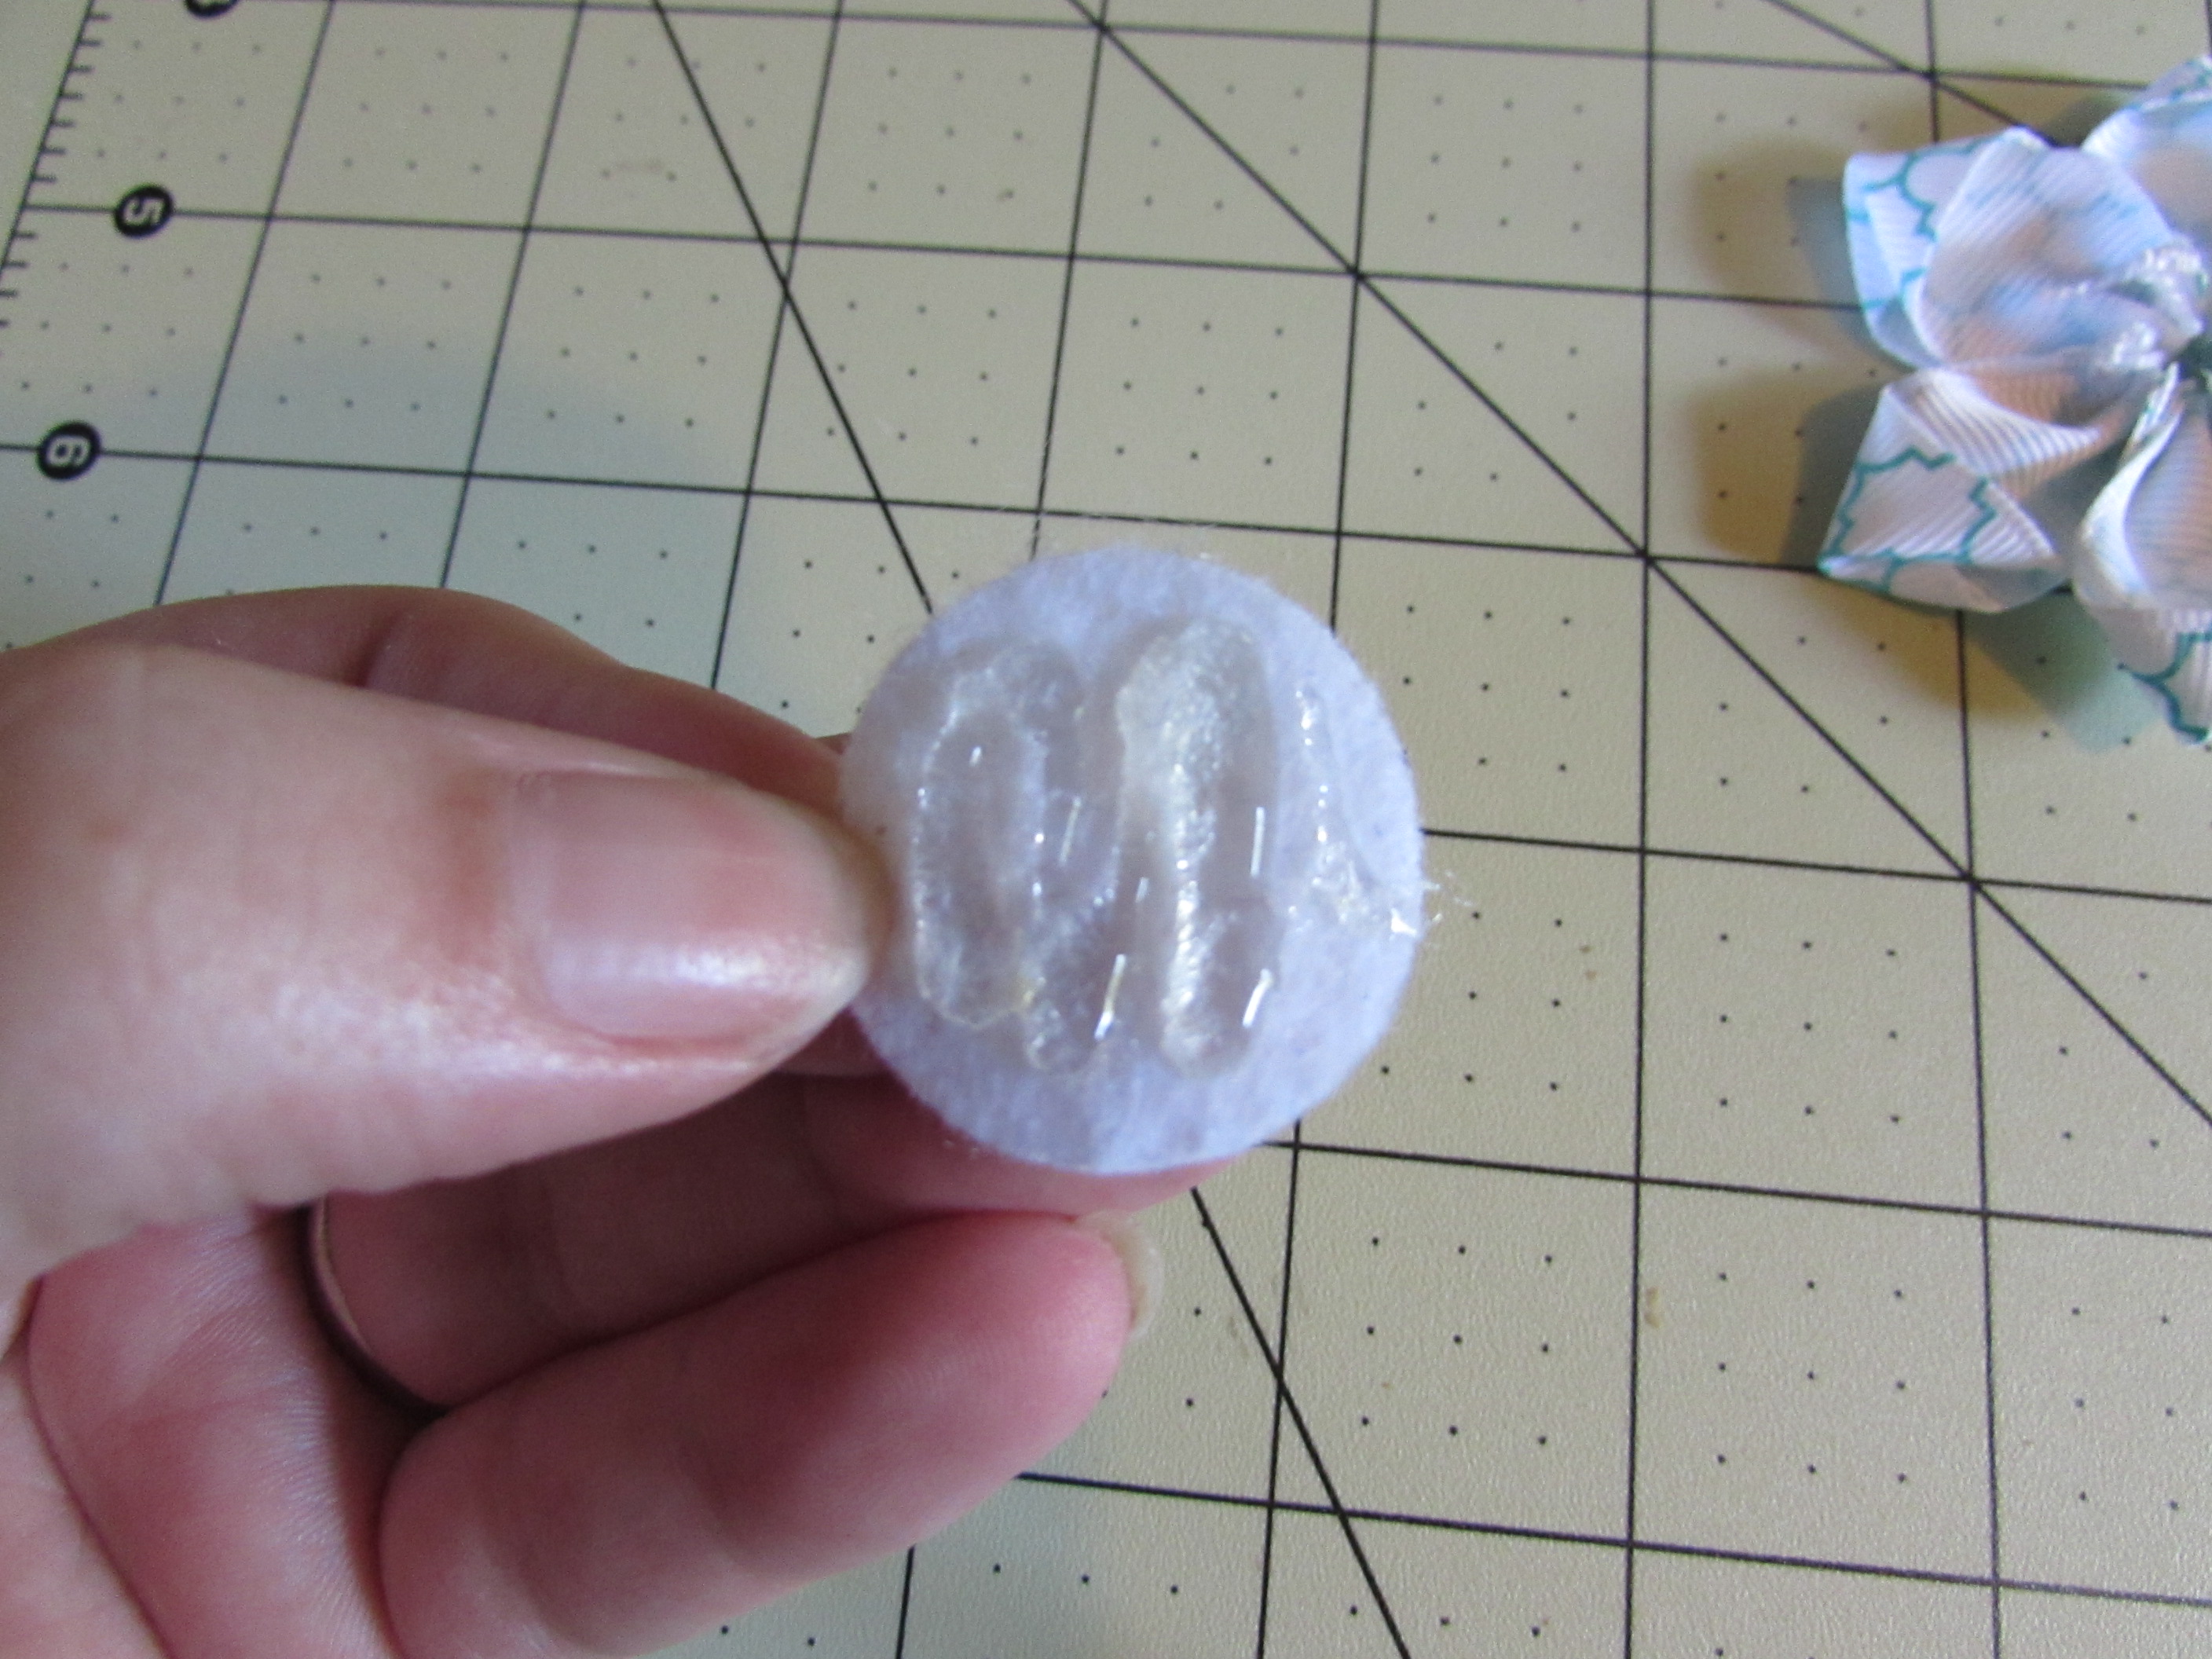
 Step 15: Take your 1" felt circle and apply hotglue on one side then lay it down on the center of the flower.
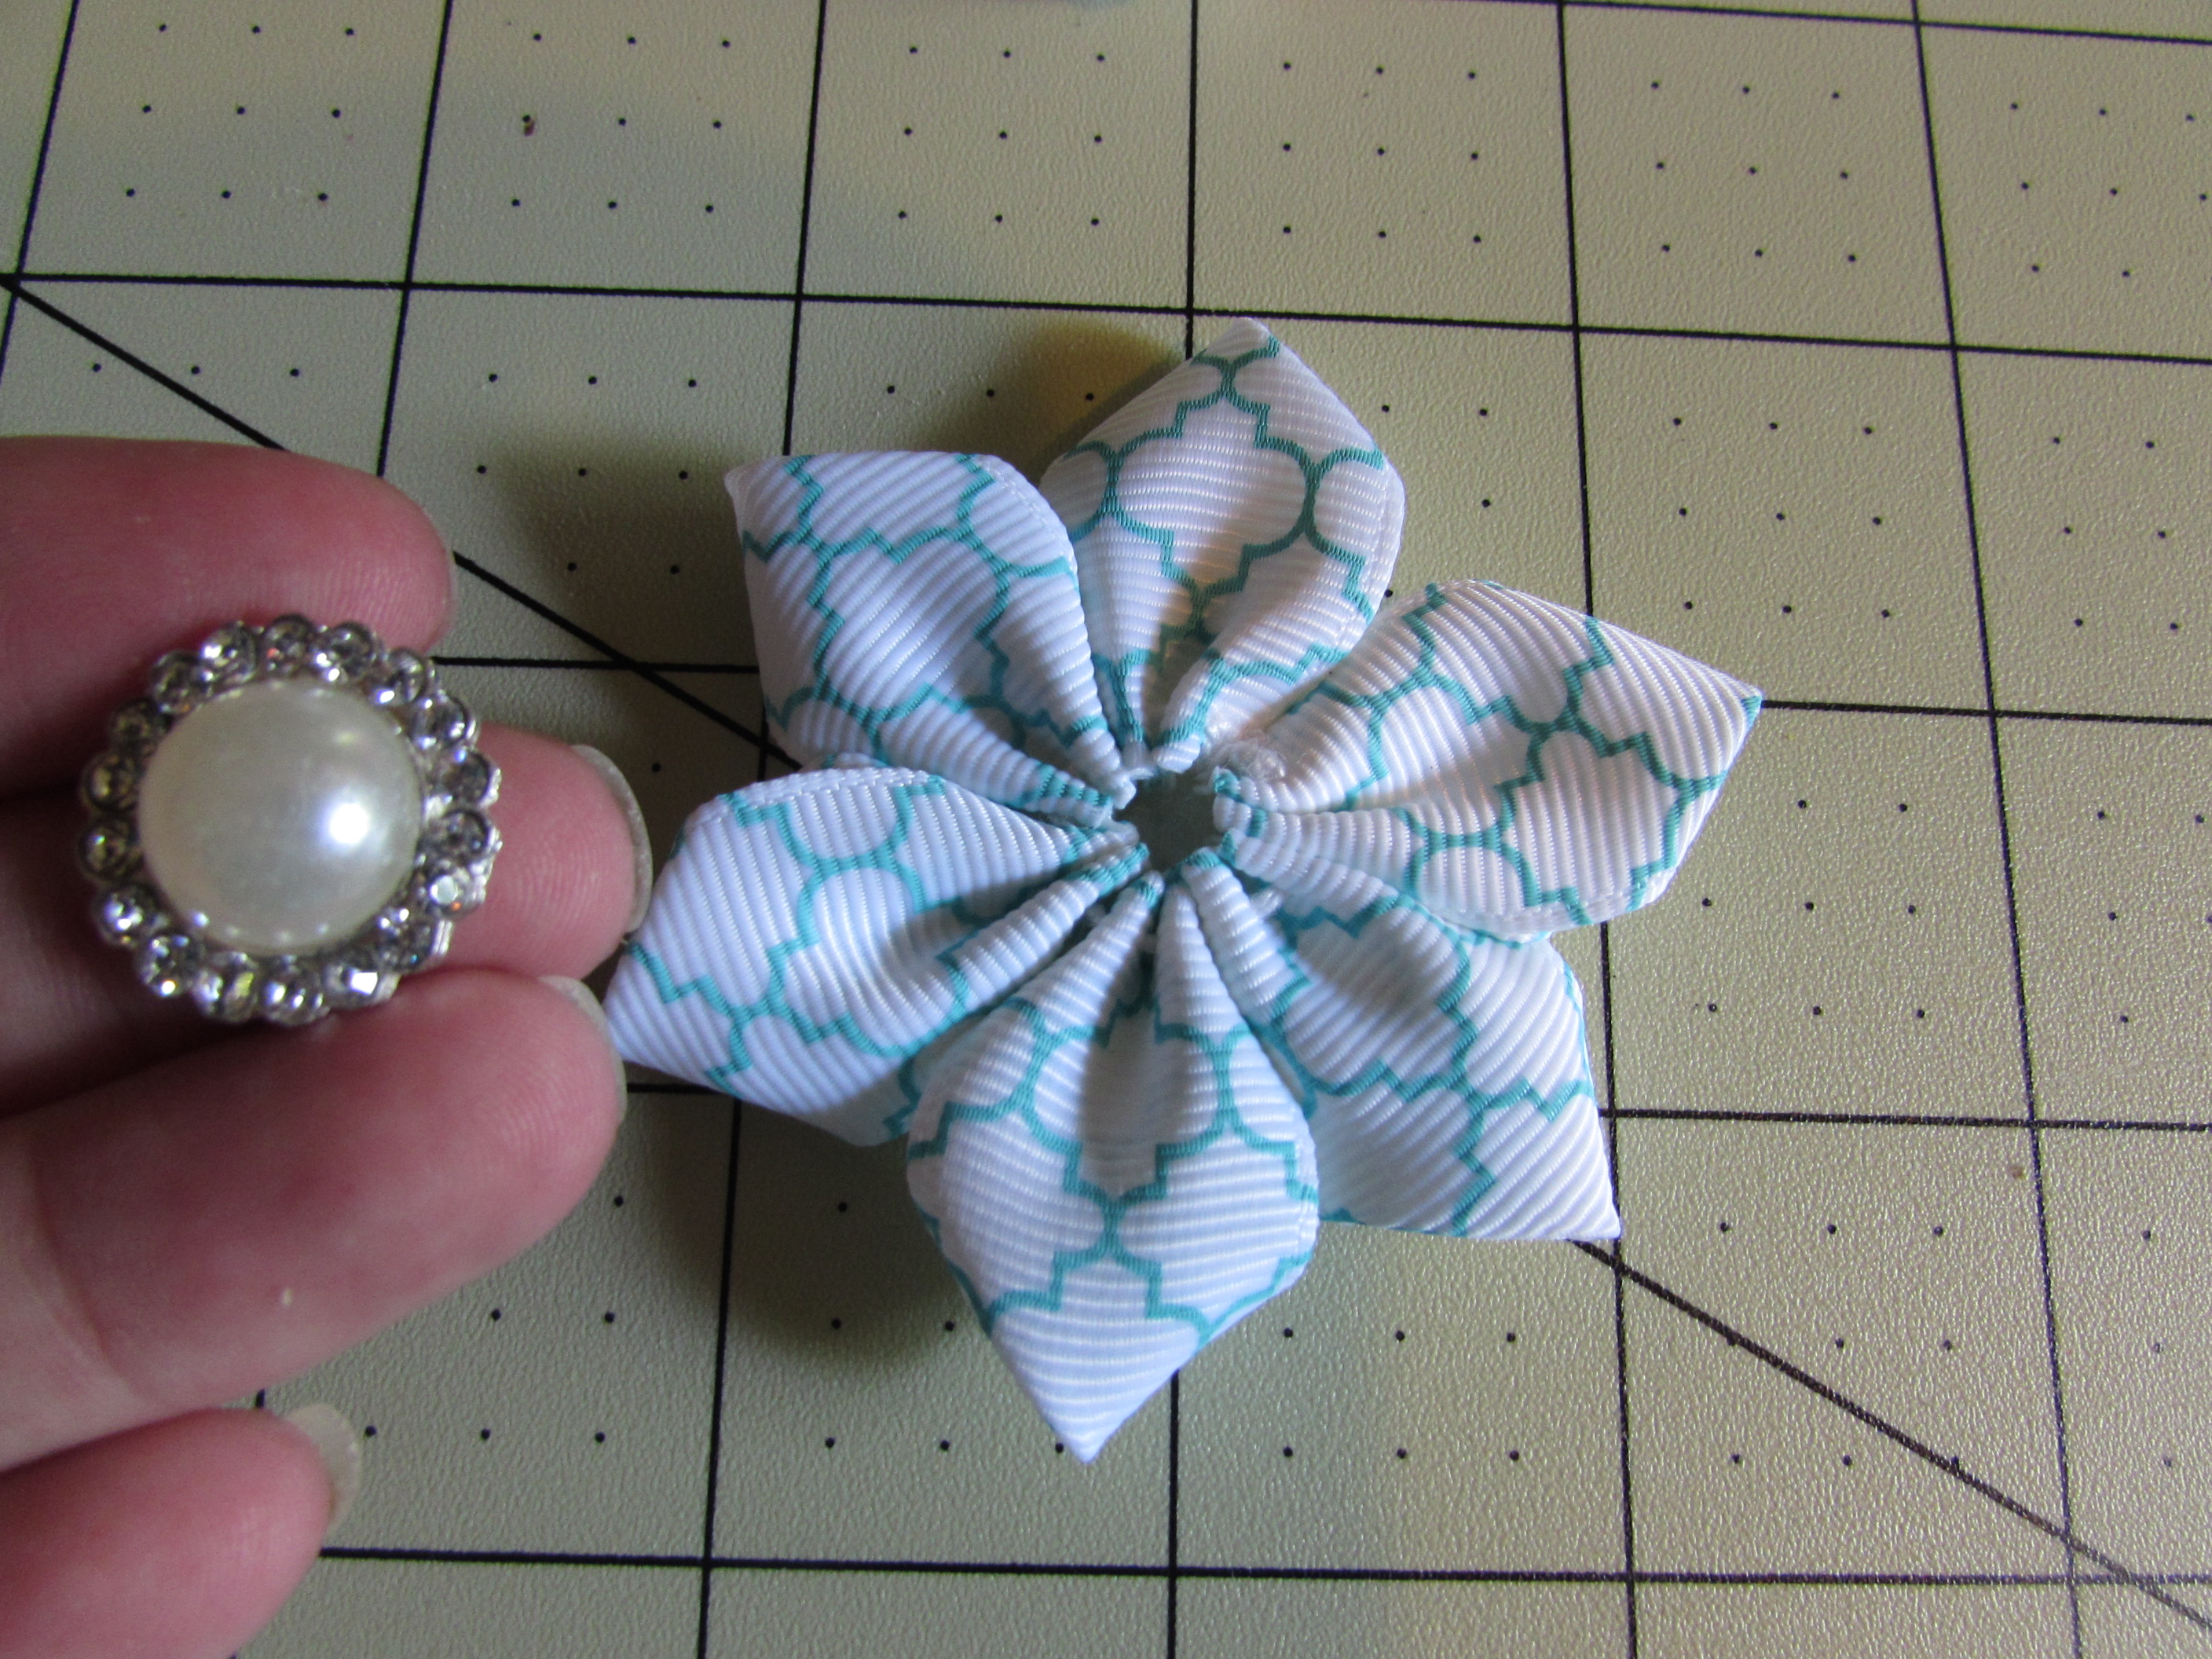
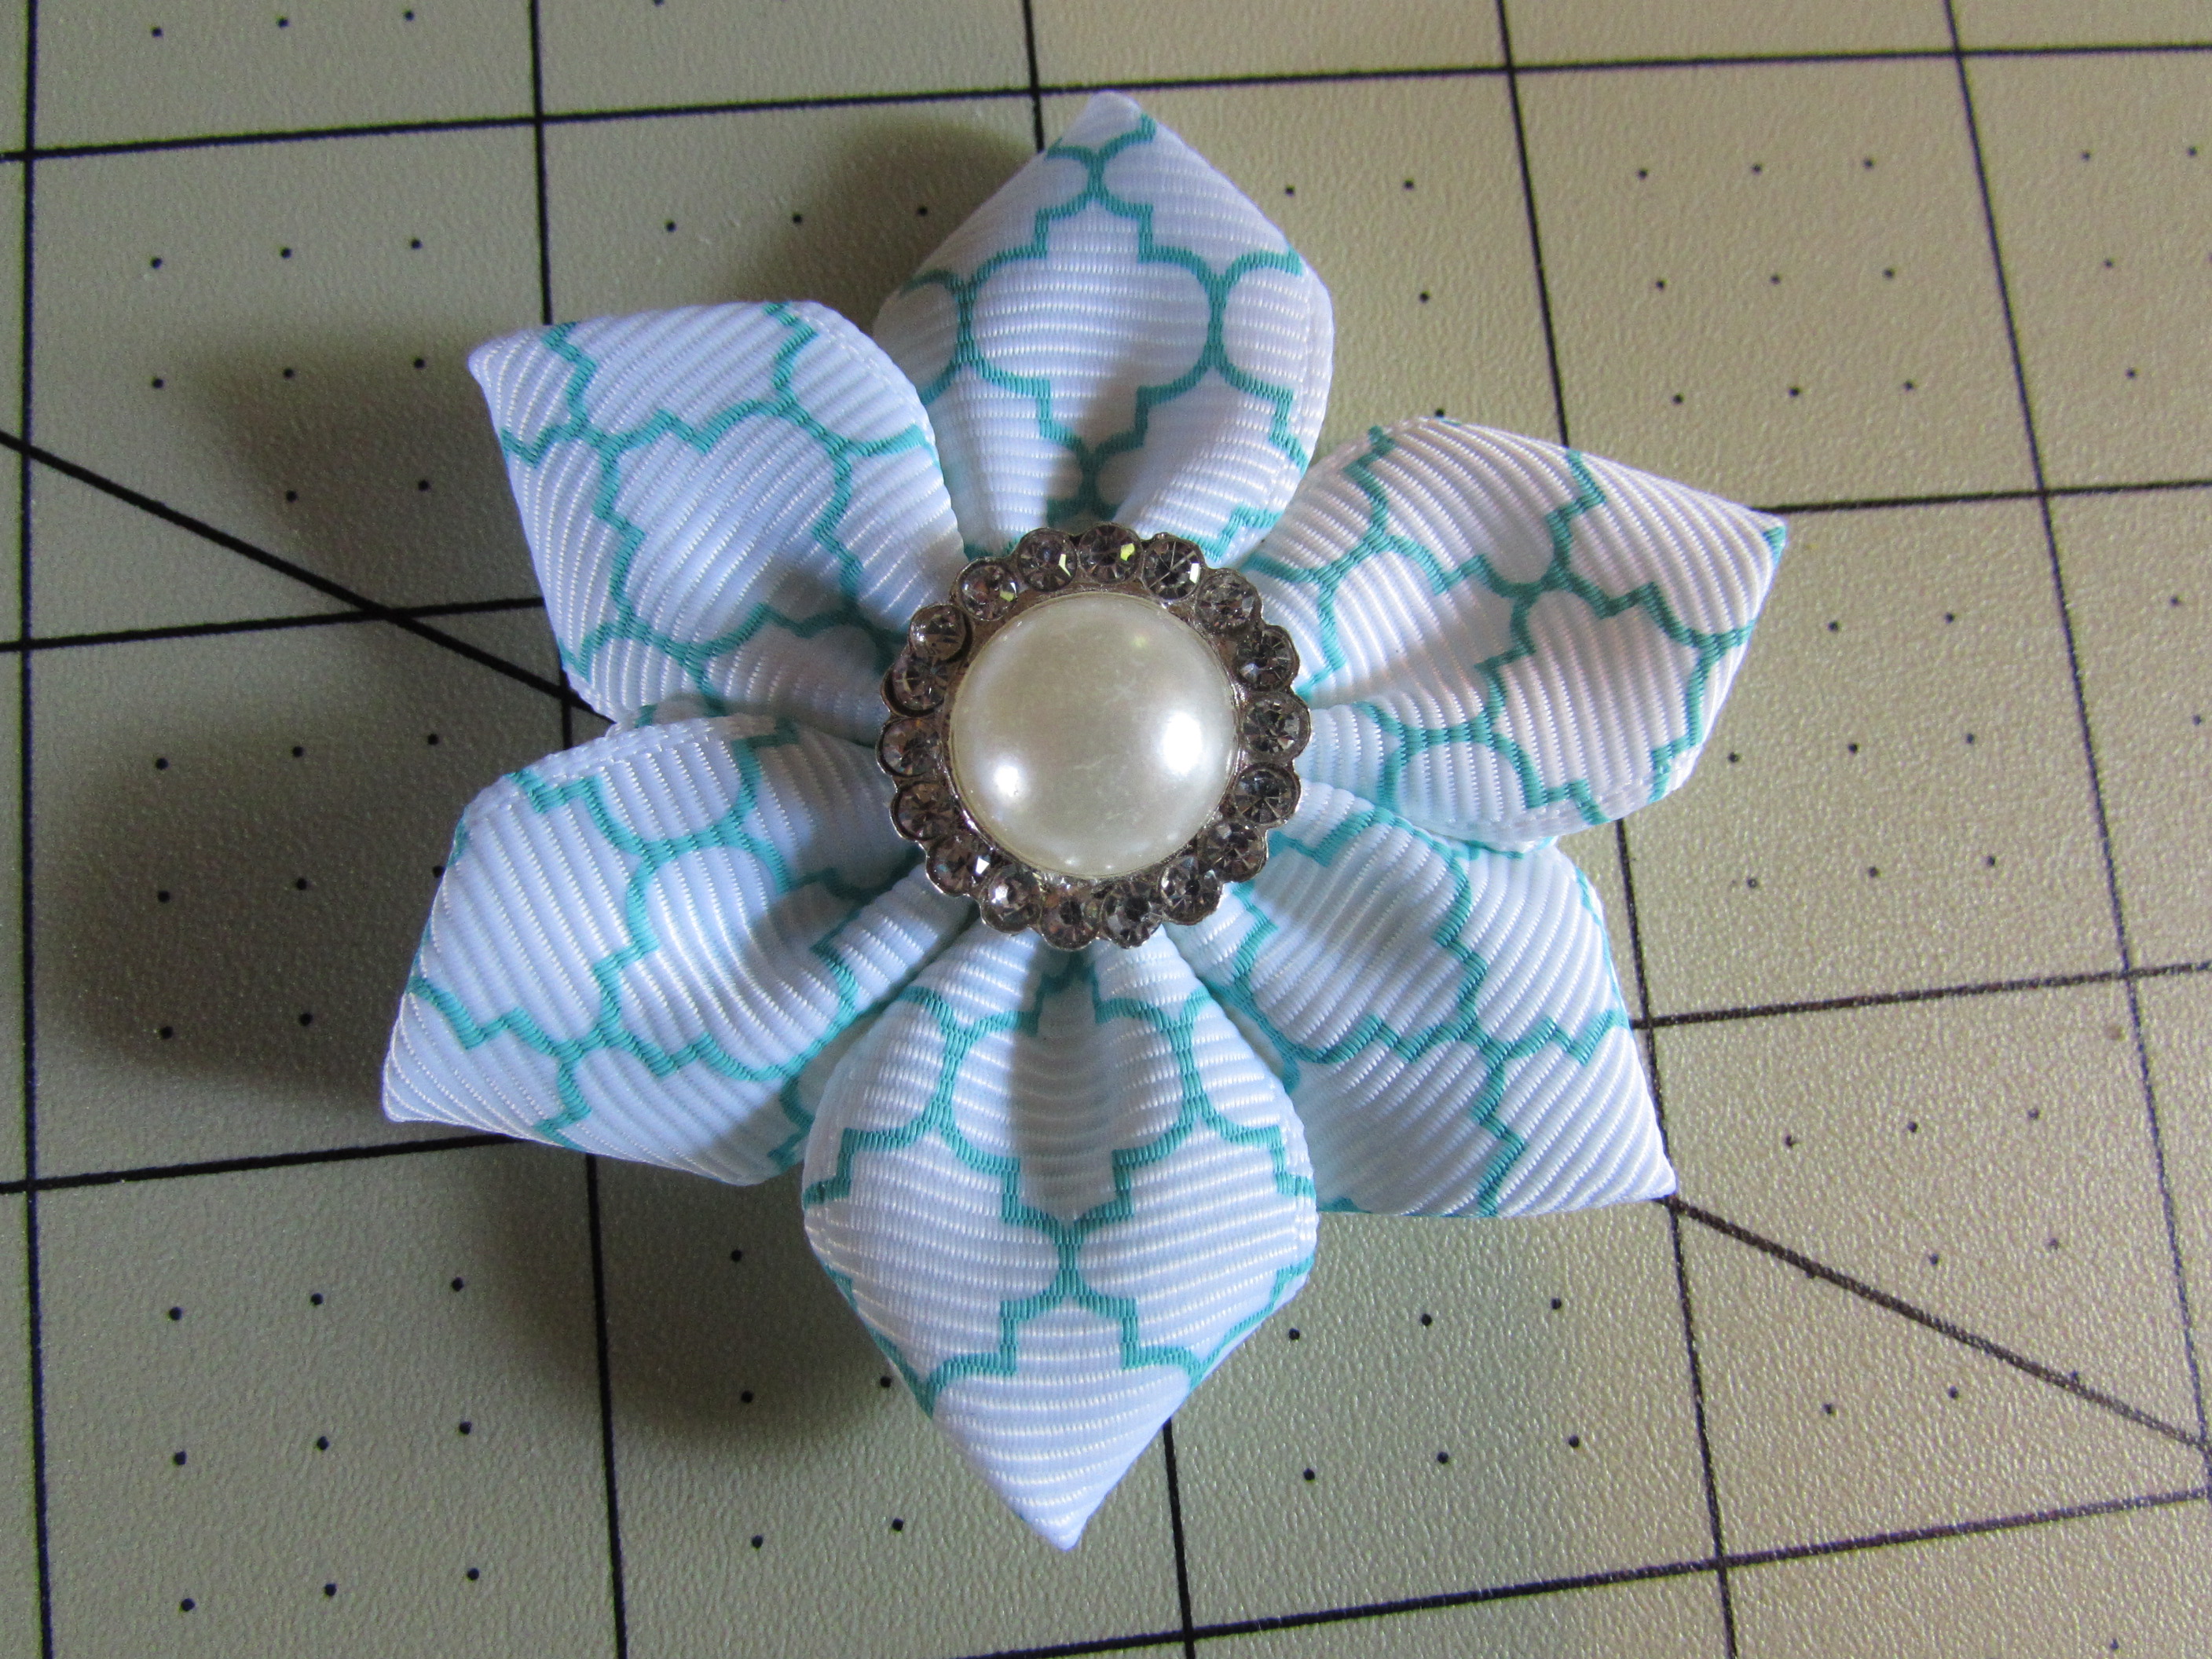
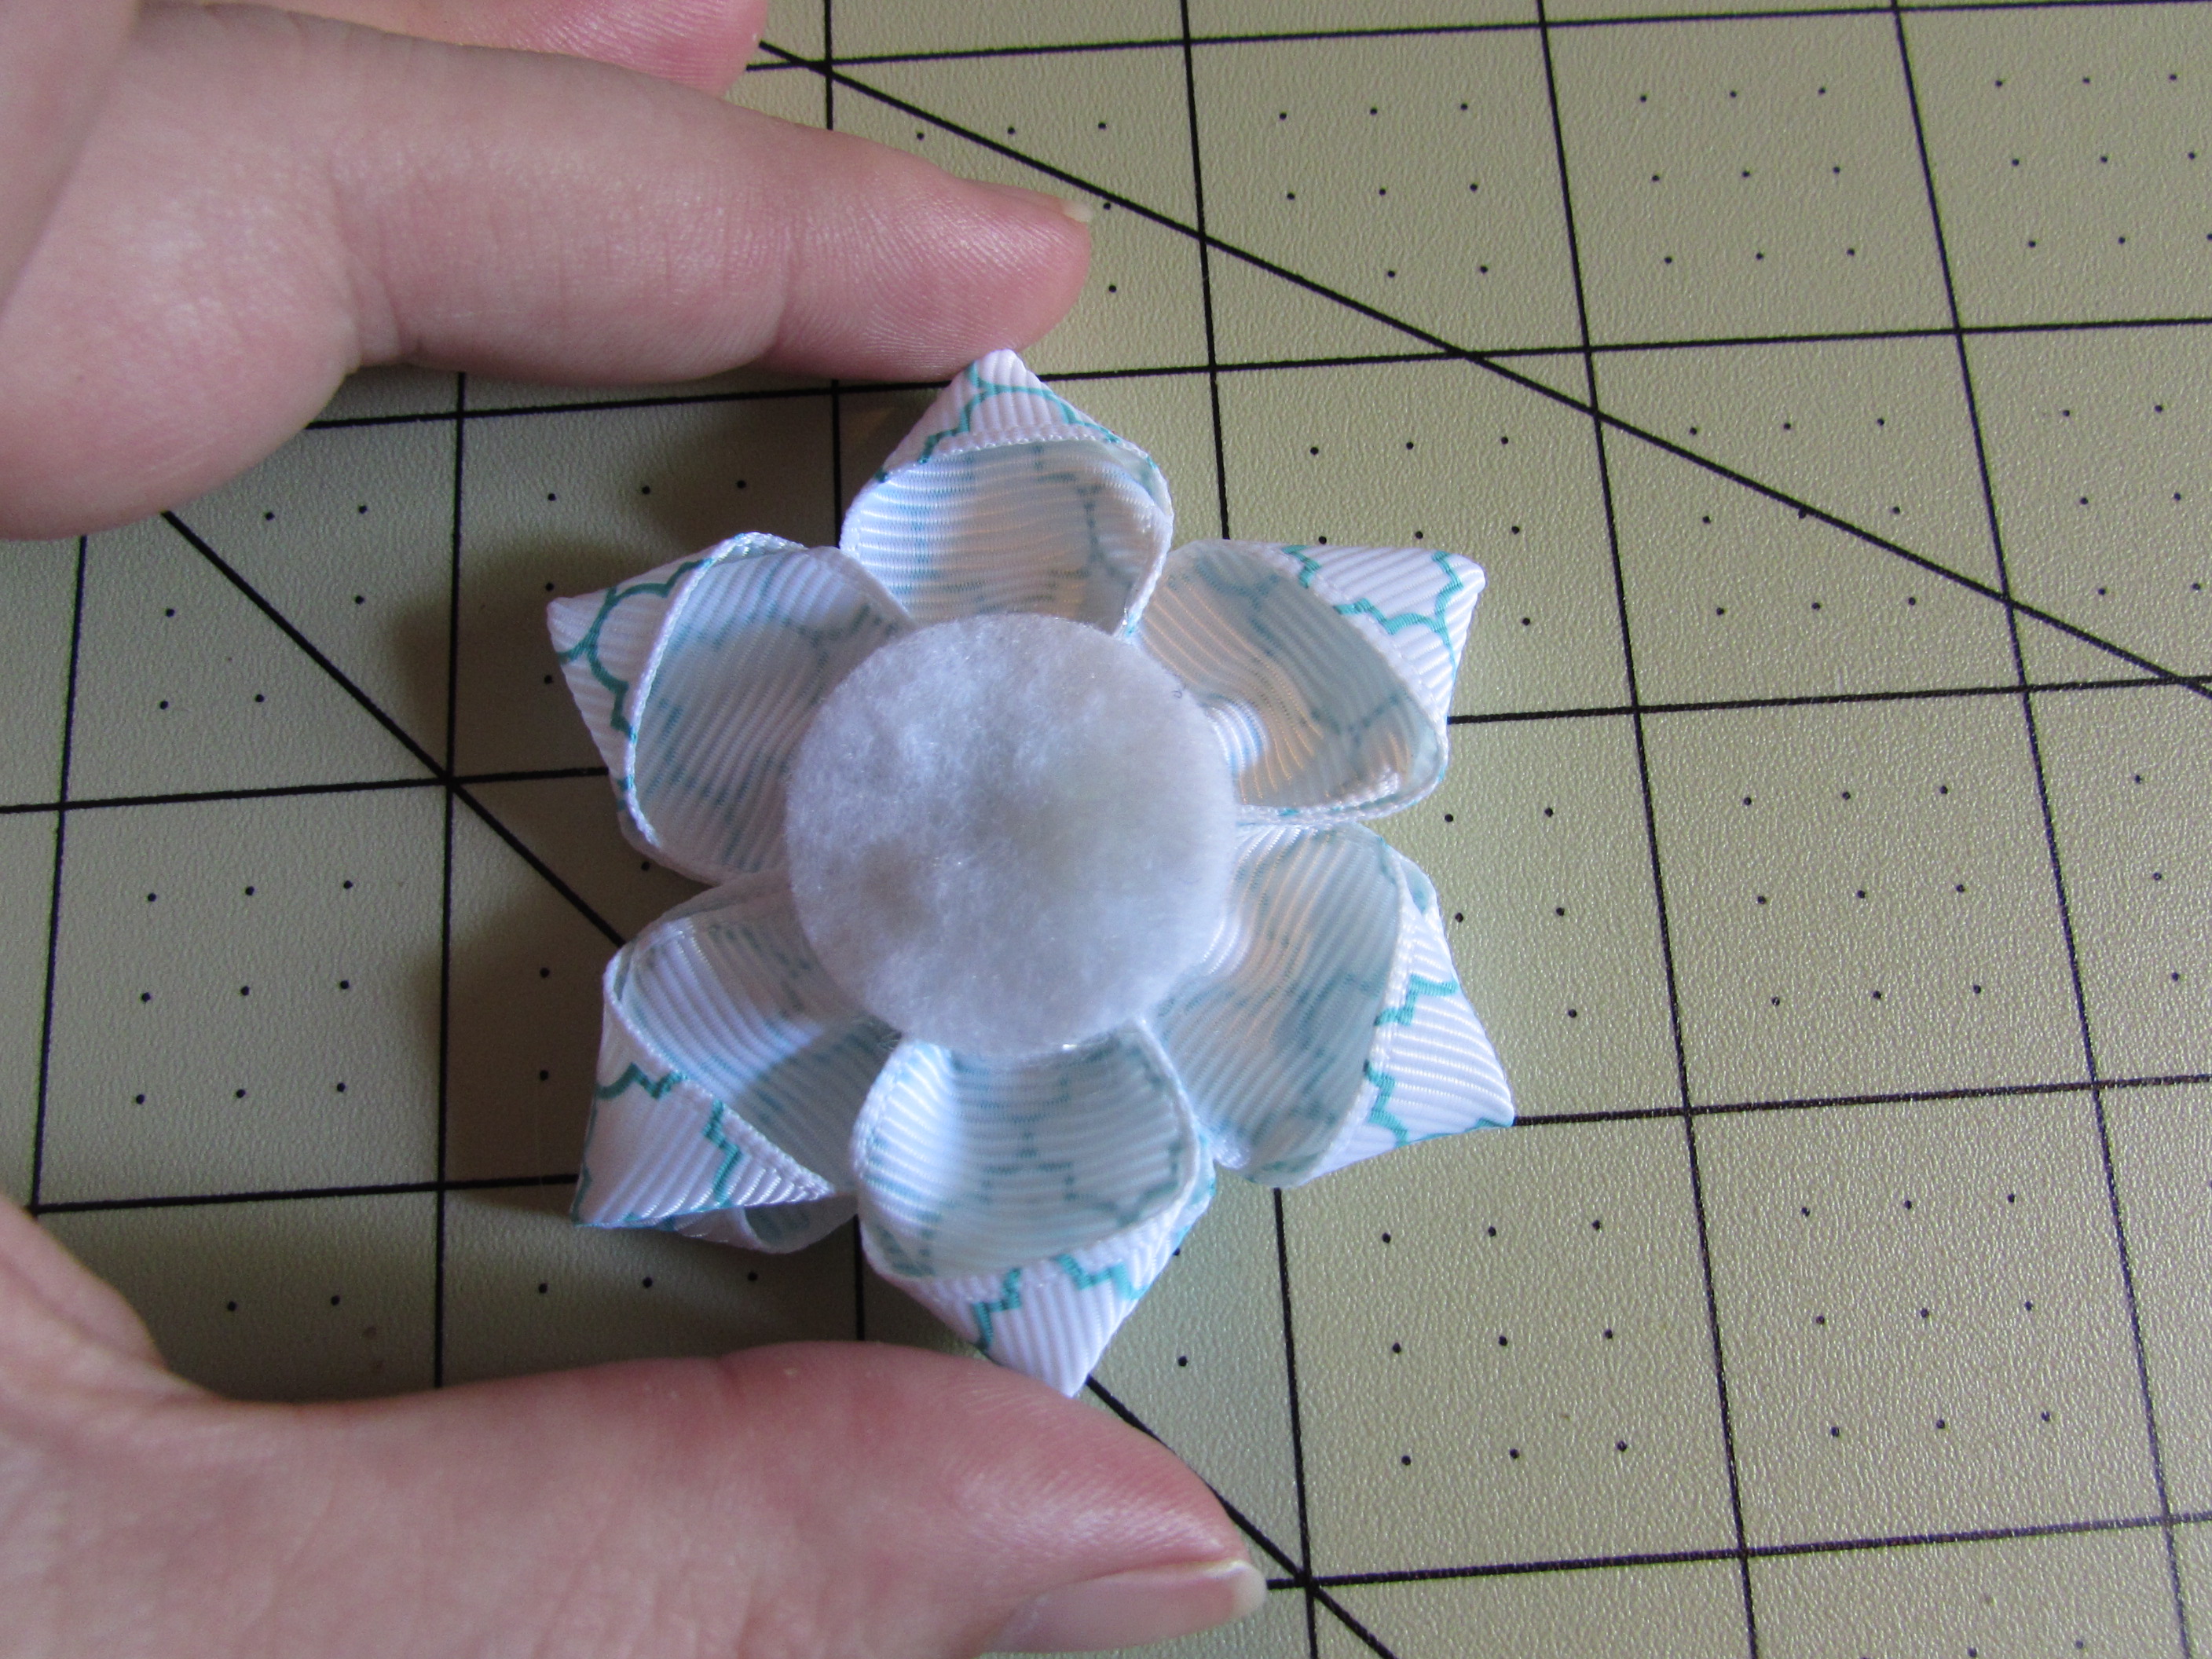 Step 16: Flip the flower over and pick your center and glue it down

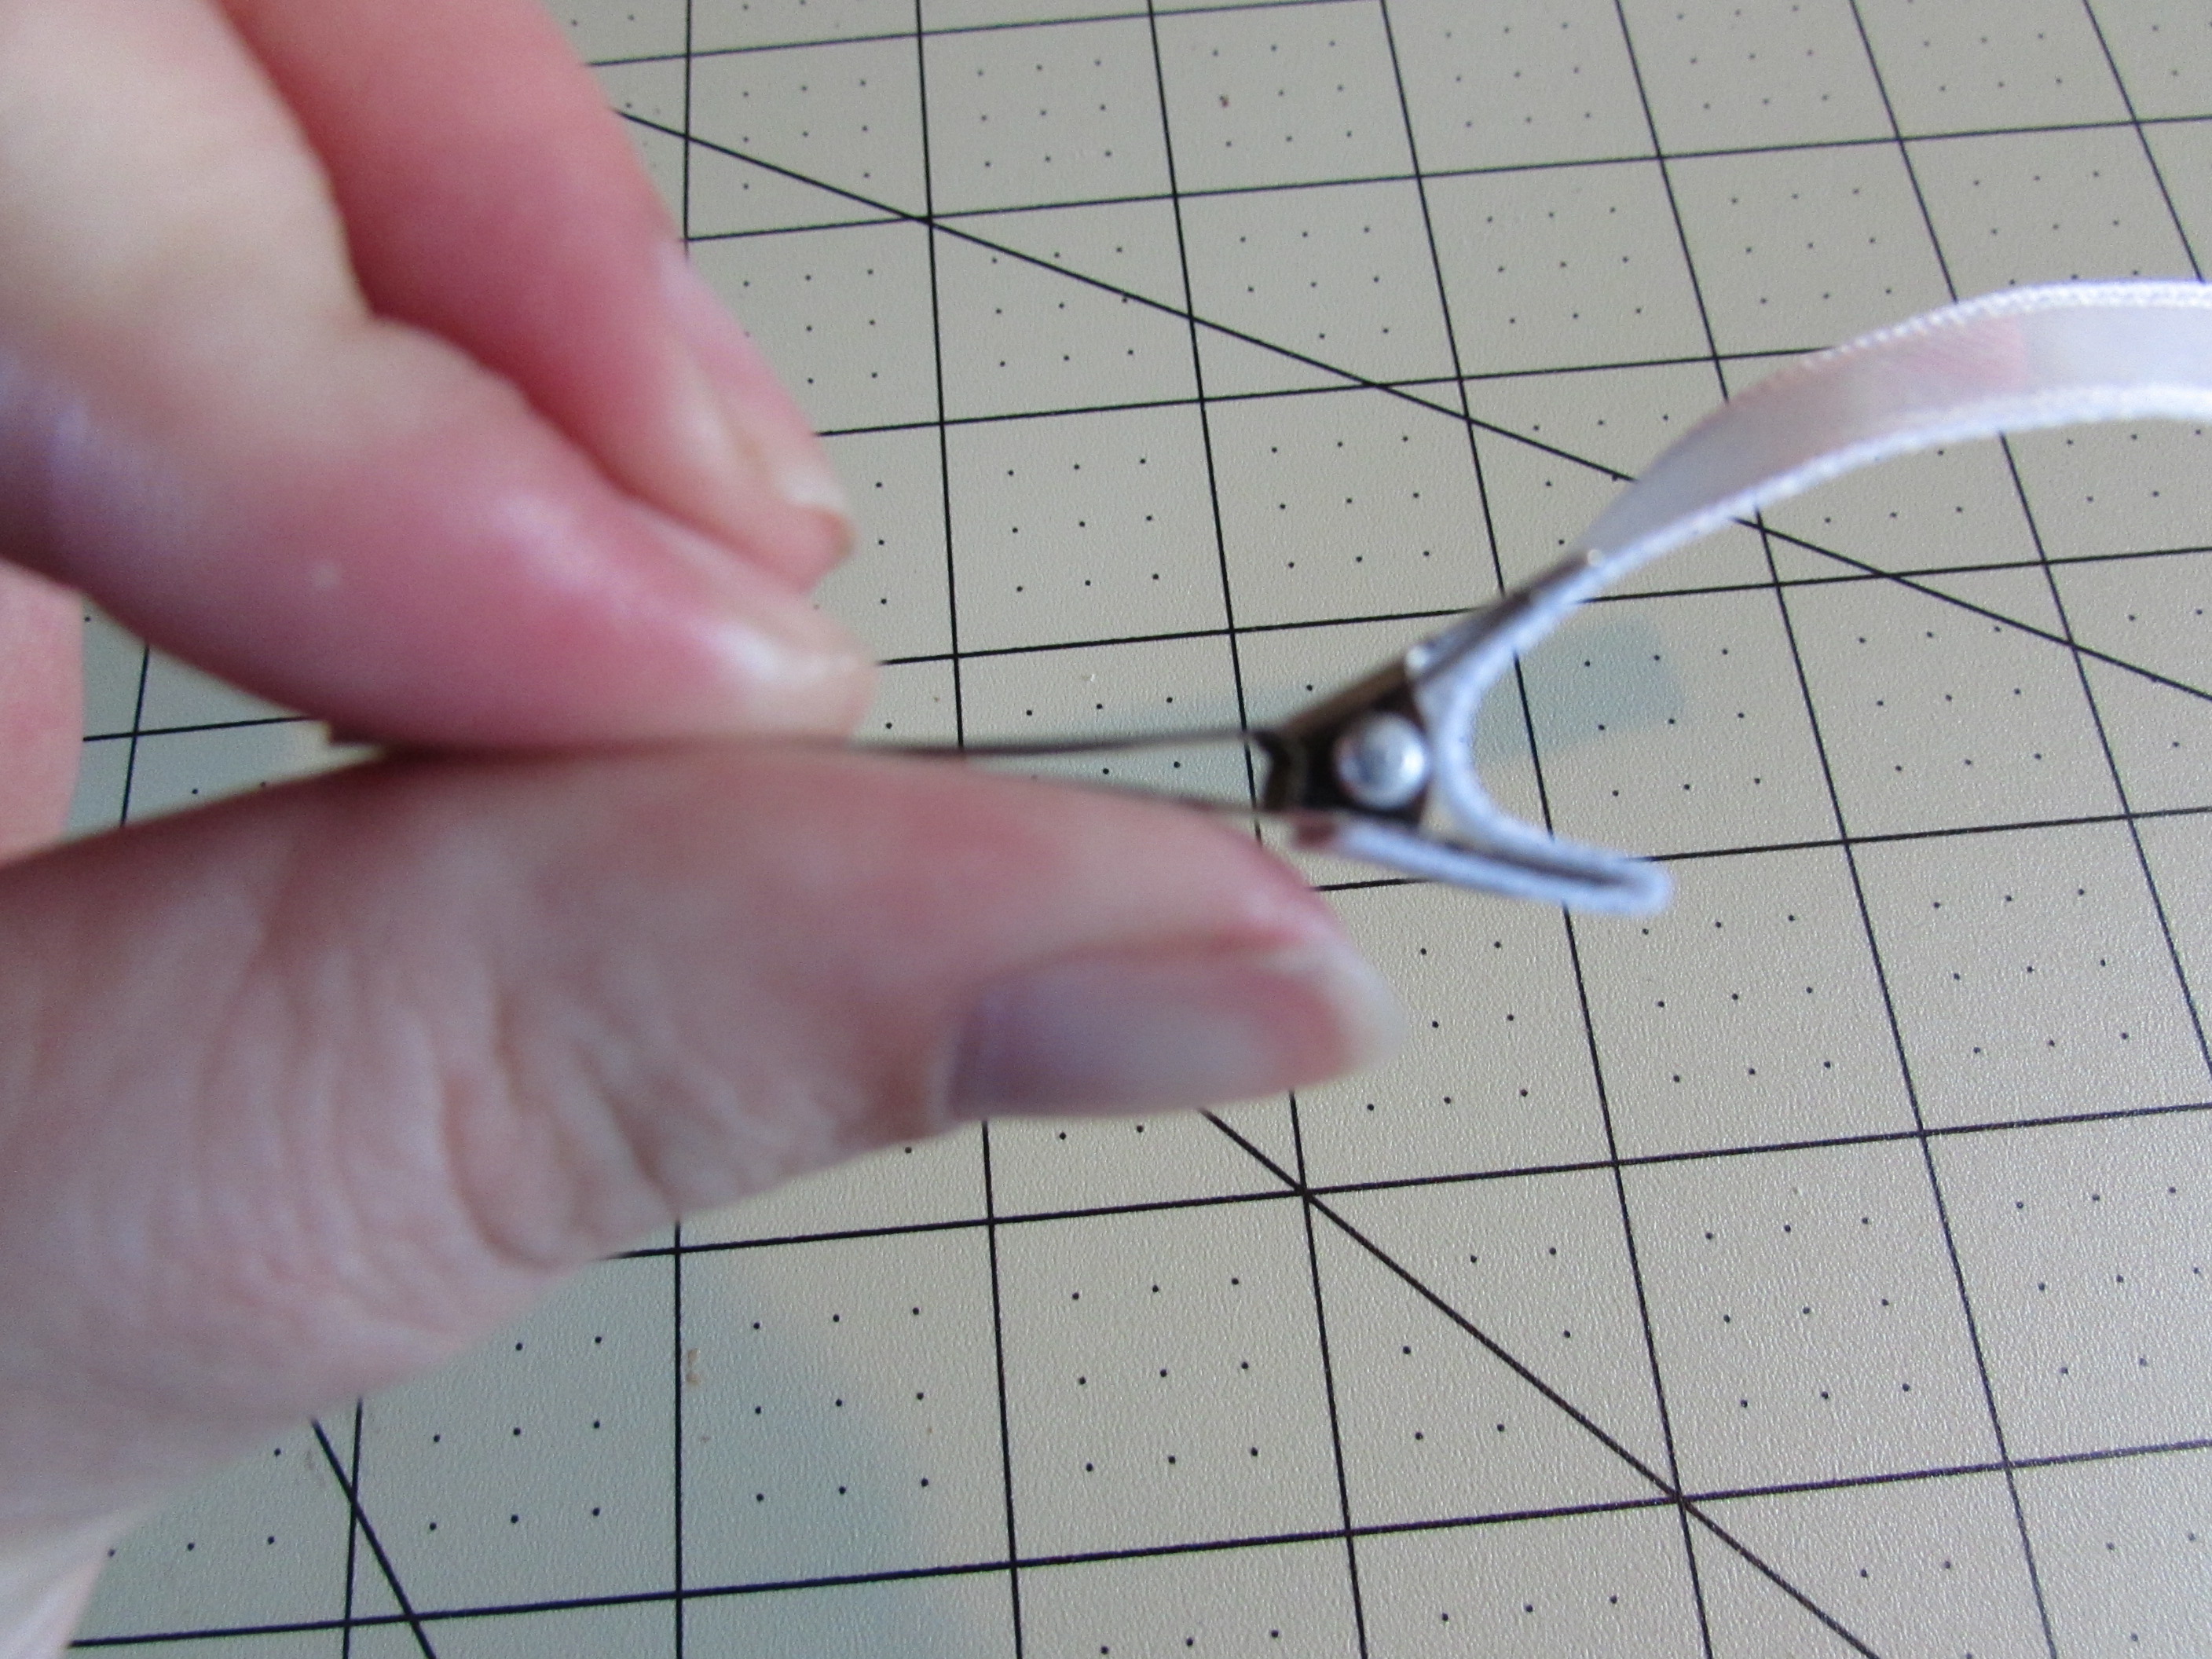
 Step 17: Attach your clip
Supplies Needed for this step:
3/8" about 4" long
HEAT SEAL!
Fillet Tape
Scissors
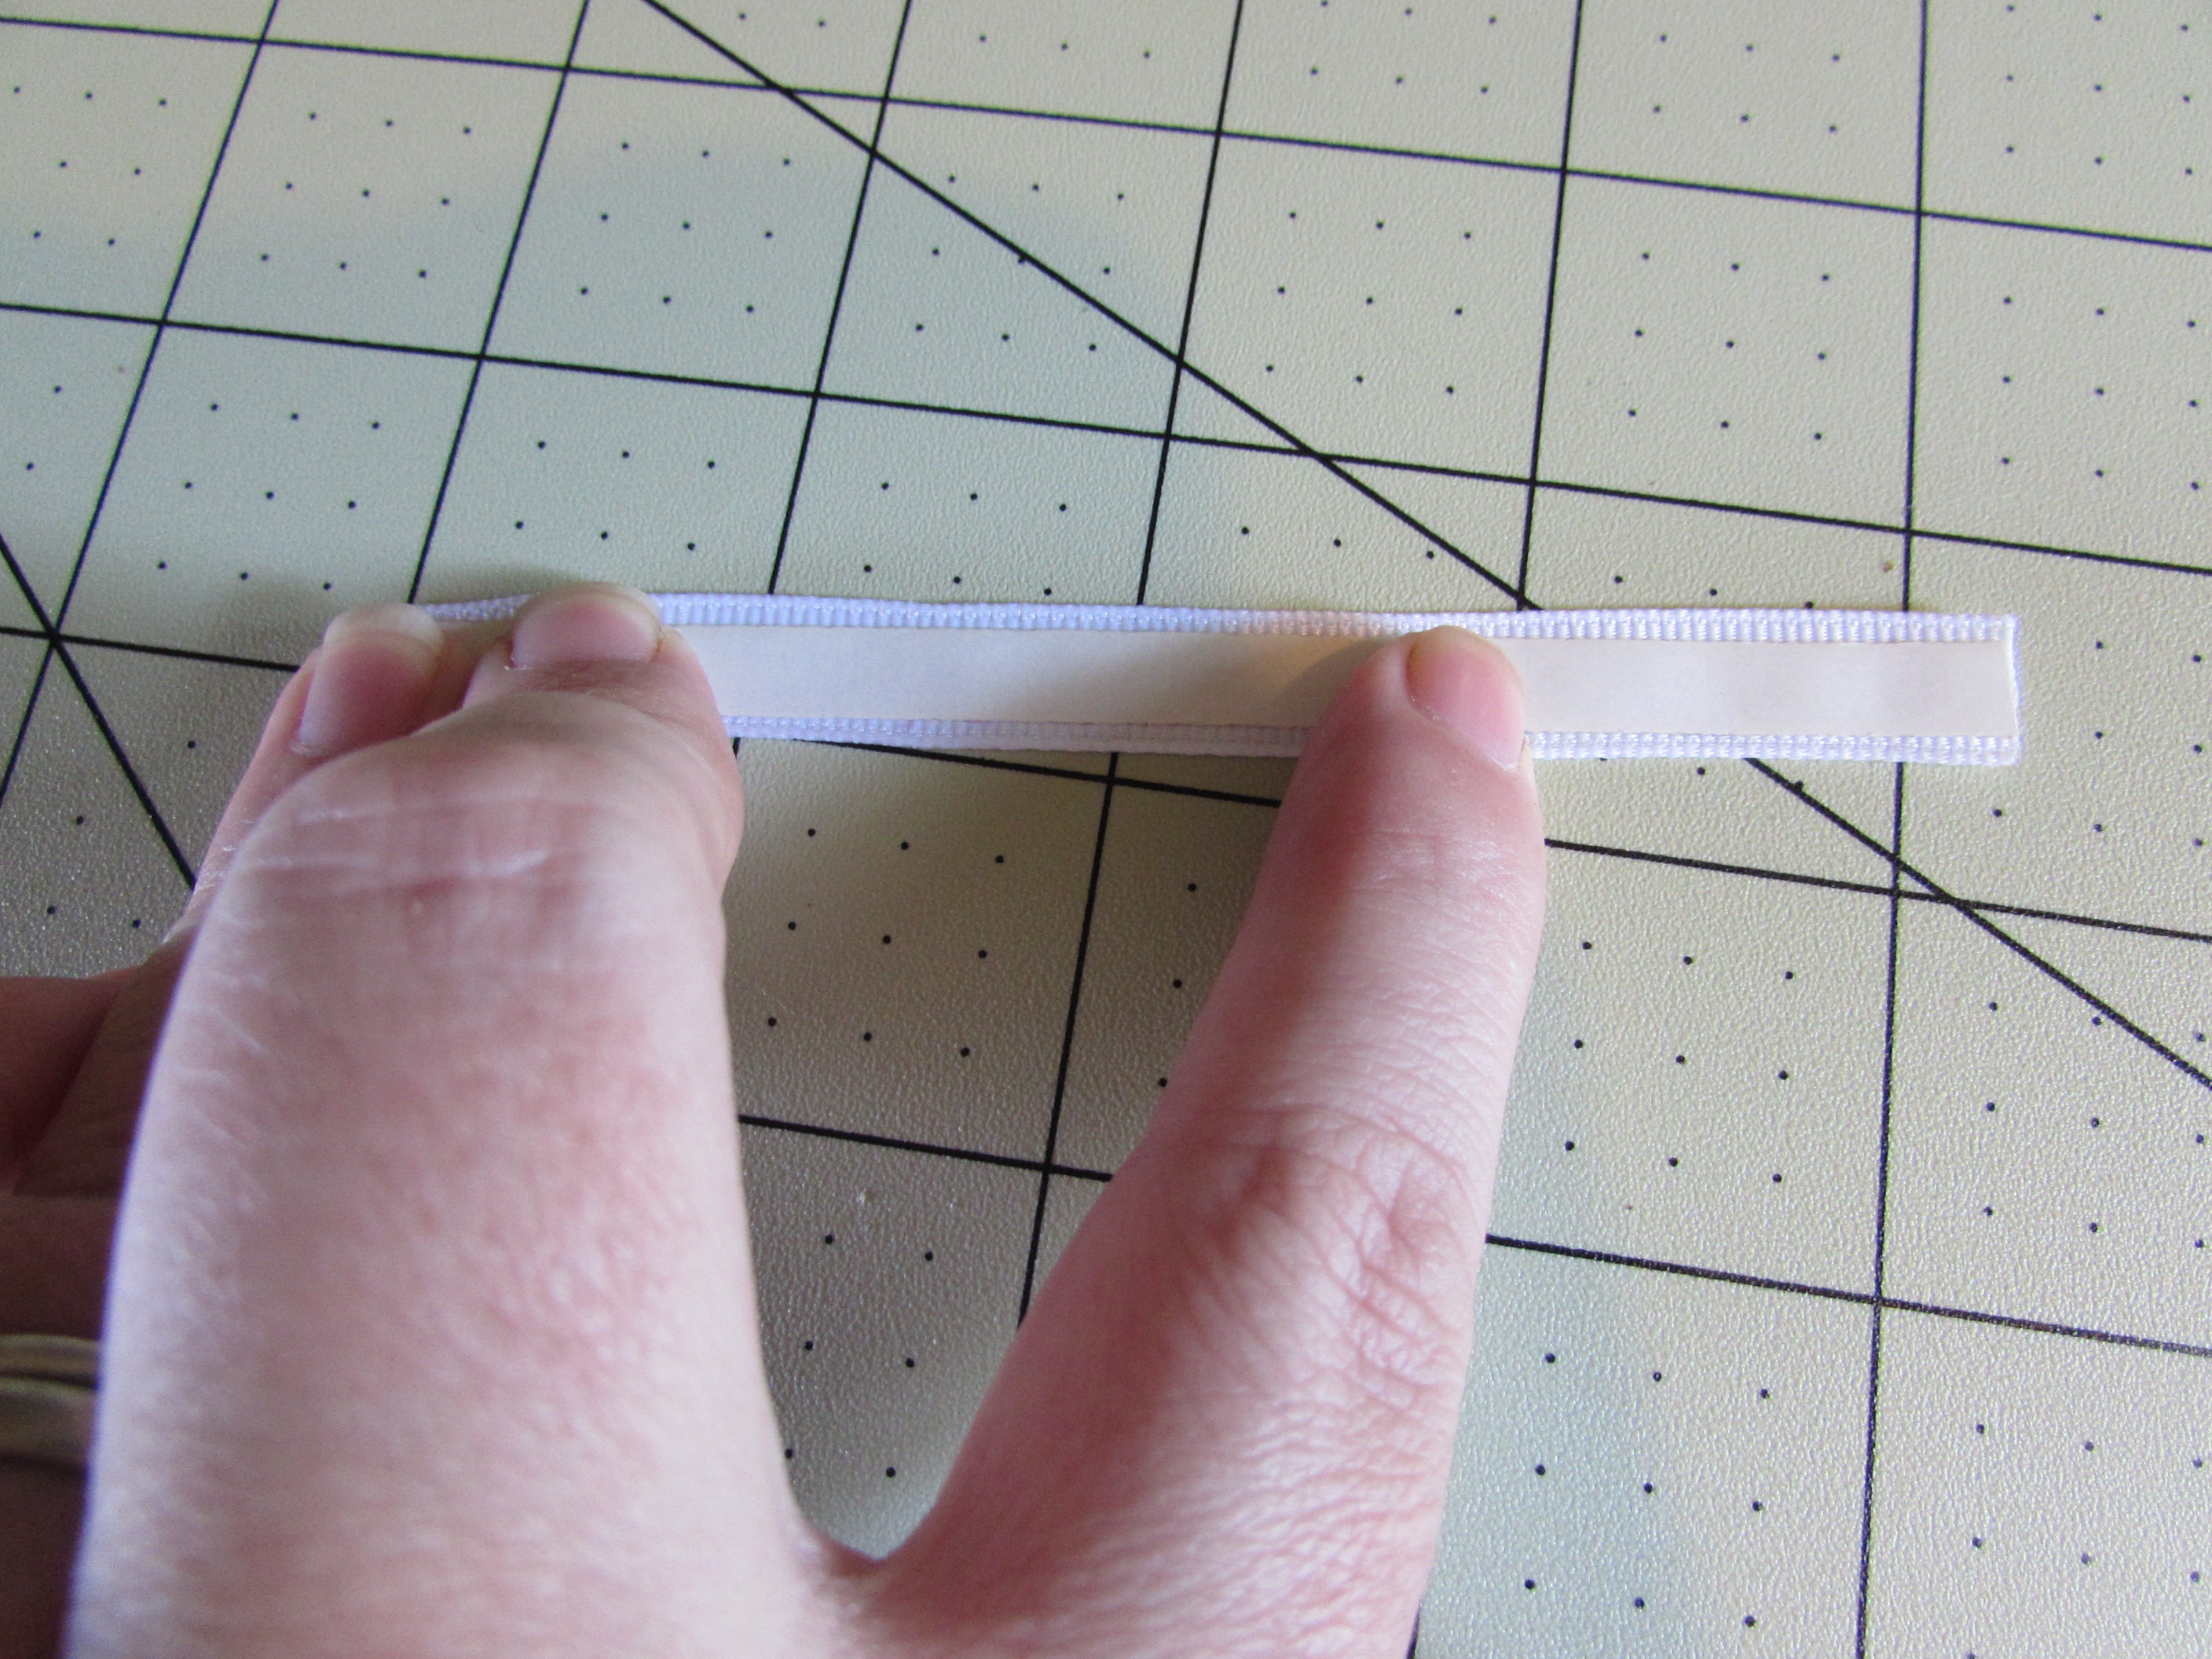
Step 17(a): Pull the fillet tape apart and lay sticky side down onto your 3/8" ribbon
Step 17: Attach your clip
Supplies Needed for this step:
3/8" about 4" long
HEAT SEAL!
Fillet Tape
Scissors
Step 17(a): Pull the fillet tape apart and lay sticky side down onto your 3/8" ribbon
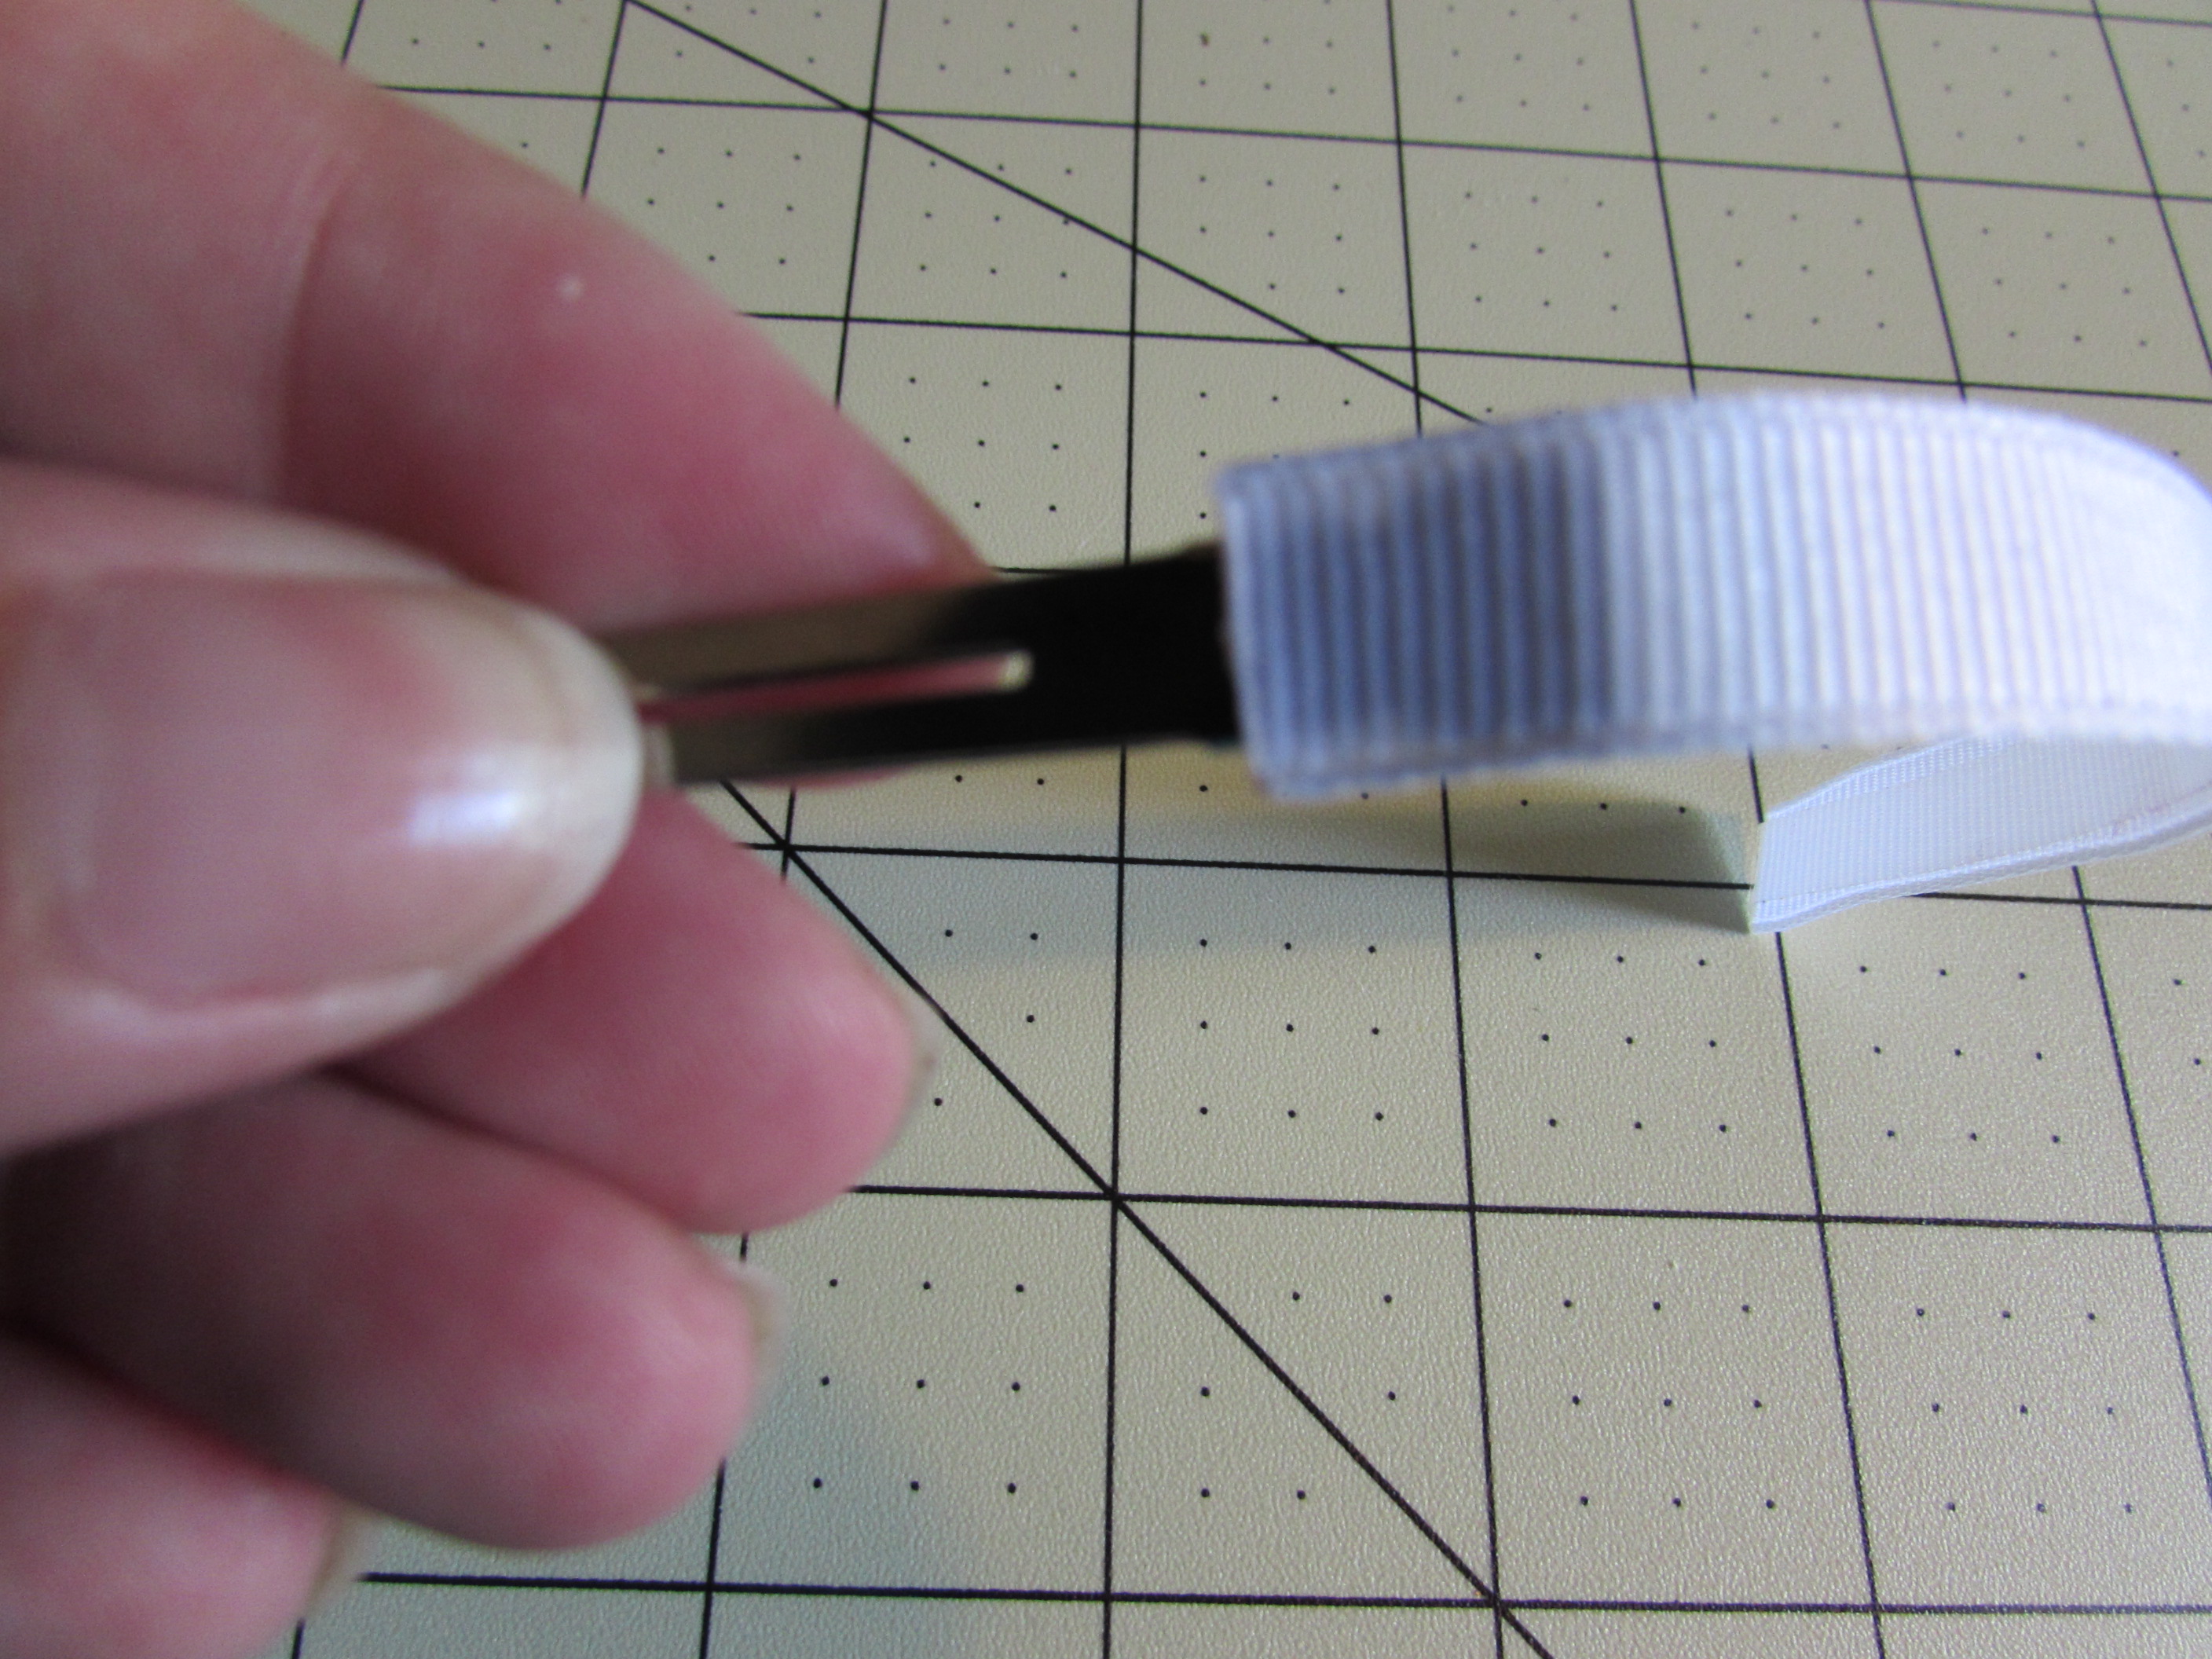
 Step 17(b): Cut off the fillet tape
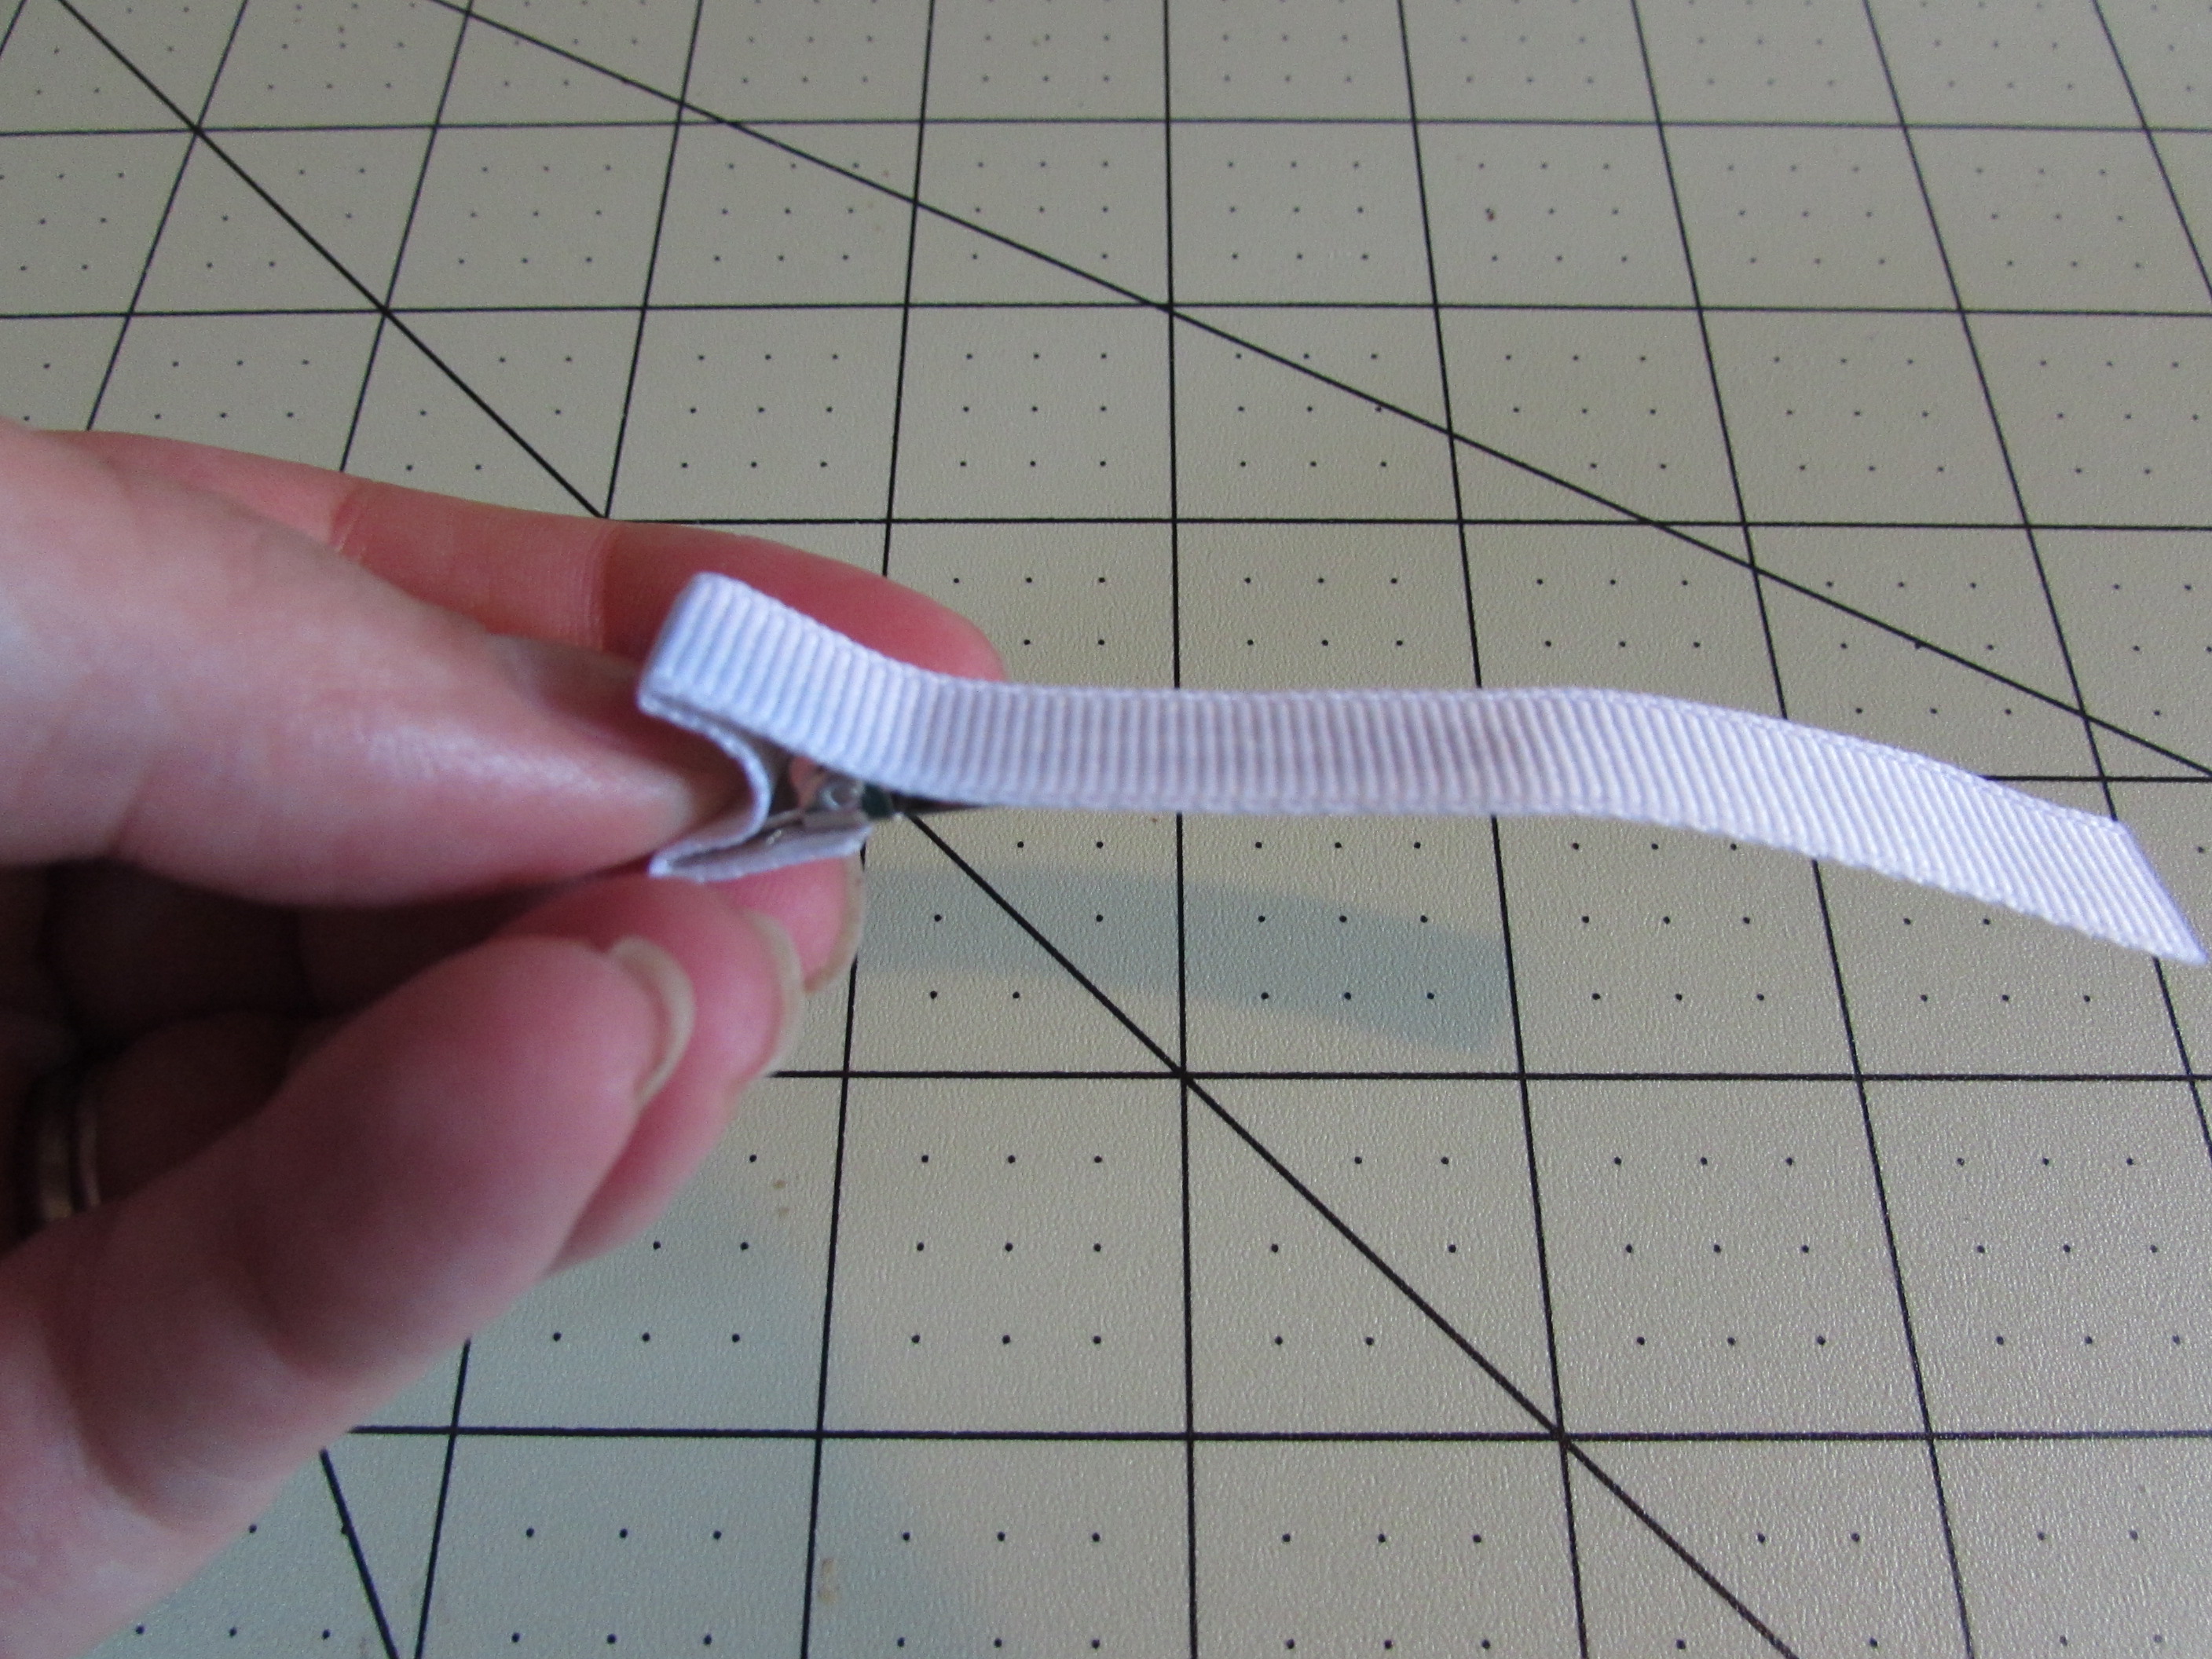
 Step 17(c): Press the fillet tape down for a few seconds. I do about a minute to secure the ribbon and fillet tape together.
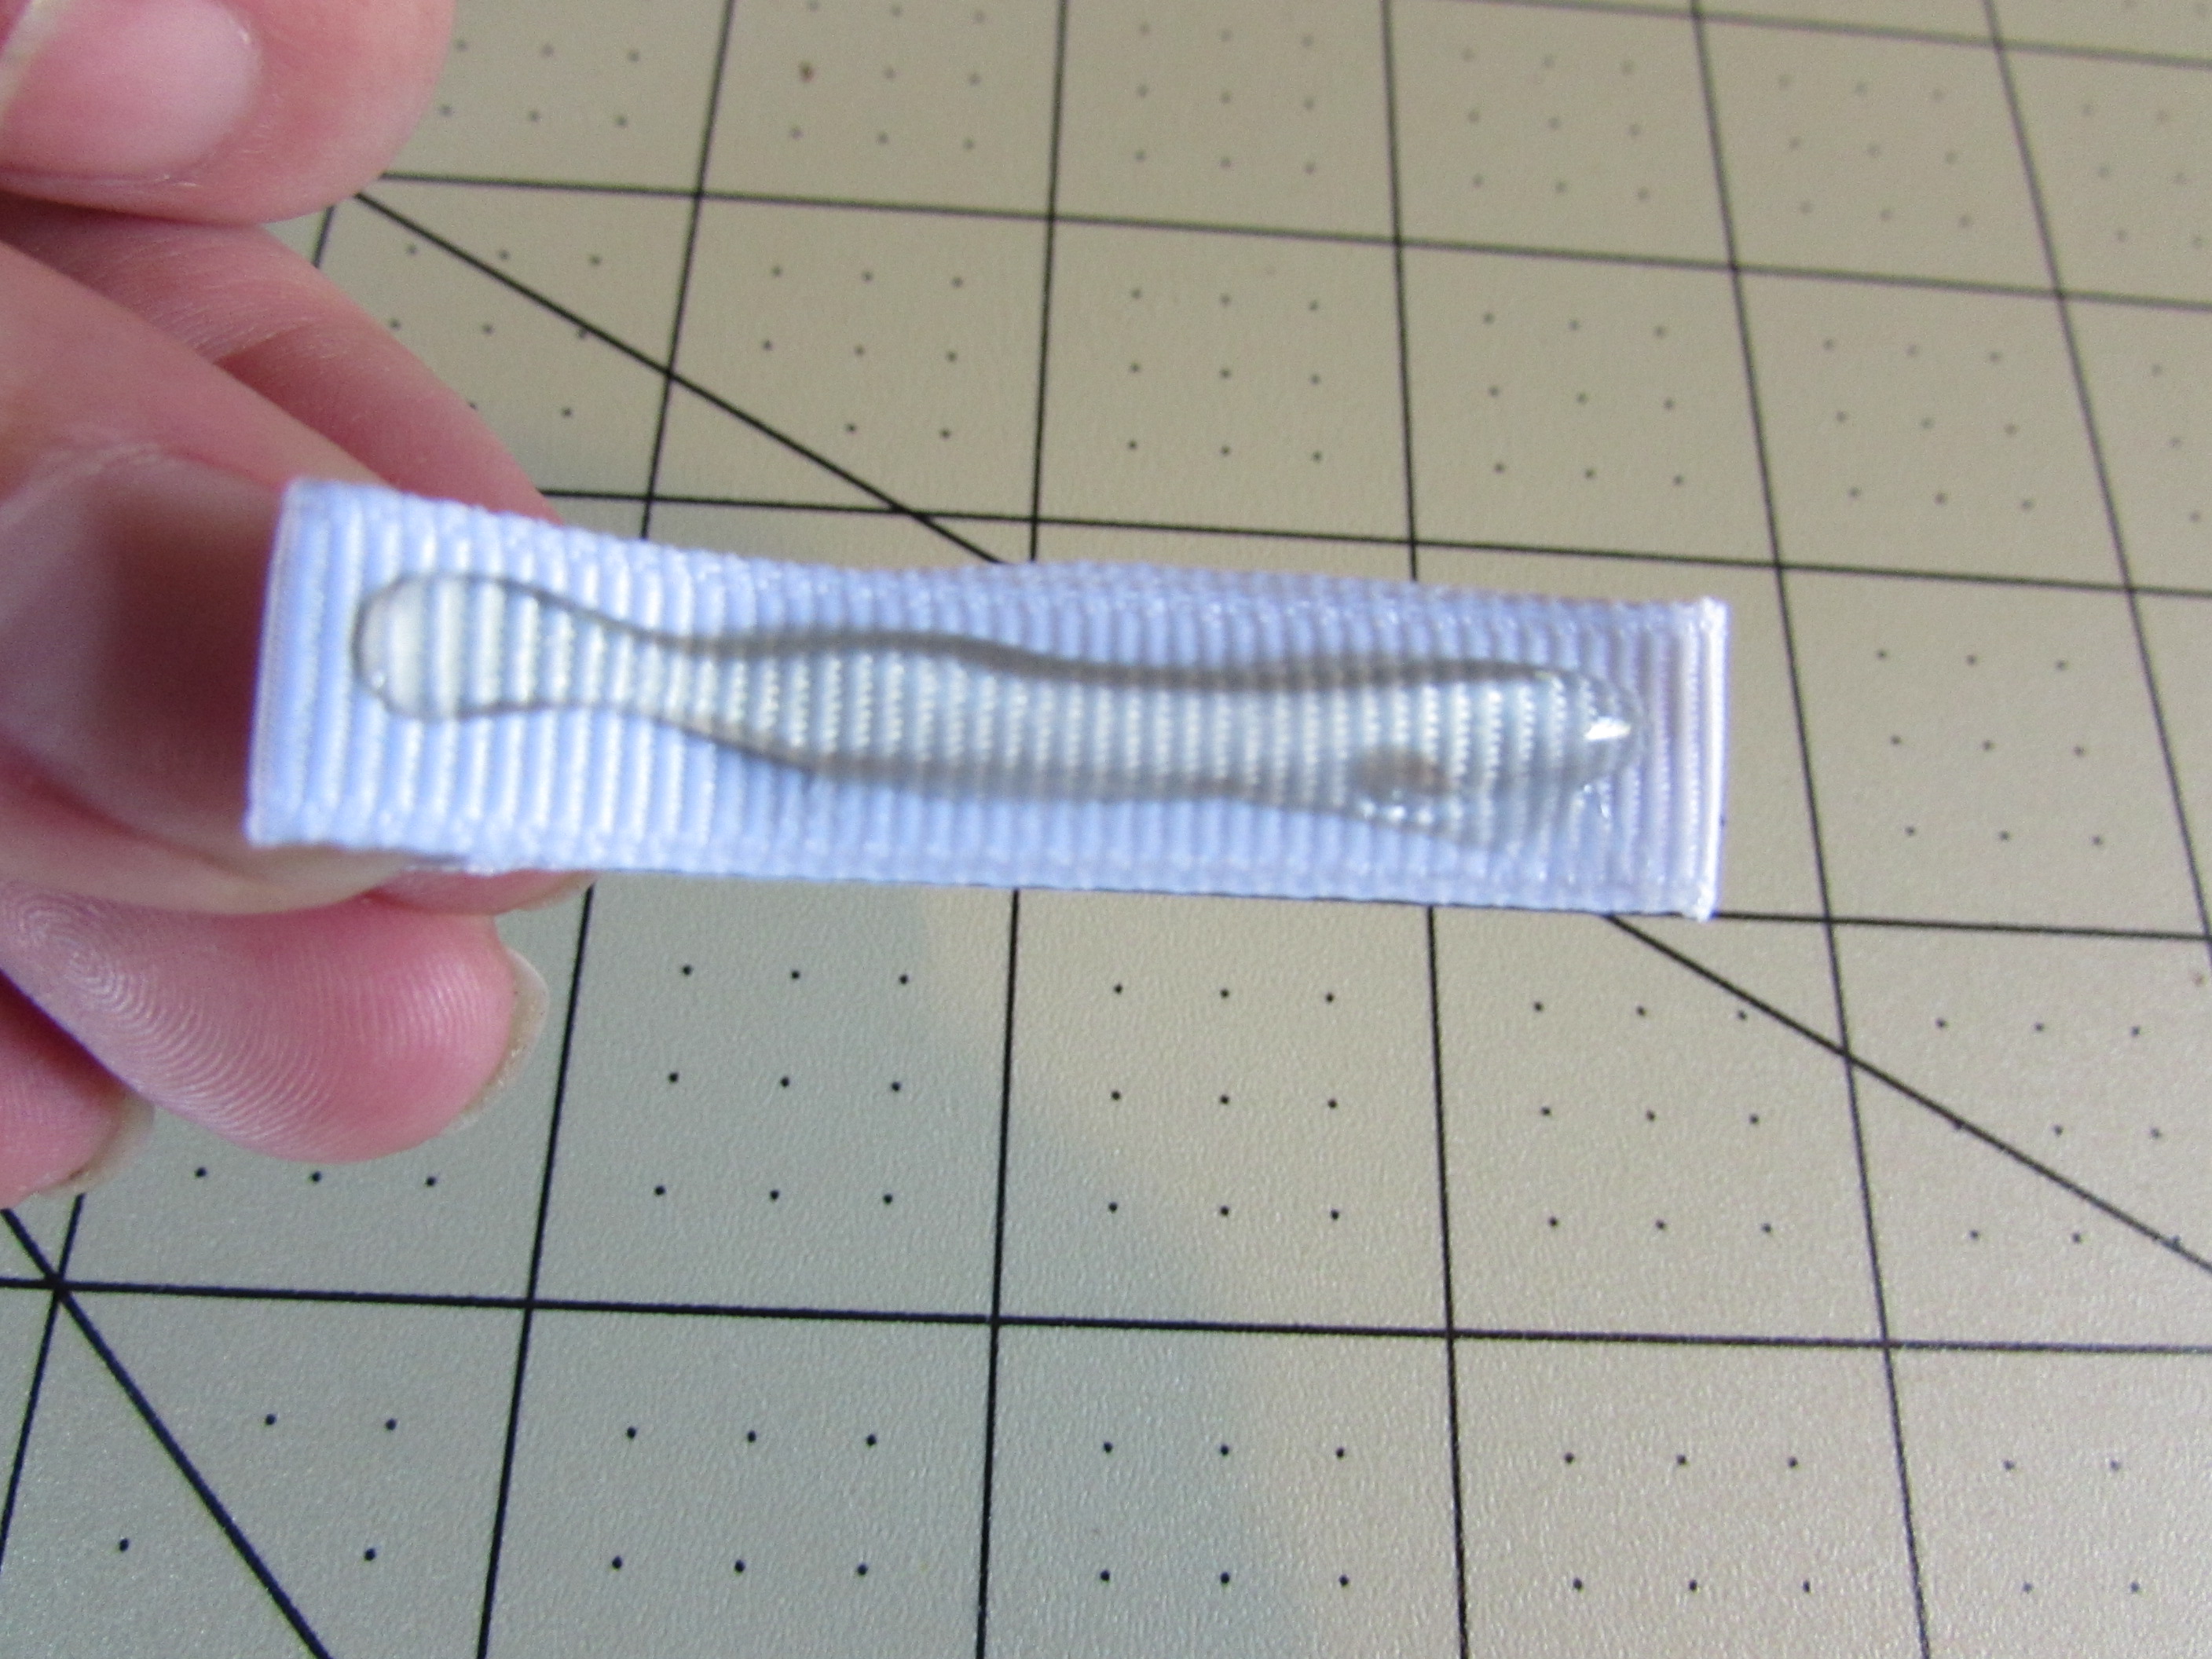
 Step 17(d): Peel off the white backing paper from the fillet tape
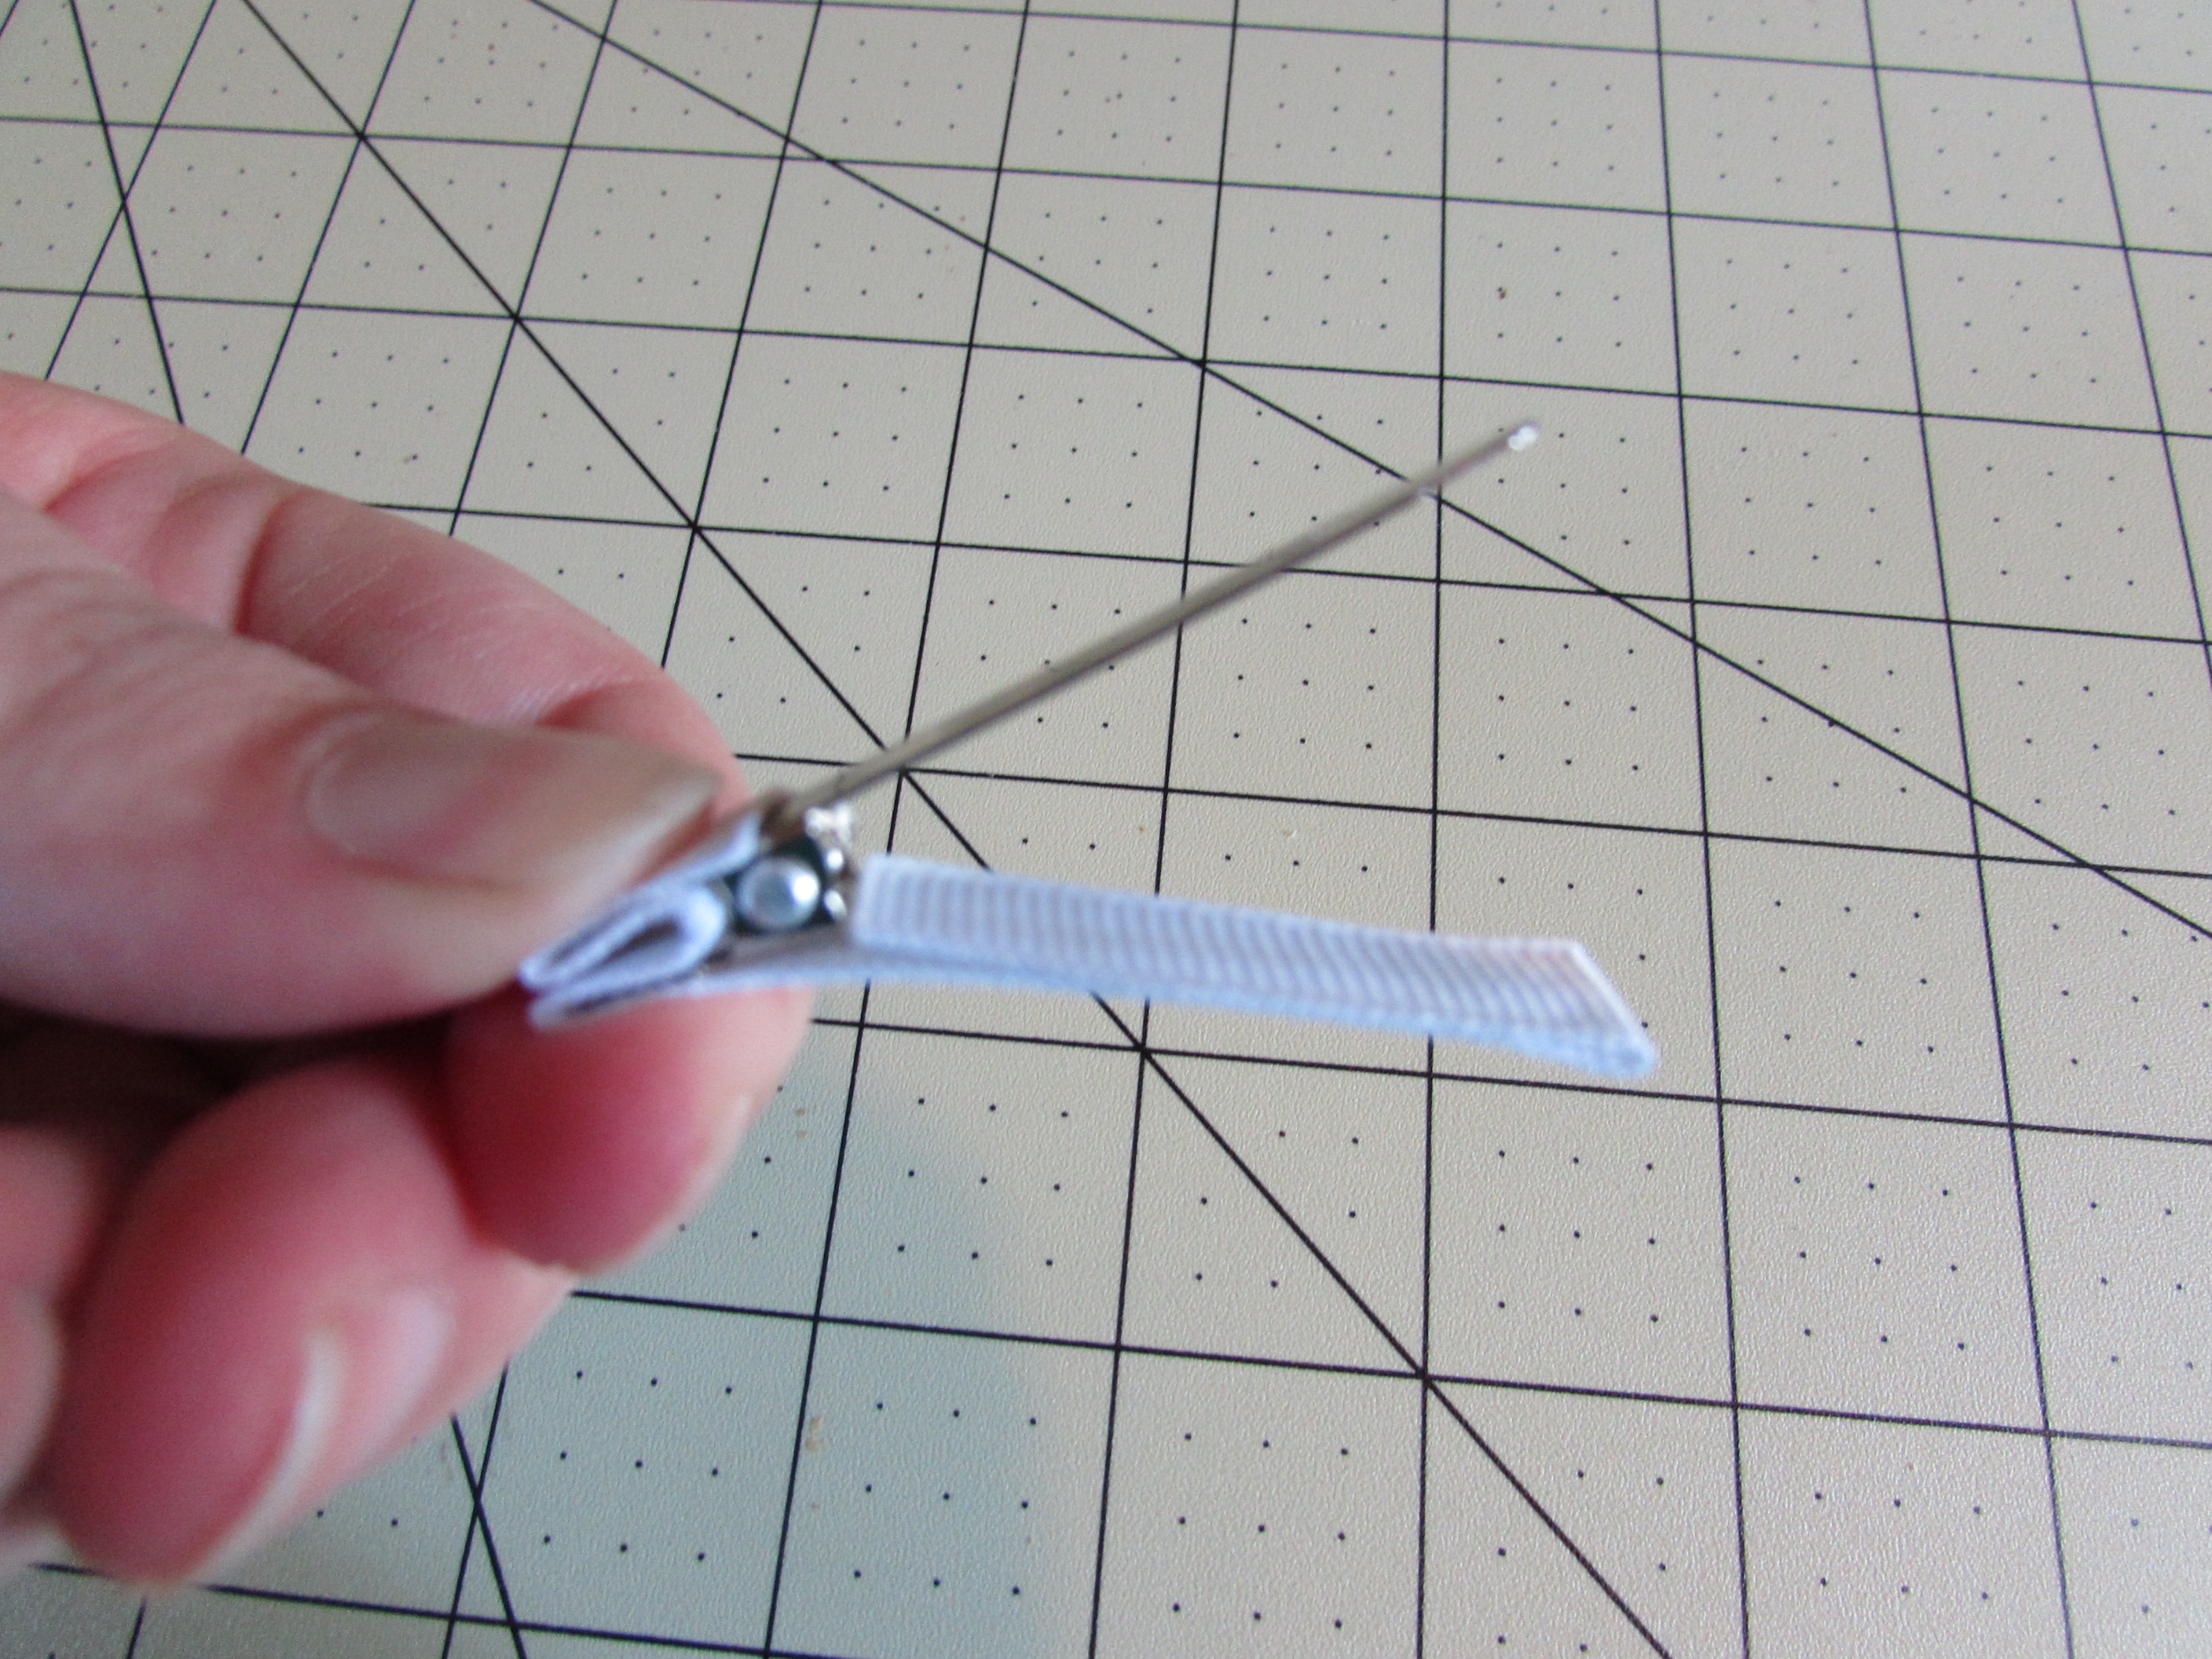
 Step 17(e): Now you are ready to line your alligator clip
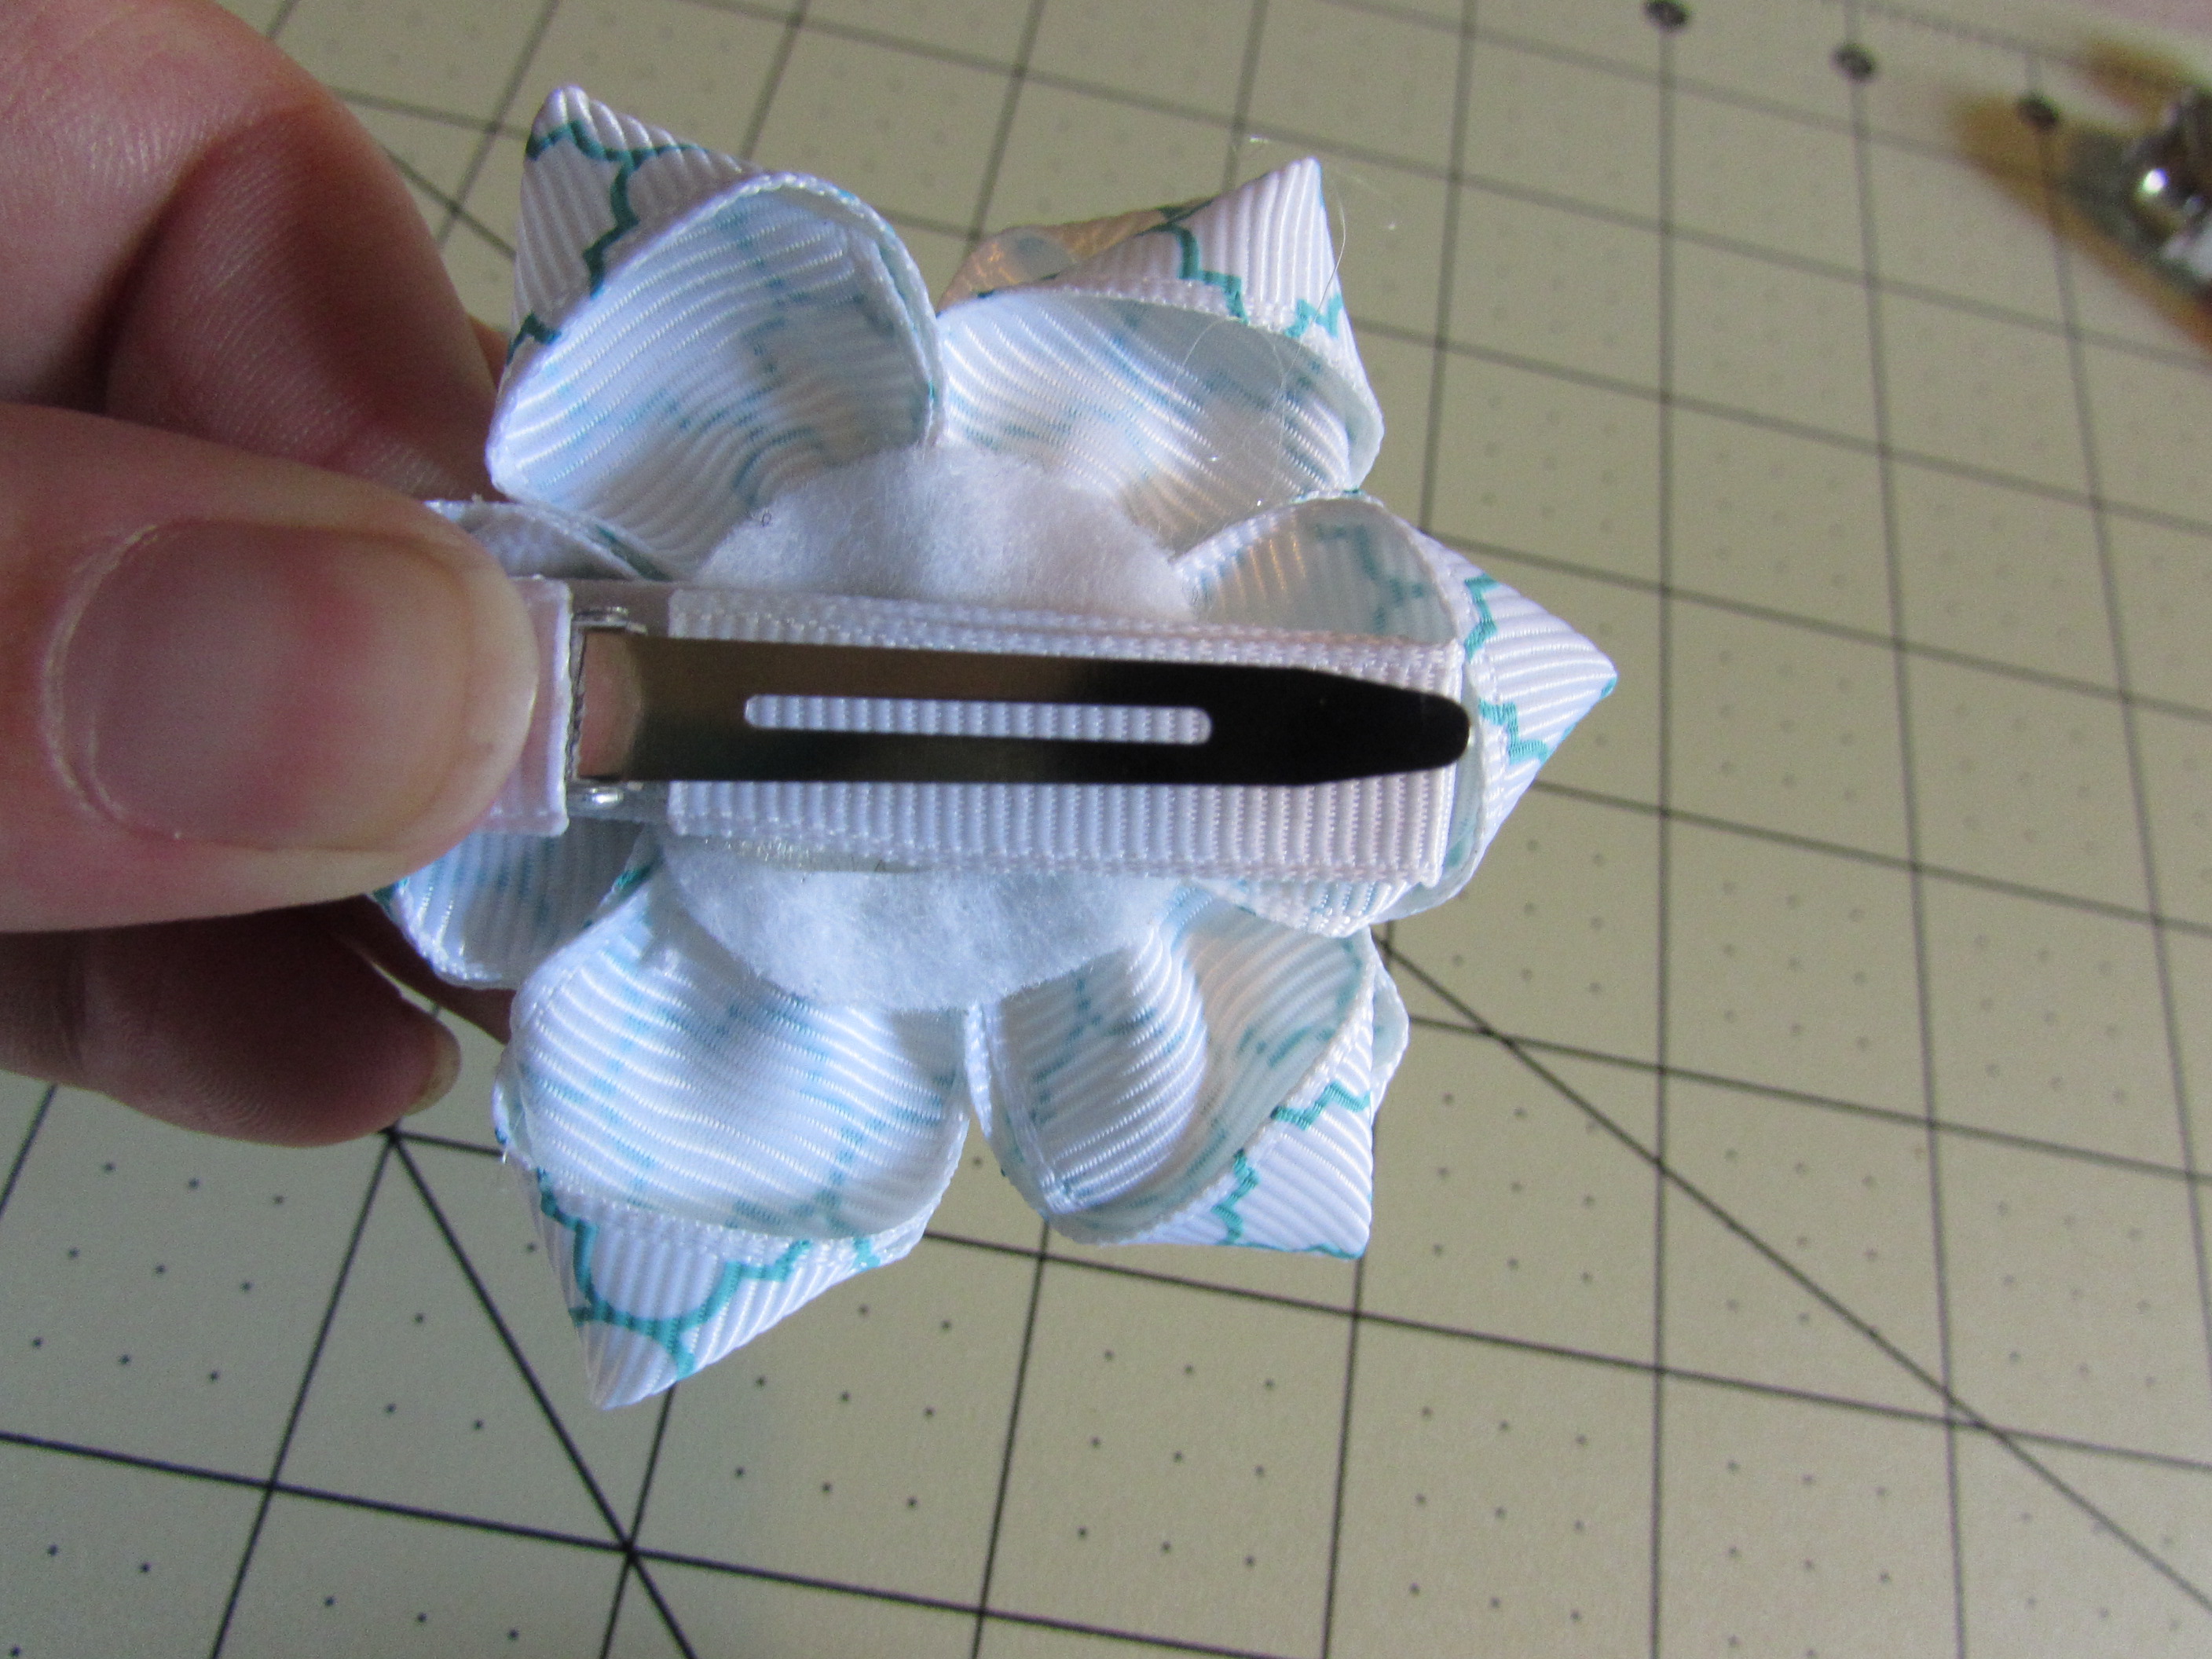
 Step 18: Apply hotglue on top of the clip and attach it to the back of the flower.
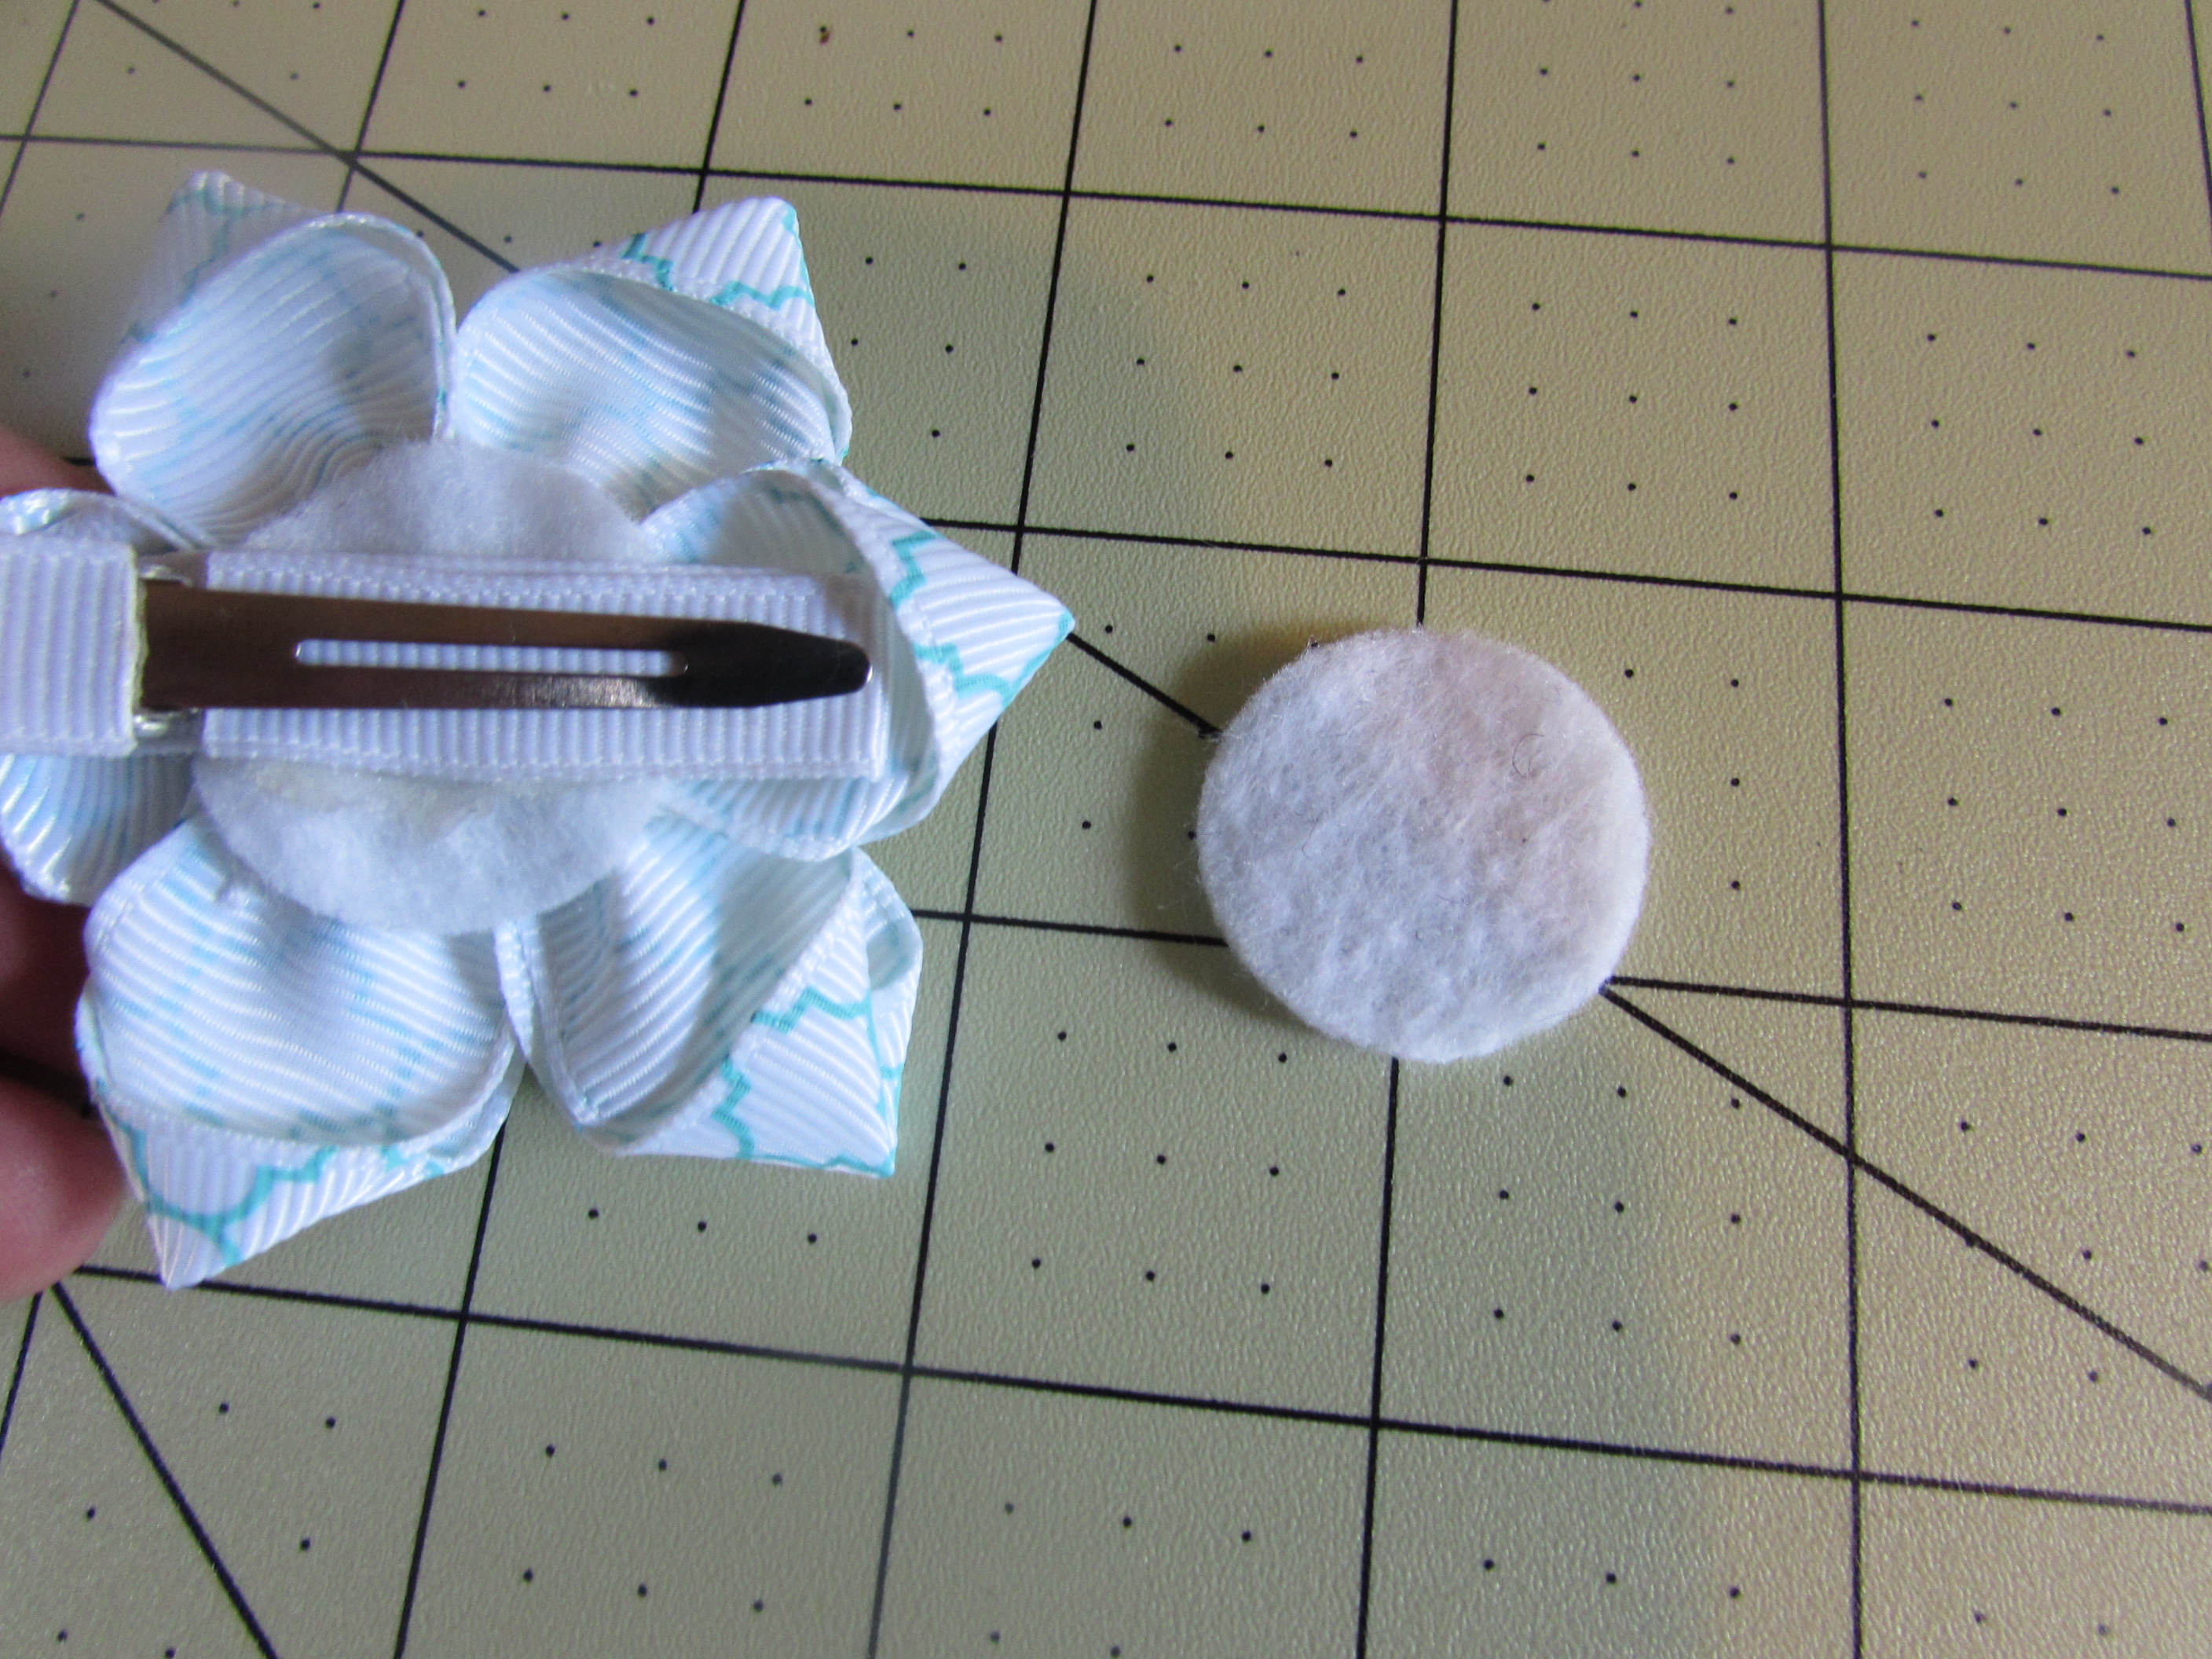
 * Optional Step: You can add an additional felt circle on the back between the clip if you would like.

 Now you are DONE! Enjoy your flower and make many more!